*** NOTE: ALL INFORMATION IS ACCURATE AT DATE OF PUBLISHING ***
Back in June 2022, I wrote a blog showing how you could create a custom trigger, and build a couple of flows in Power Automate to generate one journey for ALL of your Events if you wanted to. The challenge otherwise was there was no way to get a unique ics file for each person that registered for the event. So if you followed this blog post, you might have built it. This is NO LONGER NEEDED, and you can do the same thing without creating any flows, no custom triggers required and DEFINITELY NO CODE!!! This post will look at how to send unique event registration response emails for each event using no code at all.
First, let’s look at an Event. When creating a new Event and using the Realtime Marketing option, there are a few things I would suggest doing first in terms of getting existing fields and making them work a little better for us.
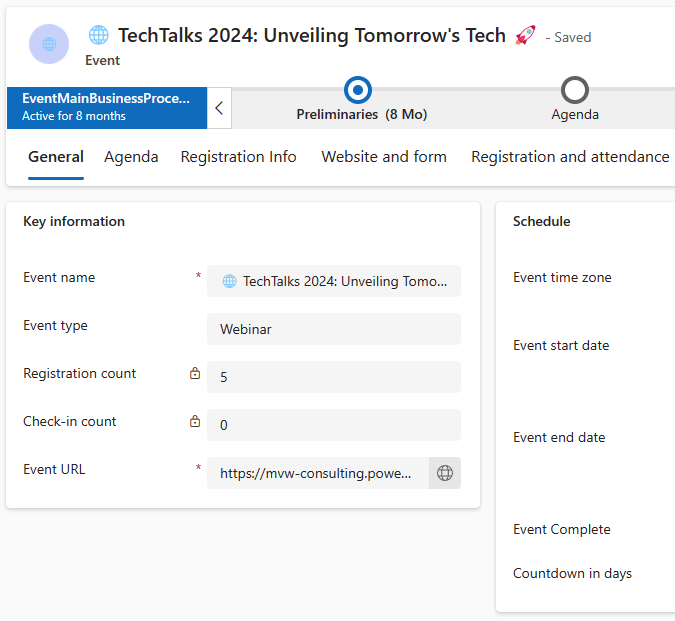
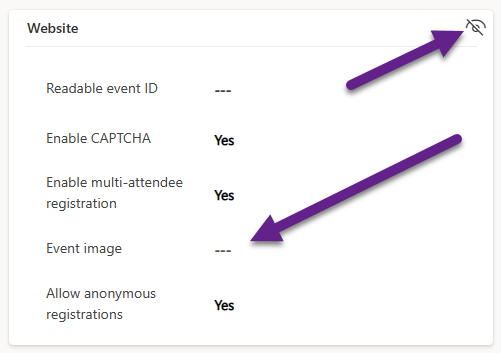
One of the fields that bizarrely is now hidden on the form is the Event image field. This for me is key to having a fully customised experience so that an email for an Event can be totally branded so it’s obvious it’s for a specific Event. We can see here that on the Event Main Form, there is a whole section that is hidden by default and only shows if it’s not a Realtime Event form. In it, there is an Event image field.
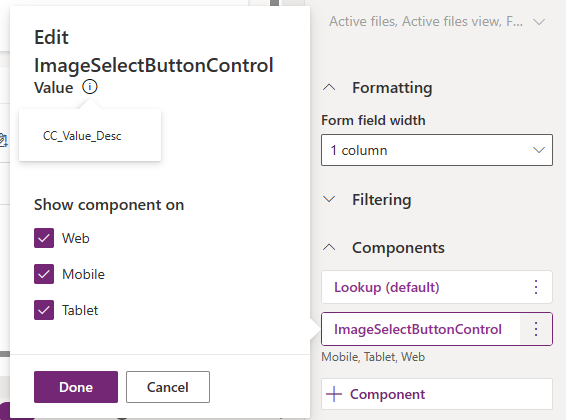
I’m going to add this field to the Additional Information tab so it shows regardless of the type of form used (Outbound or Realtime). I am also going to apply a custom control component and add the ImageSelectButtonControl. This means when an image is added, it uses a popup control rather than taking the user to a different screen to add the image, then going back again to the even page. Believe me, this is a much better user experience.
Another out of the box field on the Event record is the Description field. I am going to leave this on the Additional Information tab, but going to add a different custom control and use the Rich Text Editor. This means you can add an Event description that can be customised with different fonts, bold, italic, multiple lines etc. so when it’s passed through to an email, it all looks good.

Once those have been added to the Event form and published, the two fields can be used to add a lovely header image AND a very nicely laid out and informative description.
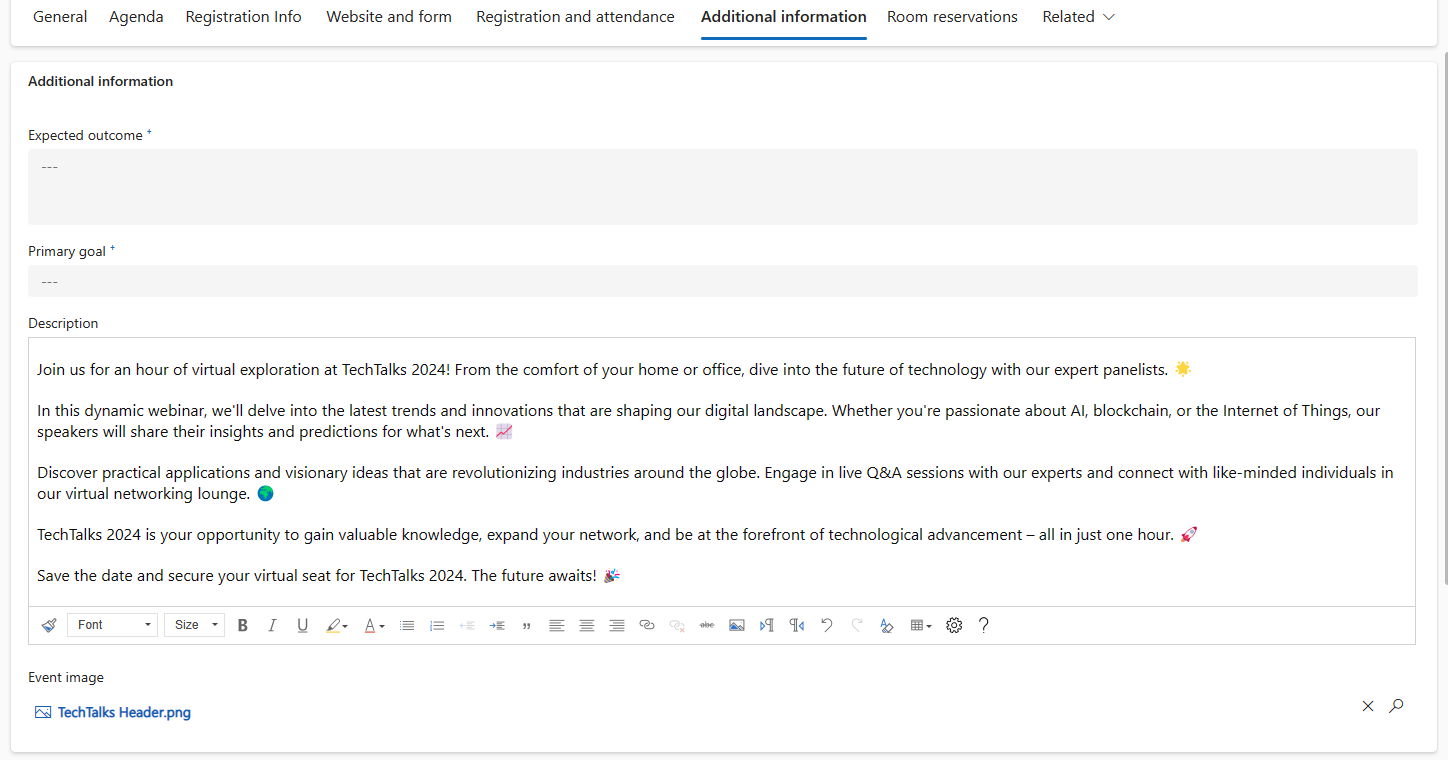
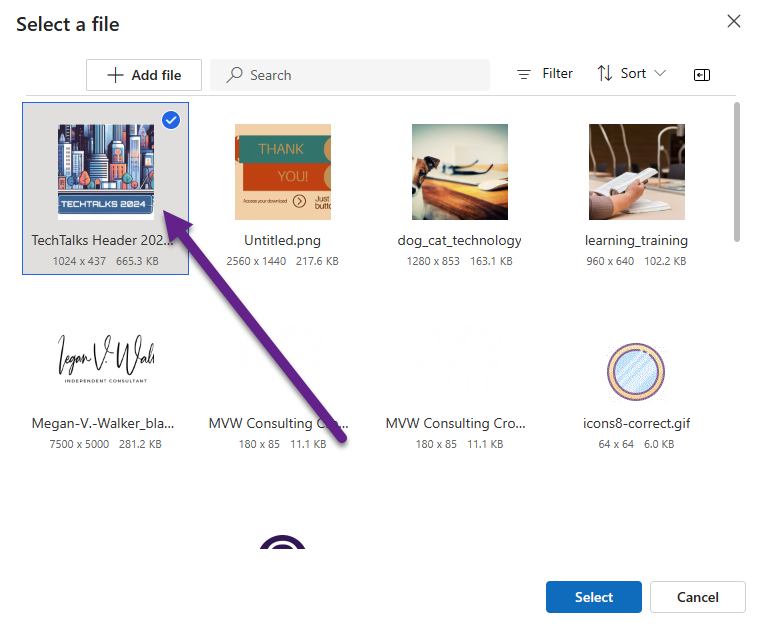
Adding the image looks like this. It pops up a lovely control where you can upload and select an image to use for this Event.
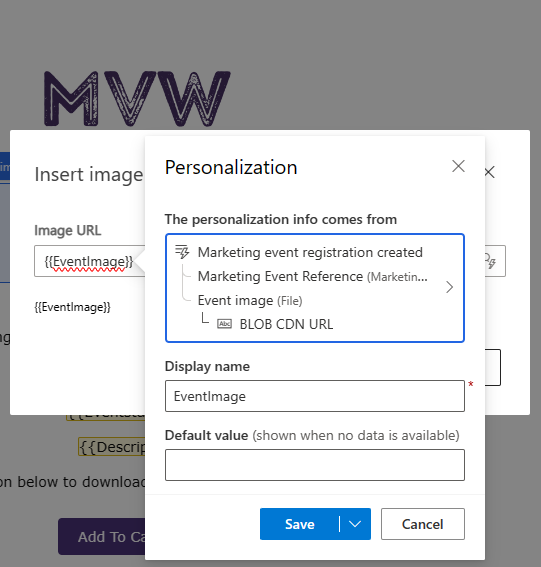
Now the fun stuff, making a nice looking email in Realtime Marketing. Adding in the image is as simple as inserting an email and then opting to add it from a URL. Then use the personalisation button and map through to the Marketing Event Registration Created trigger, then from there, the Marketing Event Reference. From there pick the Event image, and then select BLOB CDN URL. This is the full path to where the image lives and will make sure it displays. Unless you are certain your Events will ALWAYS contain an image, you might want to add a URL as the Default Value so there will always be something displayed.
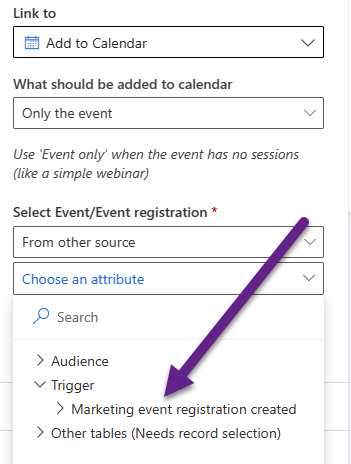
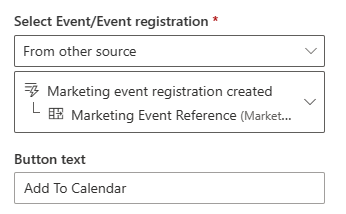
Now here is the stuff that will make sure a button to add the event to a calendar will contain information for the correct Event. Add a button then choose to link to ‘Add to Calendar’. In this case we will do Only the event, then when picking the Event, choose from other source. Then go in to the Marketing event registration created trigger again.
From there, click on the top attribute in blue, which is going to be the Marketing Event Reference.
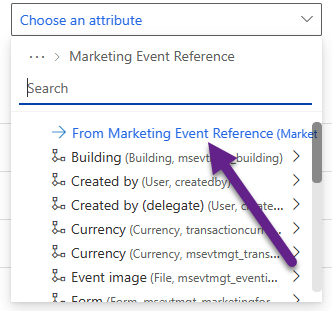
It should look like this. Each time someone registers, the value of the event is being taken from the Event that the Event Registration record is linked to. Simple!
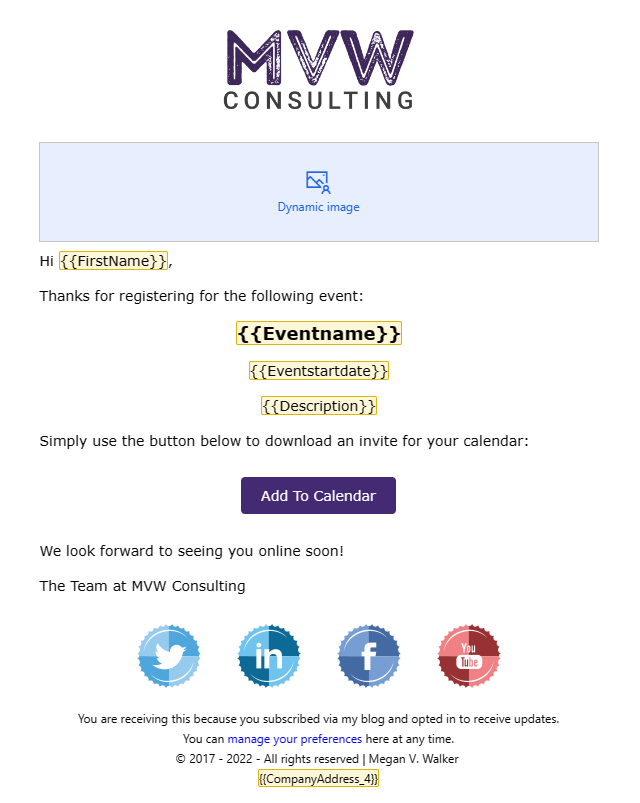
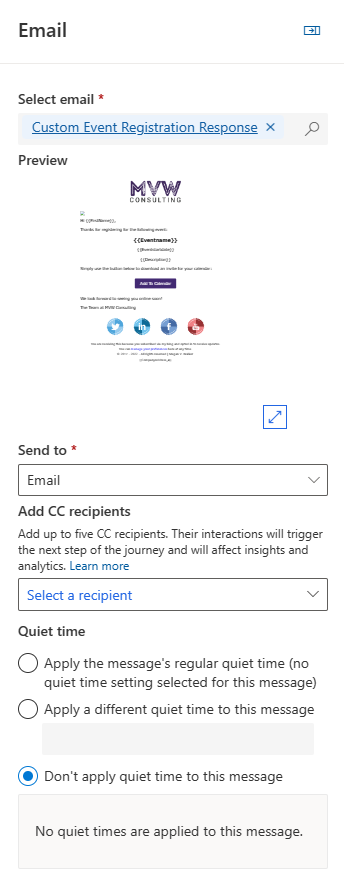
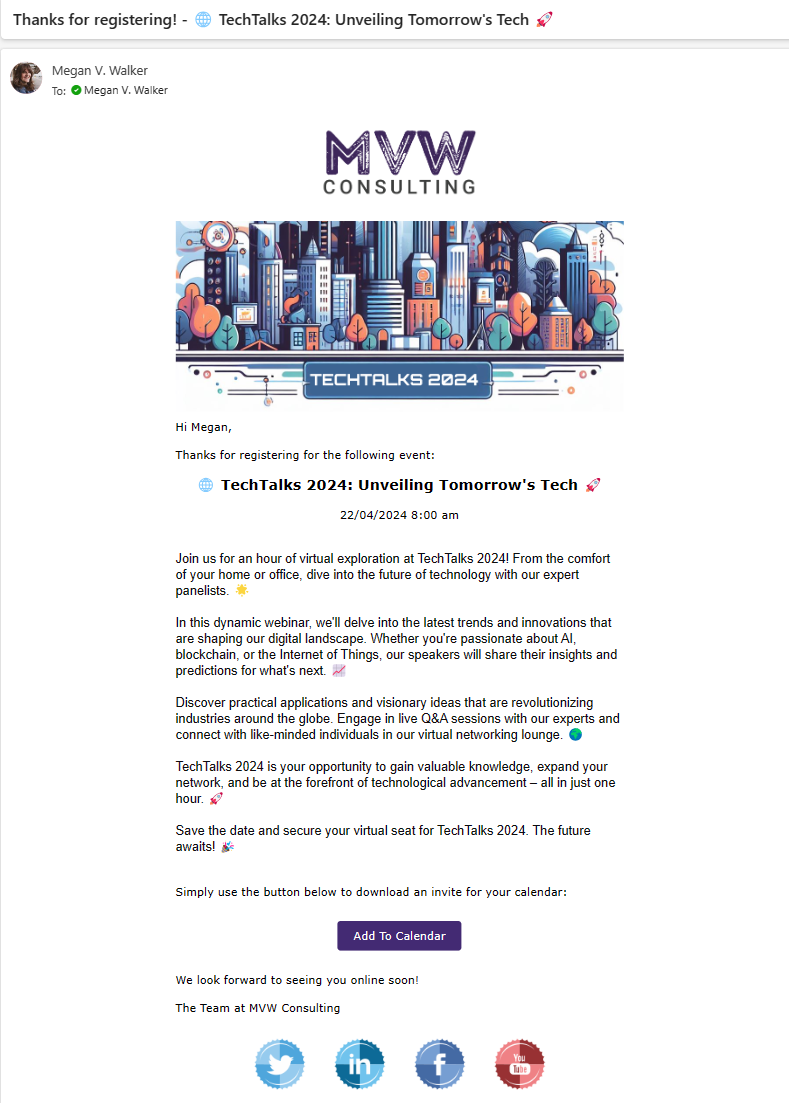
Here is what my Email looks like. Notice that the header image shows ‘Dynamic image’ meaning you won’t see anything until email are sent, then it will be set dynamically from the image added to each event. I’ve also pulled in the Event Name, Event Start Date and Event Description, all pulling via the out of the box, Marketing Event Registration Created trigger. Then there is of course the Add To Calendar button that we set in the previous step.
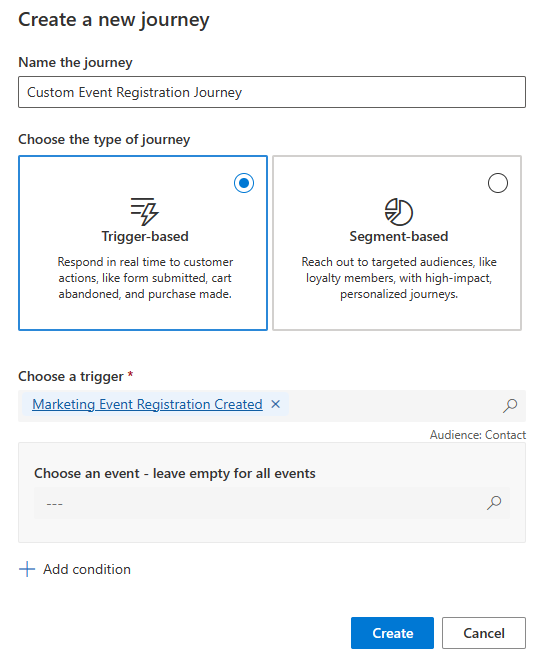
Now we make sure to build a Journey. This will fire using the same trigger of Marketing Event Registration Created, again, the out of the box one, nothing custom here. You can set an Event, although the point of this is that you don’t have to, it can be one Journey for all events. Up to you if you want to only use this if the condition of Event type is Webinar, or something similar would make sense for your own organisations requirements.
Your Journey can be just to say thanks for registering and share the Add To Calendar information, or you can have an entire Journey with reminders and follow ups like you see here. On this Journey, I would suggest not applying any frequency caps to this one so make sure to turn it off in the settings.
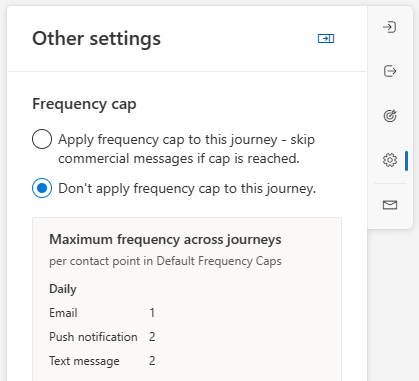
Same with any quiet times so that responder email go immediately rather than sitting waiting.
Now just register for your event, and check out the email you received! This looks pretty good, and if I register for a different event, I get a completely different email with a different header image and description, the right information for the right event each time. Bonus!
Check out the latest post:
How Can I Easily Access Event Registration Custom Questions & Answers In Realtime?
This is just 1 of 585 articles. You can browse through all of them by going to the main blog page, or navigate through different categories to find more content you are interested in. You can also subscribe and get new blog posts emailed to you directly.
Hi Megan, and thank you for an interesting blog!
A question, when you insert the “add calendar button” and the contact download this to their own calendar, do you have any suggestion for how the contact can decline for an event from their own calendar?
Hi Roger, I am not sure if this would work well, but I guess an idea… You would need to create an appointment to send out to people so that they then have an option to accept or reject it. I am just not sure what would come back in to D365 to determine what their decision was. If I have time I will review it, but might be a while based on current workload.
Hi Megan,
Great post! And coincidentally I achieved the same a couple of weeks ago.
A quick question: When I go to get the conditional content from the trigger I notice I can chose from “Marketing Event Registration” or “Marketing Event Registration Reference” and “Marketing Event Reference” – as far as I can tell I can get the attributes from or linked through the “Marketing Event Registration” so am wondering why/what are the extra “reference” options for – do you know?
Hi Stephen, it depends what you are trying to do. If you are adding information to an email using the trigger, and you want to display the Event name for example, you would go to the Marketing Event Reference. It’s using the GUID from the Event Registration that links back to the Event. If you want to show things like the QR Code or other unique links, you would go to the Marketing Event Registration Reference. I would always trust those two. Not sure if Marketing Event Registration is wrong, but the path goes to msdynmkt_sourceentity rather than the msdynmkt_eventregistrationid which I would trust more to have the correct info.
Hi Megan,
Thanks for your interesting blog!
A quick question: how can we prevent Contacts from (accidentally) submitting and registering twice for the same event resulting in duplicate event registrations? Are there any options available to prevent this?
Hi James, you could prevent it perhaps with workflows but you would need something to show on the form itself for the person filling it out which would need some JavaScript. It might be easier to have something run in D365 once someone registers so you can clean things up once it’s come in to the system.
Hi Megan,
Im currently working on this fully automated post event registration journey. It will include confirmation, reminder and post event emails.
My only issue right now is that i want to send the recording of the webinar to the ones that didnt attend.
Do you have any idea on how i could provide that recording in an email without adding the link manually?
Is the link stored somewhere that you can dynamically pick up for the email?
Hi Sebastian, ah this one is tricky because you need time to put the recording somewhere so that you can then provide access to it. And of course doing a wait time in the journey means you are on a time crunch and need to get everything sorted by a certain time. There is no place that you could do it all automatically out of the box but instead might have to do a bit of configuration and a custom trigger that holds people in a spot until the recording URL exists. Thinking of a field on the Event for the URL, then maybe a Yes/No field to say the recording is ready to be sent, which can then update a related field on the Event Registrations. Will mull it over, might be good for a blog post idea!
Hi Megan,
Thanks for the great post. I am setting up an event that has 3 locations so have set the locations as sessions in the one event so people can select the location they want to attend. Would you know if there is a way to display the sessions in the trigger email so the emails in the journey are personalised to the sessions they’ve registered for?
Hi Linh,
Yes, you could do a list from the Personalise section on the right of the email. The list should come from the Marketing even registration created trigger, then go through to the Markeitng Event Registration Reference, then Session Registrations. You can set the max number of items, and set the sort order, then define which content you want to show. Your email would then end up with code looking something like this.
{{#each SessionRegistrations}}
{{SessionRegistrations.Sessiontitle}}
Date: {{SessionRegistrations.SessionDate}}
Time: {{SessionRegistrations.SessionStart}} – {{SessionRegistrations.SessionEnd}}
{{SessionRegistrations.SessionSummary}}
{{/each}}