*** NOTE: ALL INFORMATION IS ACCURATE AT DATE OF PUBLISHING ***
If you are using Google Analytics (GA4), and are reviewing any of the acquisition reports, you’ll likely have seen some of that traffic showing up as unassigned. If Google doesn’t recognise where the traffic came from and there is no logical source or medium available, your website traffic will be tagged as Unassigned for the channel when looking at any of the standard reports. This channel is important to understand where your site visits are coming from to know what’s working for you (based on marketing spend) or when other people are sharing your content and traffic is coming from them. In this post, I’ll show how you can create your own custom channel list and add it to your own custom traffic acquisition report in GA4.
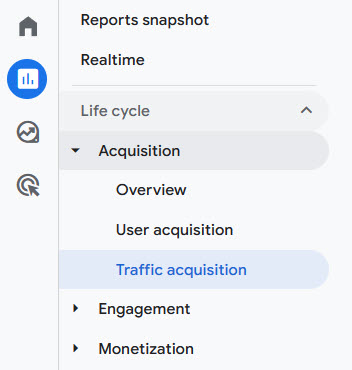
First let’s look at what I am referring to in Google Analytics. This blog assumes you have at least a basic level of understanding of GA4 and isn’t going to teach you how to set all of that up (plenty of other blogs out there for that!). After logging in, click on the Reports icon from the left menu, then open Acquisition and click on either the User or Traffic acquisition report.
The report will show the number of users/sessions and the channel the traffic falls in to. I’m using my GA4 account that is linked to a newsletter I produce called the D365 Marketing Weekly. We can see here that there are 806 users where the traffic has been listed as Unassigned, so I have no idea where it is coming from. Click on the blue plus that shows up next to the session default channel group option.

This allows us to add in a secondary dimension to get access to some more detail. After clicking, scroll through or use the search function to find the session source / medium.

Now we can use the search at the top of that part of the report and filter the information to show only those where the channel group is Unassigned. Here I can now see the source and medium of this traffic. You can see mvw website is listed quite a few times. I have various places on my own website that links back to the D365 Marketing Weekly newsletter. I can also see some traffic is defined as D365-Marketing-Weekly/newsletter. This content has come via someone clicking on the newsletter I send out. Finally we have traffic that show (not set) as the medium. I’m taking an educated guess that these things are based on someone finding their way to the newsletter from other pages within the site or emails sent when someone subscribes. So some of these, I am making assumptions, and that’s up to you to figure out where you think some of the traffic is coming for your own website.

Now that I see a few areas where I can make improvements to my reporting and have less visits tracked as Unassigned, I can adjust the channels. Click on the Admin link from the bottom of the left navigation panel in GA4. Then click on Channel groups within the Data display section.

You will see the Default Channel Group listed. More on this can be found in this recent post I wrote about setting Lead Channels in D365 Marketing using this set of channel groups. We cannot adjust this default channel group which makes sense, but we can copy it to create a new list of channels. I don’t want to start again from scratch so this is a good option.

Give your new channel group a name and description.

Now you should see all of the same channels from the default group, but with the option to add in a new channel.

I want to know all of the traffic coming from my own site. Rather than putting that in as referral, I want to keep it separate, so am creating a new channel named MVW Consulting. All I need to do is set a condition, which in my case is that the source contains mvw. I am adding this condition using details from the original traffic acquisition report that we just looked at previously. I had six different mediums being used where the source all contained mvw, so this will group all of those up in to this new custom channel.

After saving the new channel, I can then reorder the list of the channels. Good to understand that the channel rules are looked at in the order you see below. So if the traffic coming in meets the condition of the first channel, that will be set. If not, it moves on to the next and so on. I will have my MVW Consulting channel condition checked first.

I then have another one set named Newsletter with the condition of the medium matching newsletter exactly.

You can also modify one of the other channels that were copied over from the default channel group. Here is the Direct channel. By default it would be where the channel group already has Direct set… but I also want to make sure if the source is any of the other things I’ve listed here, the channel will also be set as Direct. If someone comes to the site after subscribing, or the menu on the page etc, I would consider that Direct traffic. Consider what is right for your own reporting and how you would interpret things for your organisation or website.

Although I haven’t had any traffic via this method on the newsletter site YET, I get quite a bit by people coming to me via a link posted in their own internal TEAMS environment. There seem to be two URL’s that contain this information which are statics.teams.cdn.office.net and teams.microsoft.com. You could choose to mark this as Organic Social or Referral. Again, entirely your choice in terms of how you interpret things. After you’ve added any new channels you want, save the channel group.

Now go back to the traffic acquisition report you were looking at early. You should now be able to click on the Session default channel group and your new custom channel group should appear at the bottom that you can now click on.

The data should update and use your new channel grouping. My unassigned traffic has gone from 806 to 113. Much better! I can now repeat the exercise, review the source and medium and add other channels to my new custom group if applicable. I might also review this again in few weeks and then maybe once a month to keep on top of this.

Ok, so you don’t want to have to swap the channel dimension each time, so click on the little edit icon from the top right of the report to customise it.

You can delete all of the other dimensions by clicking on the panel on the right side if you want to, or just make sure your new Custom Channel group is set as the default in that panel, then click Save and save as a new report.

Once you’ve done that, click on Library from the bottom of the reports section near the gear icon.

You should then see the different collections. Click on Edit collection for the one you want to adjust. I am going to put my new custom version of the report along with the other out of the box standard Acquisition reports.

You should be able to find the report you just saved from the bottom of the list of all of the detail reports. Click on it and drag it over to where you want to be able to access it from. Then just save it and you are done!

You should now be able to go directly to your new report within the reports section of GA4. You can always get back to the original Traffic acquisition report using the default channel group, but you now have your own version of it using your configured and customised channel group giving you a lot more detail. Hope this helps!

Check out the latest post:
Use Custom Event Registration Questions To Branch Your Journeys In Customer Insights
This is just 1 of 603 articles. You can browse through all of them by going to the main blog page, or navigate through different categories to find more content you are interested in.