*** NOTE: ALL INFORMATION IS ACCURATE AT DATE OF PUBLISHING ***
There are various options for providing an automatically generated number for the next record created in D365/CRM. Version 9 has a new feature available for auto numbering, and you can create a sequence for several of the standard out of the box entities. What if you have a custom entity, aren’t on version 9, and potentially have different lettering sequences needed IN ADDITION to numbers, and those could be different depending on other fields on the record? Well, that needs a little workflow magic to sort it out.
First create a very simple entity. I’ve called mine Auto Number Generation, and added one field named Site Reference Number. Make sure it is a whole number, and set the maximum number you want to allow this to go up to. So consider if it should be a 4 digit number, 5 digit number etc. then set the max allowed. The site is the custom entity that needs numbering. The idea is that you an use this entity moving forward for any entity where you need to add an auto numbering process. Add the field to the form, save and publish and make sure you publish the new entity. Add it to the Settings area for easy access.
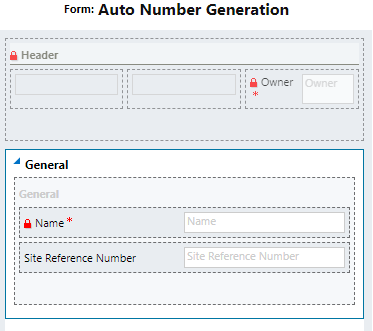
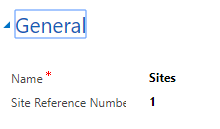
Then create one new Auto Number Generation record. You can call it something generic as in theory this could be the only record you ever need creating for this entity. Fill in the number field.
Now go to the custom entity you want to add the numbering process to, and add a new lookup field called Auto Number Generator (or similar) and look up to the new Auto Number Generation entity you created. This should not be displayed on your form. Next we will create the workflow. Here it is in its entirety, and I will explain each section below. The workflow should be a real time workflow run on create of the entity.
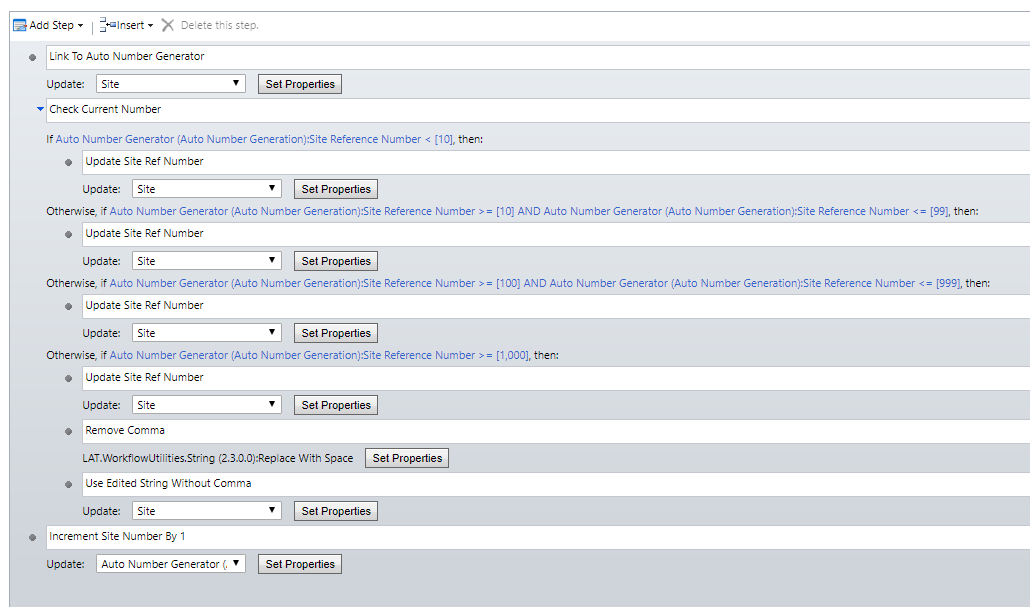
In the first step, we need to update our Site record. So add in an update step, then find the Auto Number Generator field, and lookup the one record you added.
![]()
Now we are going to add a series of conditions. You might not need the conditions for your own requirements. However, here are some scenarios when you might.
- If the client wants several digits but wants to start at 1… so 00001. We can’t just use the numbering sequence and because the Site Reference Number is a Whole Number, we can’t use that field to indicate the leading zeros. It HAS to be a Whole Number so that we can increase it each time a new record is created. If they are happy with starting at 1, no criteria would be necessary.
- If the client needs to have a prefix in front of the numbers that could be different depending on other fields. For example, if you have a Site Type field to indicate what kind of location it is. If it is Type A you might need ‘A-00001’ as the reference number. If it is Type B you might need ‘B-00001’ as the reference number. If they each need their own numbering sequence, this is also where you would need to add additional fields to the Auto Number Generation entity to account for this.
For the conditions on my example workflow, we are checking to see what the current number is to know if we need to add any additional zeros first. So if you need four digits in the reference number, and the current number on the site reference number field on the auto number generator record is less than 10, we will add 3 digits first, then add the site reference number field from the related Auto Number Generator record.

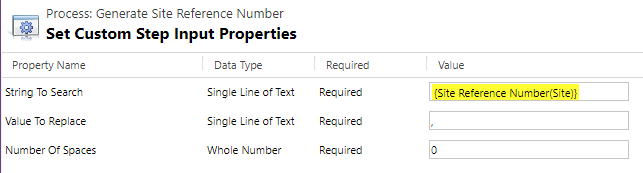
That’s all that would be needed. In the case where you check to see if the current number has the same number of digits as your max number allowed (if it has 4 already in this case), we need to add in a little step using an option from Jason Latimers CRM String Workflow Utilities solution. Any number over 999 will automatically have commas in them to indicate thousands, hundred thousands etc. So your reference number will have a comma included, which will look pretty messy. So using the Replace With Space option will allow us to search the Site Reference Number field, search for any commas and then replace with zero spaces. Once you have done this, just make sure you add the step to update your record again and this time put the replace string in to the reference number field instead.
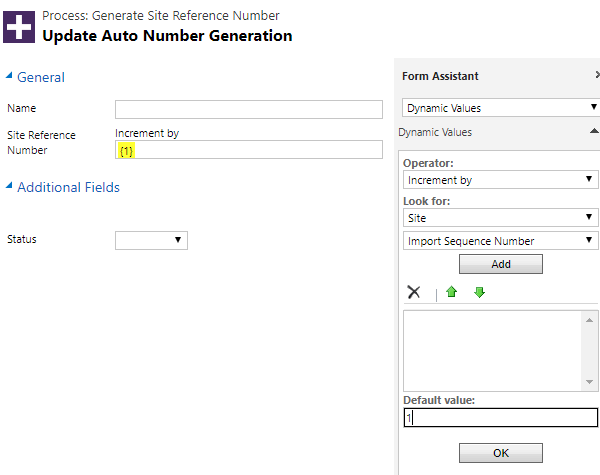
Finally, in the last step you will need to increment the reference number field by 1. You don’t want the next user coming along and ending up with the same reference number. Simply click in the field, then change the Operator to Increment by. Add 1 in the Default Value field at the bottom and click OK.
That’s it! Testing it should be pretty easy. Just test it once at the number 1, then change it to 100 and test again, then 1,000 etc. and so on until you have tested all of your criteria. Finally, once you are finished testing, make your reference number a read only field so users cannot change it themselves.
Check out the latest post:
Use Custom Event Registration Questions To Branch Your Journeys In Customer Insights
This is just 1 of 603 articles. You can browse through all of them by going to the main blog page, or navigate through different categories to find more content you are interested in. You can also subscribe and get new blog posts emailed to you directly.