*** NOTE: ALL INFORMATION IS ACCURATE AT DATE OF PUBLISHING ***
When setting up D365 Marketing for the first time, you are given an option for web hosting to determine where your landing pages and marketing forms are going to be used. You can use your own webserver, or a D365 portal. Until now, I have always suggested using your own webserver as the easiest option. The main reason was the ability to customise how the portal looked, making sure it was fully branded with the same look and feel as your own corporate site. Although it was possible, the Event website uses Angular, rather than HTML and Liquid (used in Power Pages). Until now that is. This post is the first in a series all about creating your own Marketing Events Portal using a Power Pages (Power Apps) portal.
In case you are not sure what capabilities the standard Event Website offers, you can find out more here: Set up an event website (Dynamics 365 Marketing). My series is going to be a case of learning and sharing (my usual approach). Ultimately I wanted to see how I could create a portal with as much functionality as possible that I could brand the way I want to and show the art of the possible. This image should give you an idea of the sort of thing I mean.

What Skills Would You Need?
There is no way I can teach you in a blog series how to start from scratch creating a portal. For this approach you will ideally need to have the following skills.
- Basic understanding of how portals work
- HTML & CSS
- Creating custom templates using Liquid
What Will This Series Help With?
That depends really! I am going to be working on a different piece of functionality for each blog post, ideally on a weekly basis. I want to at least provide the same as the standard Events Website, but also make it better where I can. If you have any ideas of what you would like to see in a portal, pop them in the comments at the bottom of this blog post and I will see what I can do! At a minimum I want to achieve the following:
- Using one Realtime Event Registration form seamlessly for each Event in your portal
- Login capabilities for your Contacts to log in and manage their Event Registrations
- Ability for someone registered to Cancel their own Event Registrations
- Opportunity for visitors to the site to added to the Waitlist for the Event
- Overview for a logged in user to view all Events they have registered for, are on a waitlist for or attended
How Do I Get Started?
The following link will take you to the Microsoft documentation for getting started creating a site with Power Pages: Create a site with Power Pages. It doesn’t matter which template you pick, because ultimately we will be creating custom templates to use for Events, Registrations, Waitlists etc.

Once you’ve created the portal, make sure you add it to D365 Marketing so that you can embed forms in to the domain. Add your domain (without the https://) and make sure you untick the box for enabling the domain for sending emails. There is no way we can authenticate ownership of the domain or add any records to DNS, but that’s OK, we don’t need to just for adding event registration forms.

One the second screen on the configure domain wizard just click Save and Close and you are done.

One More Thing…
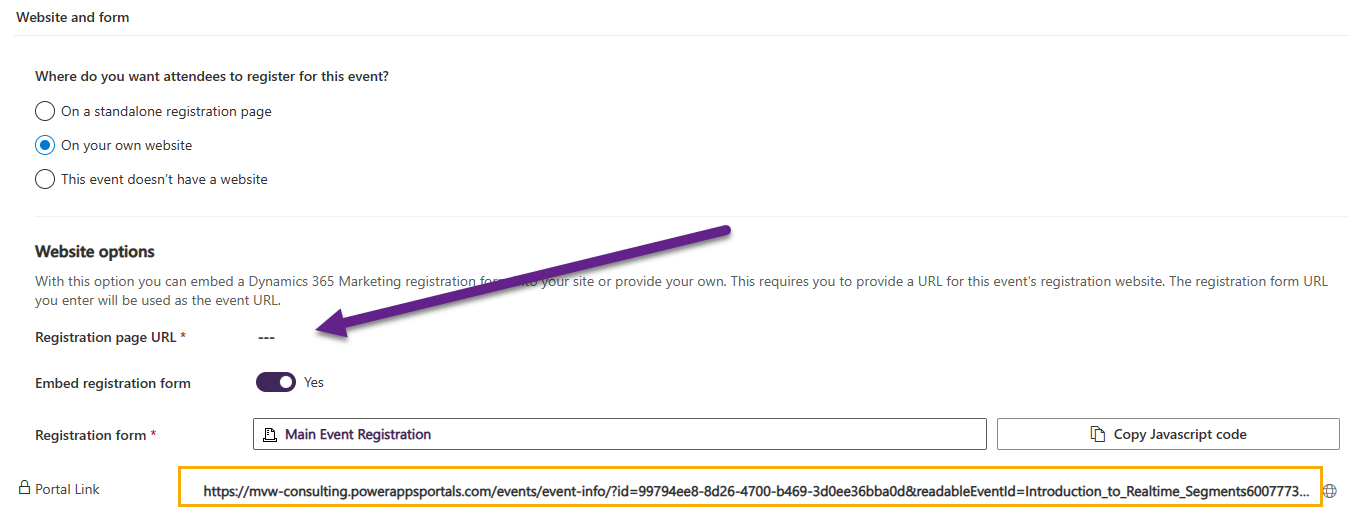
We will get in to creating your Events in D365 Marketing in another blog post, but one thing you’ll want to set up is a process to generate a unique link to where your event will be hosted on your portal. With the standard Event Website this would have been done for you. We can see below that when picking the option that a form is going to be embedded on your own website, the registration page URL is required. Although this could be figured out by someone, they would have to dig around and figure it out each time which isn’t ideal. There are several ways this could be done, but I’m going to create a new field, new business rule and new flow in Power Automate.
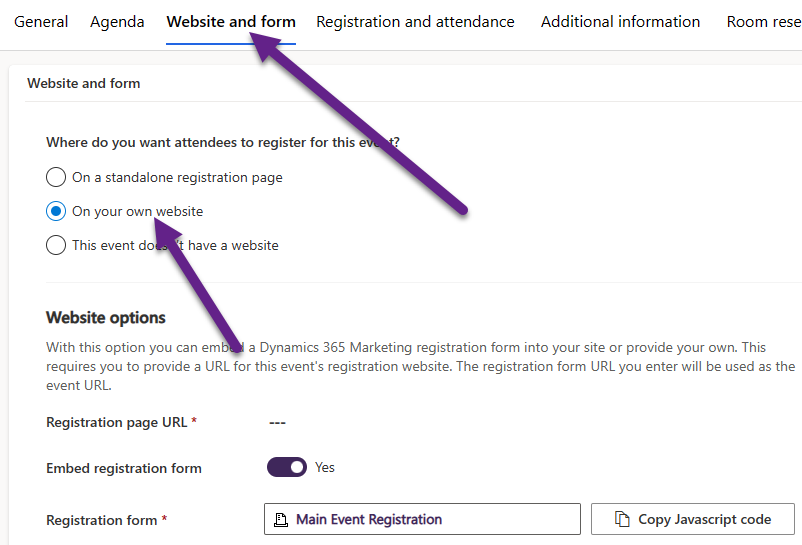
The format of the URL is going to contain the Event GUID and the Event Readable event ID. Both of these are generated when an Event is created. Although this isn’t needed for the coding of the portal, it will be needed to make sure the marketing team can share an accurate link on social media, or send out to invite to the event via a Journey in D365 Marketing. If you are a hard core developer you could perhaps create a plugin or do something different, but for a low code perspective we will provide the URL using a couple of steps.
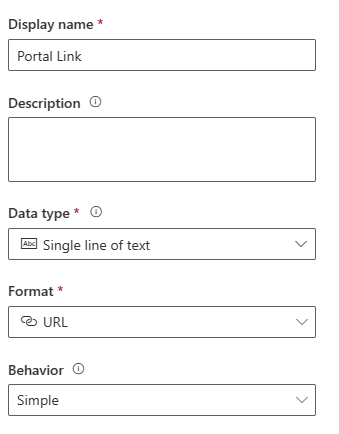
1. Add a new field (column) on the Event table called Portal URL. Make it single text and a URL field
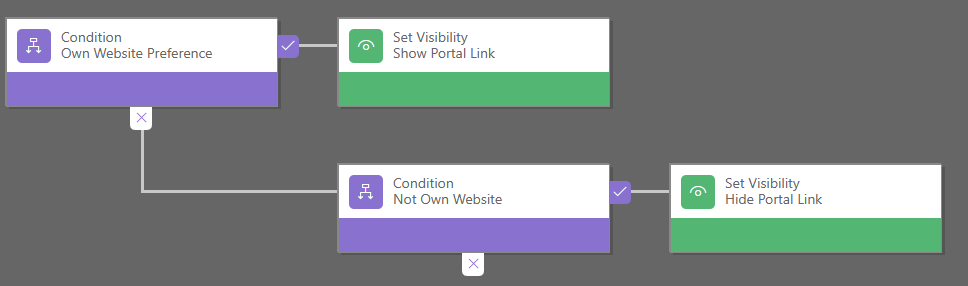
2. Create a business rule on the Event table to show or hide the Portal Link field. Use the condition on the Website Preference field. If Own website is selected, show the Portal Link field, otherwise hide it.
3. Create a simple two step flow in Power Automate to run when a new Event record is created. Then use update a row to update the Event record.
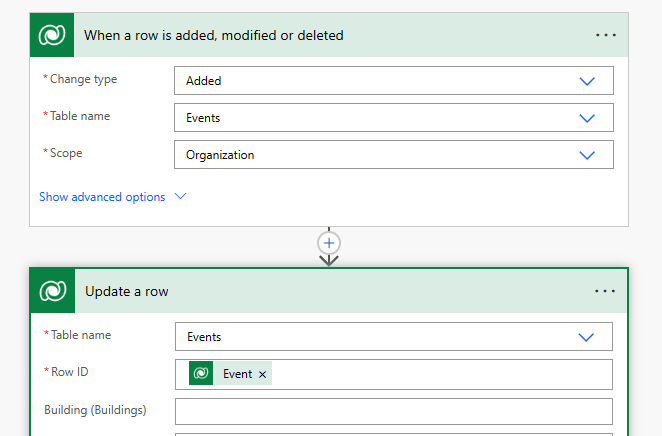
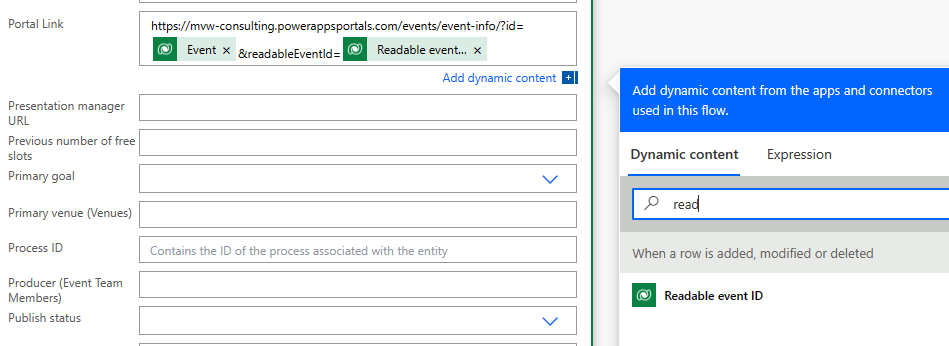
Set the new Portal Link field using the full link to your Power Pages portal, then any sub page links used. For example, on my portal there is an Events page listing them all, then each event is on a child page using the event-info partial URL. Next we will pass through ?id= followed by the ID of the Event record, and then &readableEventId= followed by the readable event id value that gets generated for each Event. We will cover more on this in a future blog post.
YOUR-PORTAL-URL/individual-event/?id=EVENTGUID&readableEventId=ReadableEventID
Now when an Event is created, the user can just add the title and save the record, then continue on with setting dates, adding an image etc. When the are ready to make the Event live, they can select that they are going to add it to your own website. The Registration page URL field will be made required, but the Portal Link they need will be available below. They can simply copy the URL and paste it in to the Registration page URL. Note that I tried various options with this including having the flow actually just populate this field and set the value to be On your own website. However, as soon as the Event was published, the formatted URL was stripped out and a different one was generated. Find what approach works for you!
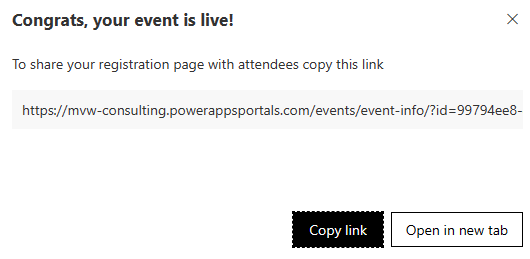
After making the Event live, you will see that the URL you added is used. This can now be included in Journey emails or posted on social media to encourage people to register.
In the next post I will walk through creating and adding an Event Registration form on a Web Page in the Portal. This will explain how it all works and give you one way to do this. In follow up posts we will look at creating a Web Template so just one Event Registration form can be used, passing through the Event details via the URL so anyone registering will be linked to the correct Event automatically.
Check out the latest post:
Filter And Display Contacts Based On Account In Custom Page
This is just 1 of 588 articles. You can browse through all of them by going to the main blog page, or navigate through different categories to find more content you are interested in. You can also subscribe and get new blog posts emailed to you directly.
HI Megan slightly off this topic is there a way to manage landing pages in Real-Time marketing? I understood that landing pages was delivered yet but perhaps this has changed and if not any idea when Microsoft has this on the roadmap. Thanks
Hi Brad. The functionality exists but it’s done on a form. You can then add images and different elements, and when you publish it, choose the option to create a standalone page. I will have a blog on it coming up soon!

Hi Megan,
Loving this series so far!
One thing I’ve found is that even though I’ve added the domain and enabled ‘External form hosting’, I’m still getting a form error on my portal that says: ‘The form can not be loaded on a domain that hasn’t been allowed for external form hosting’
Are there any other settings I need to change for this to work?
Thanks
Hi Sonia – check out this blog post, it might help solve your issue? https://nishantrana.me/2023/06/30/fixed-the-domain-where-this-form-is-embedded-might-not-be-enlisted-as-a-domain-record-for-externally-hosted-forms-in-dynamics-365-marketing/
domain ownership question
You set in the first step the domain ownership but you did not verify is this correct can you add some more text or screenshot of the end result ?
Hi Jet. There isn’t anything more to add. There is no way we can authenticate ownership of the domain or add any records to DNS, but that’s OK, we don’t need to just for adding event registration forms. You just need to add the record with your Portal URL. Nothing more for you to do.
HI Megan,
You don’t appear to have added the field to the form.
Where did you add it? My event form show the OOB experience.
Hi Carrie, not sure I understand the question. What field?
Hi Megan,
You *can* use the Flow to set the “Event URL” column…but irritatingly you then can’t use the Flow to set the “Website Preference” – if you do when you go-live the “Event URL” will be reset as you describe.
Stephen