*** NOTE: ALL INFORMATION IS ACCURATE AT DATE OF PUBLISHING ***
One of the areas in the Google Analytics Acquisition section is the Search Console. Search Console is another free Google product which provides data and analytics designed to help you with pointers and information so you can improve your site’s performance in Google search. By enabling the Search Console within Google Analytics, you can see the queries visitors have used to actually find your site, then review the length of time they stayed, view bounce rates and understand more about your visitors.
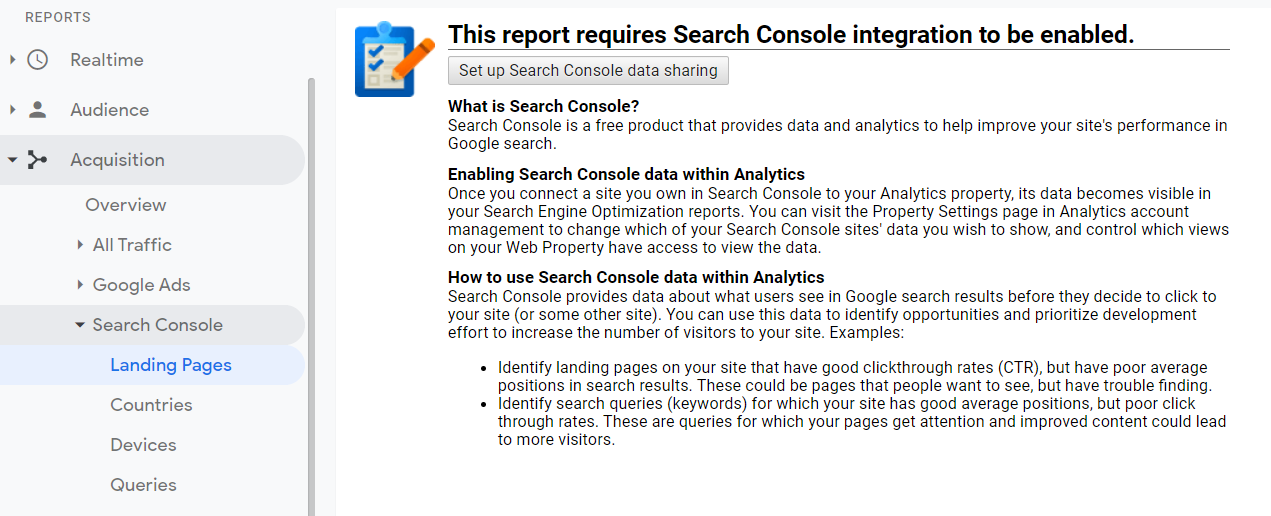
If you click on any of the items in the navigation under this area, you’ll get this message letting you know that the Search Console integration needs to be enabled first. Click on the button to set up Search Console data sharing.
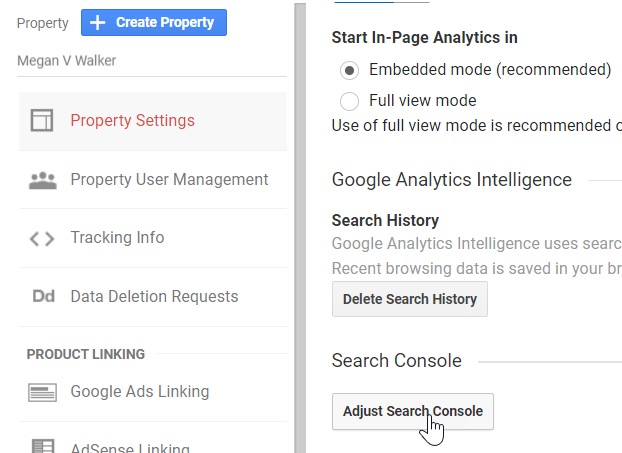
You will be taken to the Property section in the Admin area. In the Property Settings is a Search Console section. Click on Adjust Search Console.
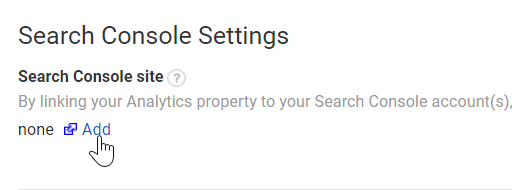
From here, click on Add.
On the next screen, click on Add a site to Search Console.

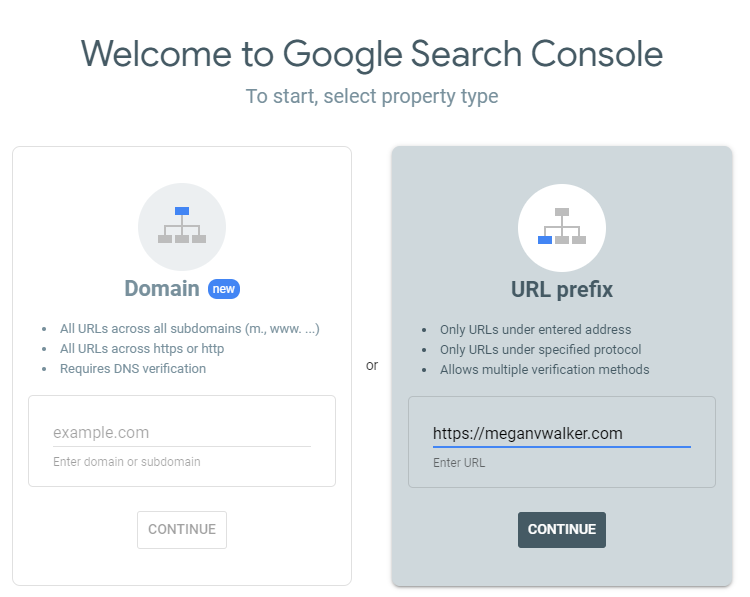
There are a ton of things you can do in Google Search Console, and it’s recommended you review all the features there (but hey, that’s a whole other blog series). You’ve got two options to add your site, Domain and URL prefix. If you do the Domain, you must have DNS access, which not everyone will have. The URL prefix is also going to give you the same end result and is easier to verify, so in this example that’s what we will use.
If you’ve verified your website before, you’ll see this message. If not, you’ll see a variety of ways you can use to verify your website. The easiest way is via an HTML tag.
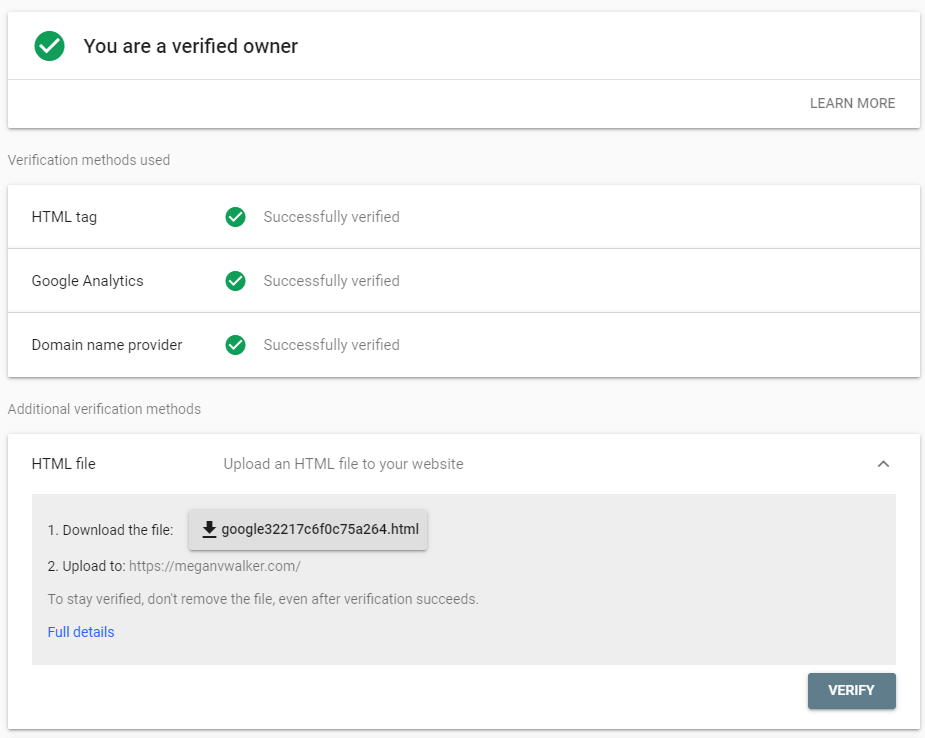
The tag will be provided, and will look something like this. It needs to be added to the <head> section of your website. If you aren’t sure, ask the person that edits or maintains your website, they should be able to do it quickly for you.
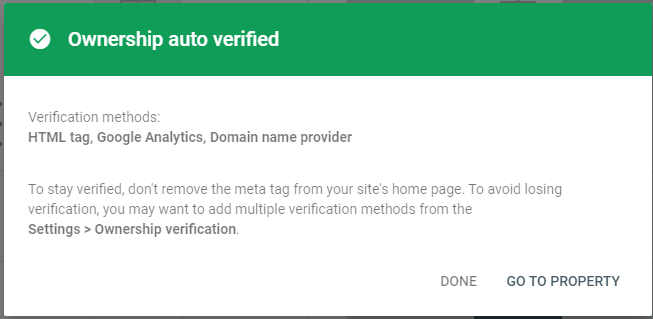
<meta name="google-site-verification" content="GENERATED ID" />Once done, you’ll see that you’ve verified that you own the website.
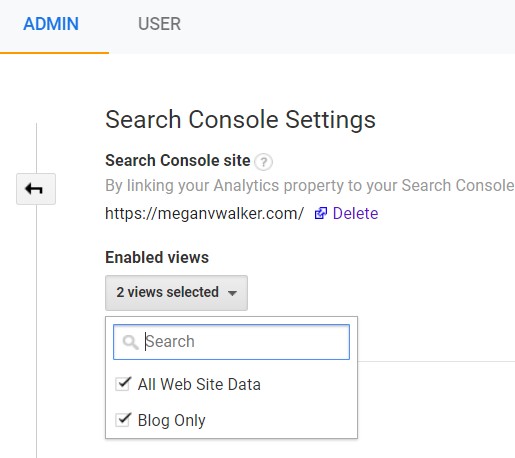
Once you go back to Google Analytics, you should see the Search Console site is now linked, and you can determine which views (if you have more than one) to enable it for.
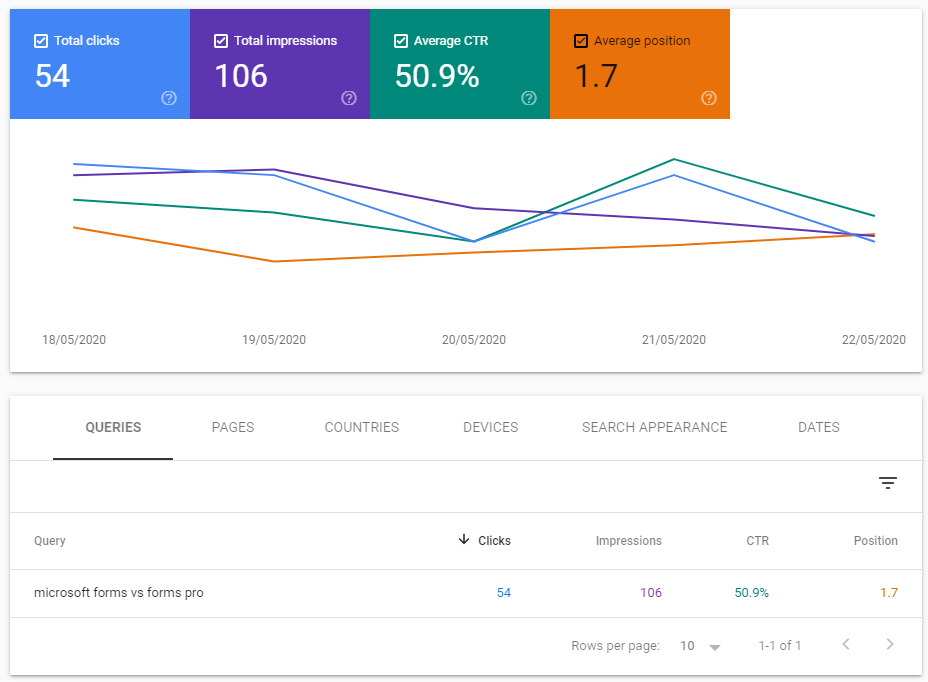
You might need to wait a day or so to see any data, but you should start seeing queries recorded in the performance section of the Search Console. This shows all of the search terms used that brought visitors to your site.
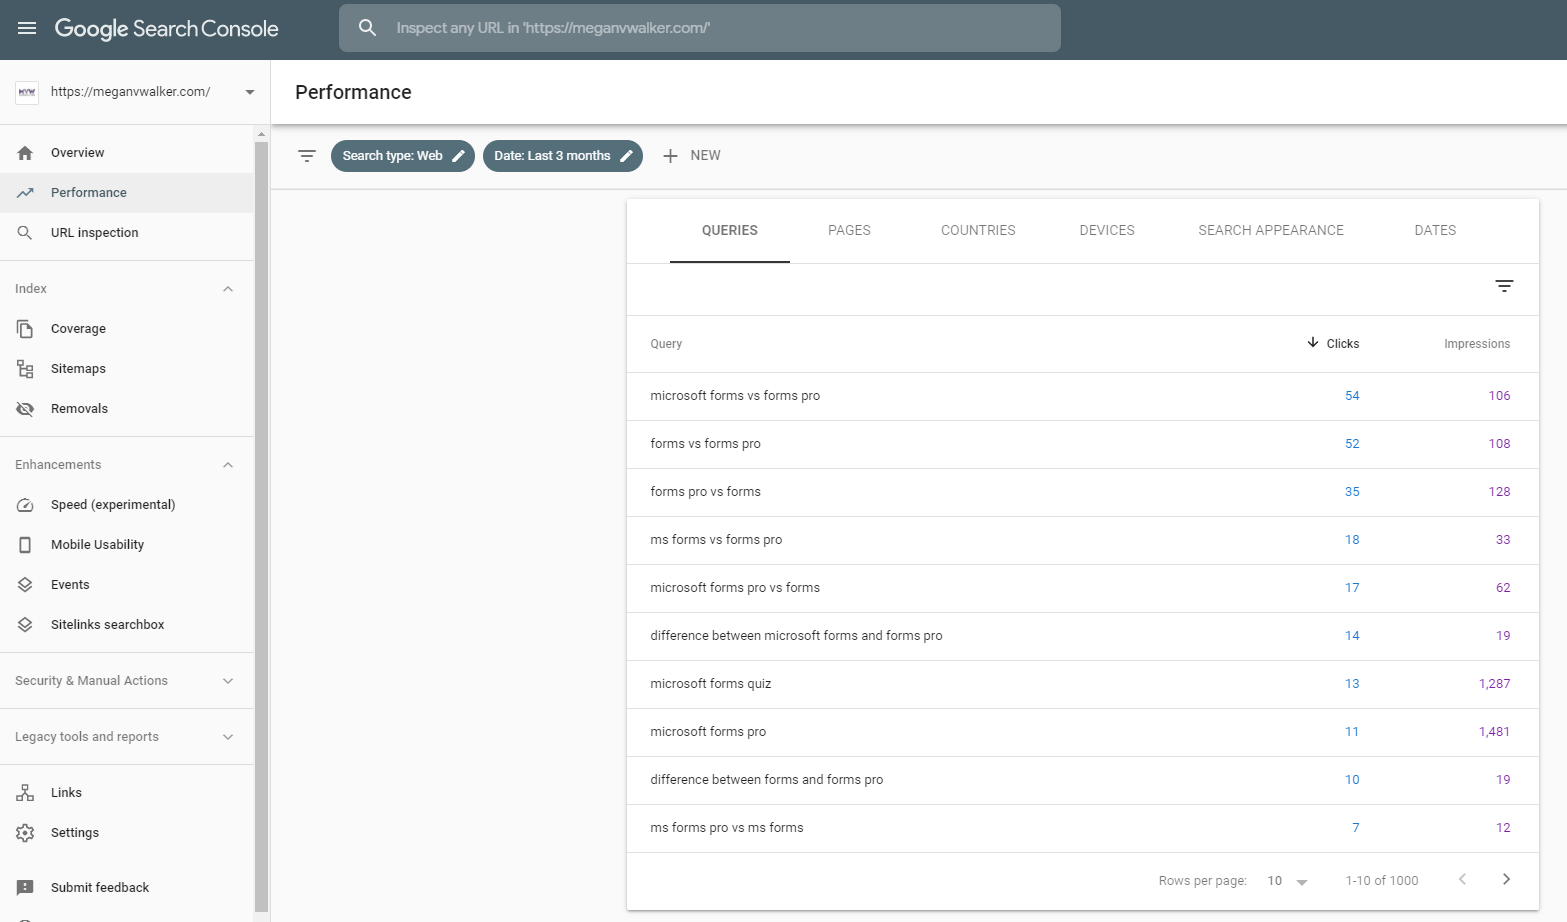
You can drill into specific queries for more detail to get information. You can then view the Total clicks (how many times a user clicked through to your site), Total impressions (how many times a user saw a link to your site in search results), Average CTR (the percentage of impressions that resulted in a click) and Average position (the average position in search results for your site whenever it appeared in search results).
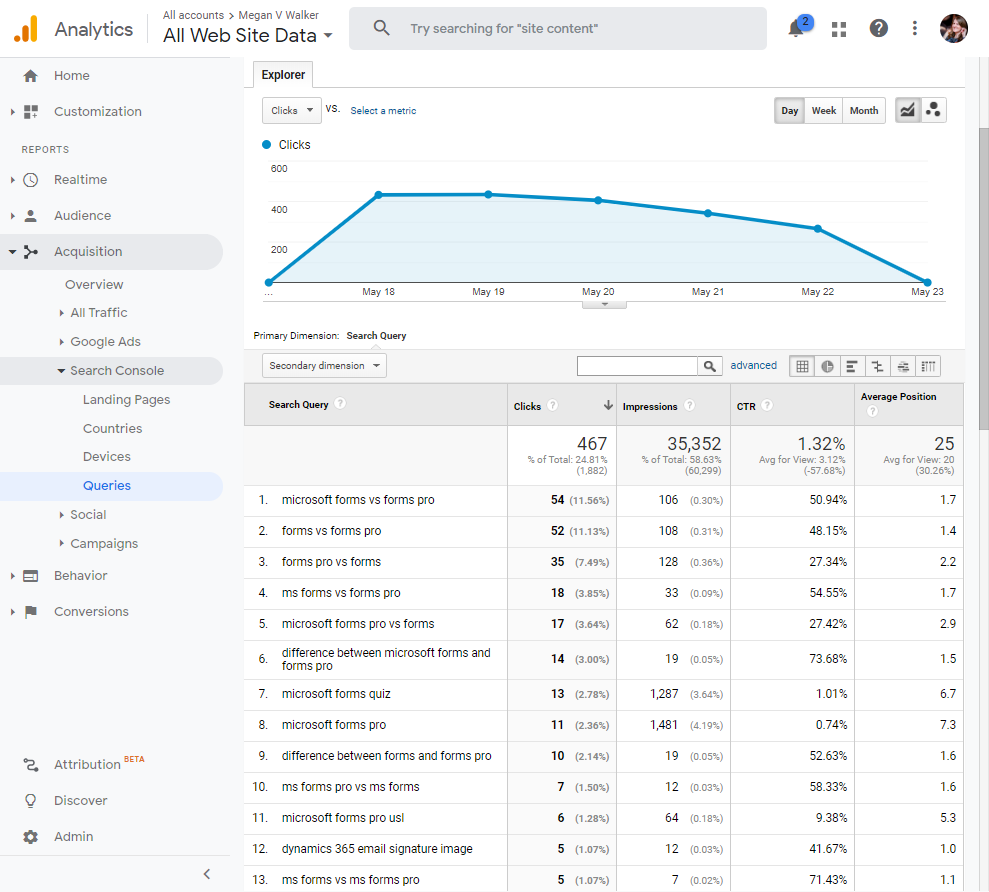
If you go back to Google Analytics, navigate to Acquisition > Search Console > Queries, you can see the same data that’s stored in Google Console, which saves you from having to go back and forth between the two.
Make sure you set up Google Console for this functionality, but also go check out some of the training videos created by the Google Webmasters team to learn how to use it further.
Want to just watch how to do this? Check out the video: https://youtu.be/gFuOjHVK7Jo
Check out the latest post:
Create A Segment Using Unmapped Fields On Marketing Forms in Customer Insights Journeys
This is just 1 of 601 articles. You can browse through all of them by going to the main blog page, or navigate through different categories to find more content you are interested in. You can also subscribe and get new blog posts emailed to you directly.