*** NOTE: ALL INFORMATION IS ACCURATE AT DATE OF PUBLISHING ***
For any organisation creating content and planning on using that content in their marketing efforts, making sure you are reaching people who actually want that content is key. Although it would be nice to think all of my own subscribers want ALL of my content, that would be naïve and slightly short-sighted. With that in mind, I have a specific page where people can pick and choose which content they will get. The same goes if you are using the Dynamics 365 Marketing App. Whenever you send out an email, you MUST include a link at the bottom for people to access a subscription centre page. This is what it looks like by default.

The only option provided to the Contact is for them to say Do not email me. That’s it. So anyone clicking on that Unsubscribe link at the bottom of an email is going to saying goodbye to any further communication from you. When the Do not email field is ticked, that will change the Bulk Email field on their record to Do Not Allow and prevent you from sending them anything else. Instead, how about we give your Contacts options? They might not want to unsubscribe from everything but perhaps don’t want to hear about events any more, or maybe they don’t even know about all of the topics of content you write about and could even subscribe to getting MORE from you! First thing, go to the Subscription Lists section under Customers in the marketing app. Simply create a new subscription list and give it a name. That’s it.

Next, create a new Marketing form, but make sure the form type is set as Subscription center. When you are using that specific type of form, you will notice that in addition to adding fields to the form, you can now select from and add in your subscription lists.

Dragging a subscription list on to a form displays a check box for each one. Make sure you still include the Do not email me check box (this is the one that updates the Bulk Email field), but be sure to split it out from the rest of your subscription lists so it is clear exactly what actions can be taken on the form. Be sure to include at least the email address field, as when the Contact clicks on the link from the bottom of the email you’ve sent them, this will automatically be populated on the form and it’s getting linked to the right person.

Once you have finished making your form look nice, go ahead and save it, then make it live. Once you’ve done this, you should notice a Form hosting tab appear on the form. From this tab, click on New Form page in the Related marketing form pages area. Although not needed, I usually like to change the auto generated name provided. Just save the record that has been created.

Now from the Form hosting tab, you should see the new form page you created, and also see which domains you have set up that you would be able to host it on. Click on the name of the new form page you created.

Now we can access the code needed to add it to our main website. You’ve got two options. You can either host it as a script or have it displayed in an iframe. Iframes will mean all of the fonts and styling you set on the form will be used. If you use a script, and you don’t set any specific styling for fonts etc, it will draw from the site itself and use that styling where possible. Take the code and add it to your site (or have your web person do this for you).

Once you’ve got the form on the site, we then need to update the Content Settings record (found under the marketing templates area in the marketing app). Edit the Content Settings record then simply remove the dynamic code that already exists and replace it with the link to the page on your website where you added the form. Save the record and make sure it is live again.

Now when someone clicks the Unsubscribe link on the bottom of your emails, they will be taken to your new lovely updated subscription center form instead of the default not so lovely one. It’s a good idea to change the wording used for this link, so instead of Unsubscribe, it shows Update Your Preferences. This lets people know that they can make changes to what they receive from you, and it’s not all or nothing!

When someone clicks on the link and is taken to the form, anything they are currently subscribed to will show as being selected. If they deselect it, that means they are unsubscribing. If they select it, they are subscribing to that new one. The Contact will be added to or removed from the various subscription lists automatically.
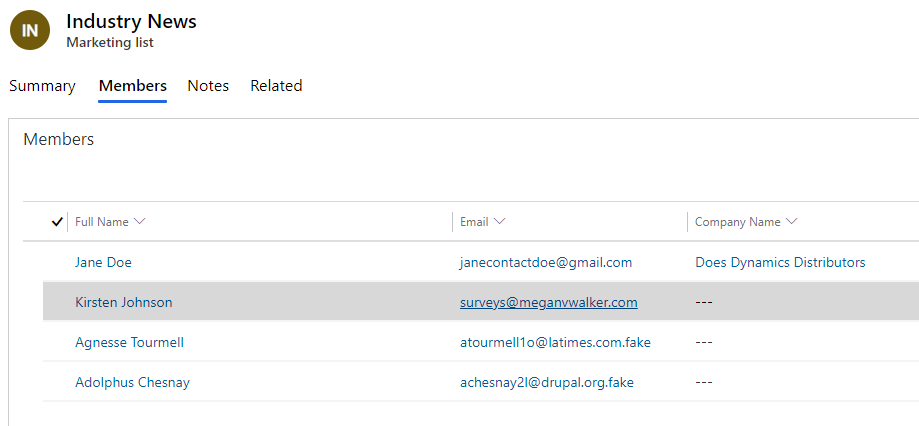
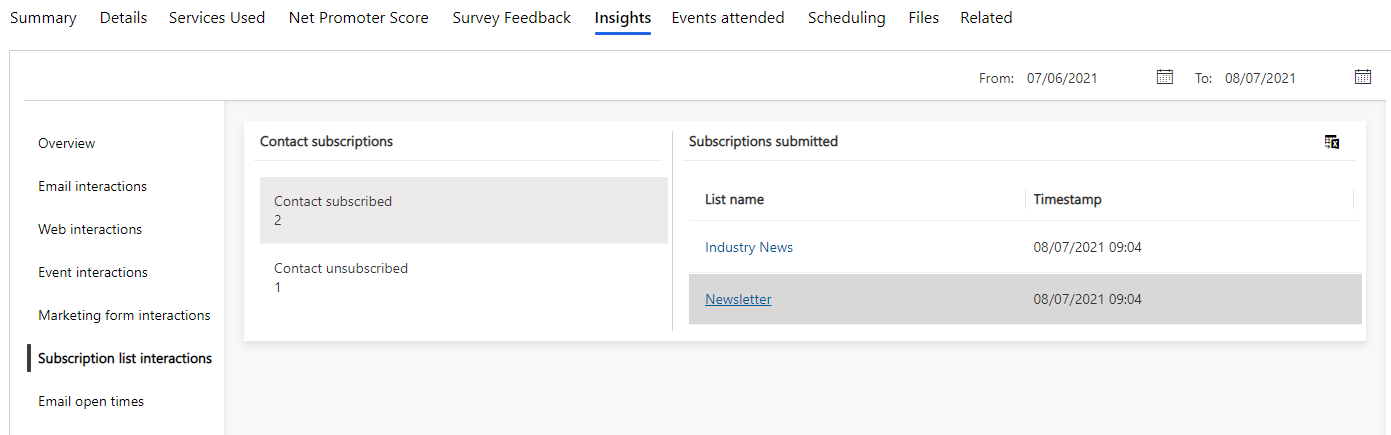
You can also see from the Insights area on their record in the Subscription list interactions area which ones they have been added to or removed from, and when it occurs.
Now all you need to do is consider what kind of content you are going to create to send to your various subscription lists! Use them as the starting point for your Customer Journeys so you know the right people are getting the right content from you.
Check out the latest post:
Use Custom Event Registration Questions To Branch Your Journeys In Customer Insights
This is just 1 of 603 articles. You can browse through all of them by going to the main blog page, or navigate through different categories to find more content you are interested in.
Hi Megan,
Thank you for this great blog. One question regarding consent. When do you/do you not add a consent field on a newsletter sign-up form? I.e. I have the fields first name, last name, email, checkbox for newsletter and a checkbox (consent field) for “I agree to your privacy policy” .
Vinh, I am so sorry! Not sure how I missed your comment! It is likely far too late now… BUT if it was me, I would be making sure I am compliant with all of the rules for the country I am in or do business in. I would make sure that near the checkbox I had a link to the privacy policy or whatever other terms I had. Then I would be happy.
Hello Megan,
Hope you are doing good.
I have been following up your videos and blogs very closely in order to gain knowledge with respect to practical scenarios and key learning across for different topics. One question which I had in mind is, could we refer to this particular article, basically to provide a reason dropdown for contacts when they unsubcribe from a particular list? With the survey been leveraged, could it provide inights for those paticular reasons selected to unsubscribe?
Hi Aayush, are you thinking of one drop down per subscription list? That could end up being a lot of different drop downs. If so, you would need to add a different form field for each dropdown and then add to the form. Could end up being a pretty cluttered form maybe. You could always just add one field to ask why they are changing their subscription levels I guess.
Hello Megan,
Thank you so much for your response.
It would definitely not be a multiple option sets across for each lists. The idea is that lets say, I share across subscription for one of my new newsletters and send it across to 100 people. They would lets say “Unsubscribe” from it, from the link, it directs them to our Subscription Center form, where they check the “Do Not Email field, and we have a validation as a dropdown as a reason field. Further, out of all the option sets if they select “Other” as one of the options, we run a validation again to provide them a description field to understand the reason to unsubsribe.
Got it Aayush. So if it’s just one dropdown, you would need to add a new field to your Contact table, then add a new form field and map it to that new optionset (choice) field. I am not a developer and it’s not something I have experience in, but you can add javascript to the marketing forms that could be used to then show or hide another description field: https://docs.microsoft.com/en-us/dynamics365/marketing/developer/marketing-form-client-side-extensibility
Hi Megan is it possible to block the Do not Email box ON, so to hide the fileld and when hitting unsubcribes, they just hit the submit? How?
Thanks in advance for your time
Yes, just add the Do Not Email field to the form, then set the default value to Do Not Allow and then mark it as hidden. That’s it.