*** NOTE: ALL INFORMATION IS ACCURATE AT DATE OF PUBLISHING ***
Even if you don’t read the Wave 1 and Wave 2 release notes in full detail, it’s ALWAYS a good idea to pay attention to the areas that you and your team use regularly. There is one feature that might potentially go un-noticed but it will be pushed out to users automatically meaning you had better understand what it does and how it works before you start getting asked questions about it right? It’s already there for early access so anyone who already opted in to Wave 1 2023 will see Focus View when working through records. Deployments start for environments at the end of this month, so I think this should be nicely timed to explain how focused view works.
How Does Focused View Work?
Well first thing is to understand who can use it, and this page from Microsoft shows exactly which licenses and security roles are needed. Go to an existing view (works on Account, Contact, Lead and Opportunity) and you should see the Focused view button at the top in the ribbon.
With a lovely slick seamless transition (no seriously, it’s lovely!), you will see the view turn in to a side panel you can navigate through, with the first record in the view selected and displaying in the main area.
The really nice part is for any records that have a scheduled activity, it will be visible in the focused view. If there is an activity without a due date, that was created within the past 30 days, that would show also. So this is giving you what needs to happen next for the record. So the focused view is on the left below, and when clicked on, we see the record on the right. The default form in the Sales Hub will show the Up next control by default so we can see that displayed too.
Hovering your mouse over the activity section for a record in focused view will give use a little icon that we can click on (same thing if clicked on from the Up next section on a form).
Clicking on it will then open that activity record on the right hand side for use to review and/or complete. It’s really slick! I like it a lot.
What If I Don’t See The Up Next Panel?
The majority of clients I work with have a custom form for these four entities (Account, Contact, Lead, Opportunity) so it is entirely possible the Up Next panel will not show up for them.
Using the maker portal, you can easily add a new section above the timeline section (or anywhere on the form) and add in a new display component. Just look for the one called Sequence and add it.
That’s it, no extra configuration needed. Just save and publish the form.
Now we can use a custom form but still take advantage of the Up next functionality.
Customising The Information Displayed
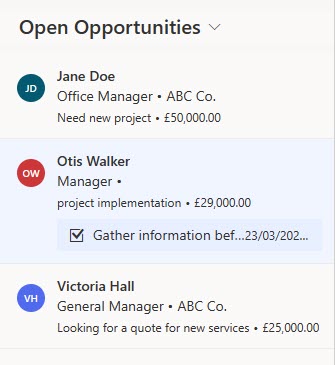
Now what about the information displayed in the focused view? Remember that there are four record types you can do this for, but this is how the opportunities view looks. What if I want to add extra stuff for my users?
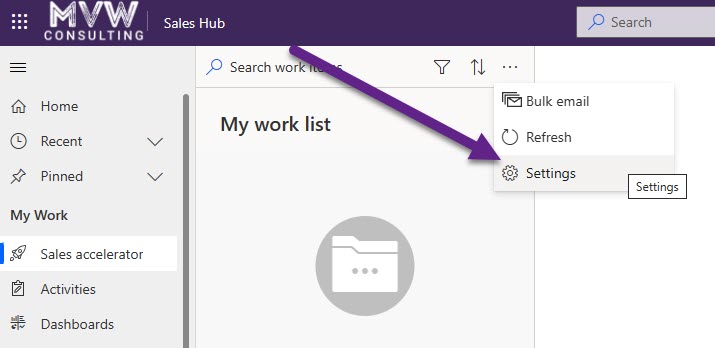
You’ll notice if you click on the ellipsis from the top of the area, you have a Settings section.
Clicking on it might disappoint you though as it is all inactive and you can’t do anything with it.
Instead, change to the Sales Hub app and go to the Sales accelerator (you can add this to a custom app if you want, let me know in the comments if you want instructions!) and then click on the ellipsis again and then Settings.
If you have the right level of access, you should be able to switch to admin mode for this screen now. Then pick the record type you want to customise.
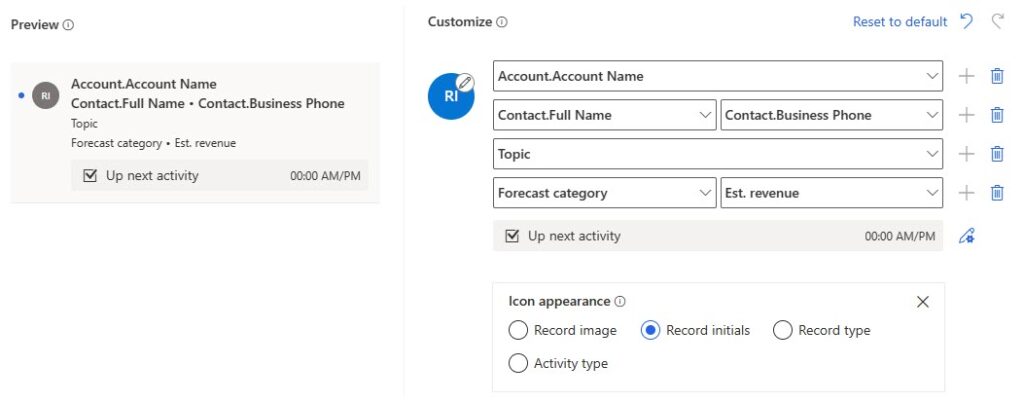
Now you can pick and choose what fields you want to display, and can even change the appearance of the icon which is nice if you are uploading images to Accounts or Contacts for example. Save your changes which will publish it out to the environment and other user.
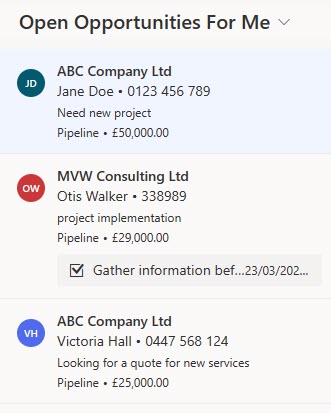
Now I can see the information I want for my users and they get more info right away without having to click in to each record.
Using Filters In The Focused View
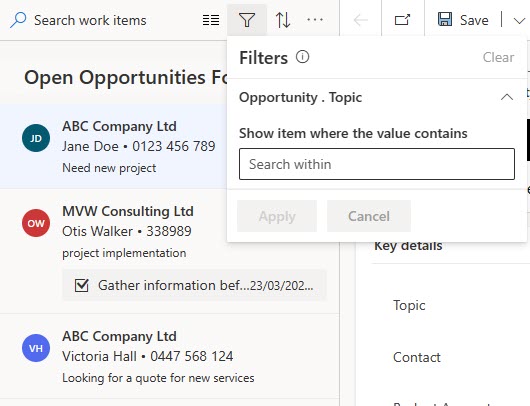
Right, so next we can also filter on the focused view. This one took a bit of trial and error figuring out, because I assumed it would use the Sales accelerator functionality but I was wrong. So, first you can see if you click on the filter icon, I only see Topic. This is because I came from a view that only had the Topic field for Opportunities on it. This was also before I added any customisation to the fields shown on the items in the focus view… so it was bare bones.
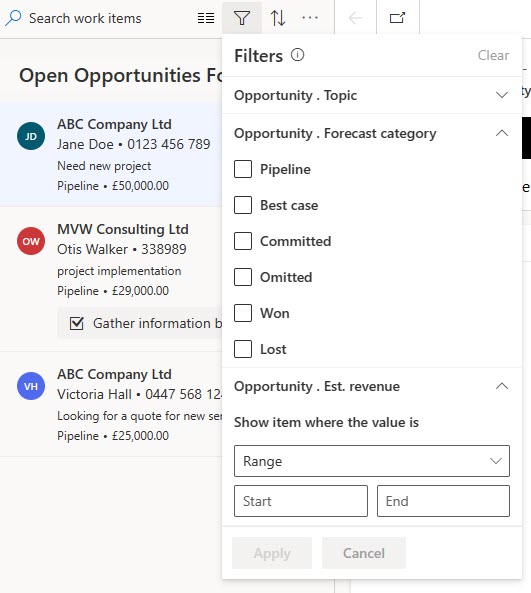
Now if I look at the filters again after adding in the estimated revenue and forecast category to the display, they will also show in the filters.
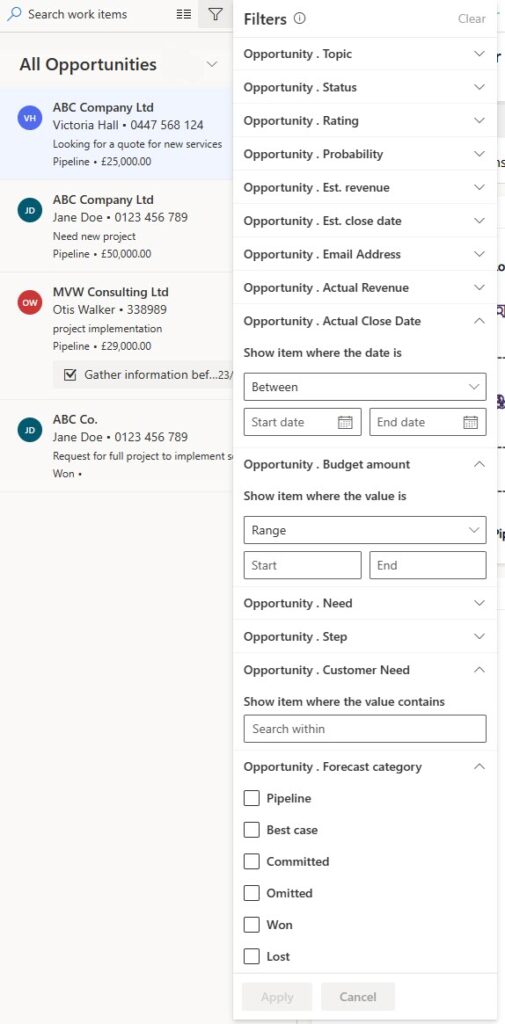
Now if edit a view and add in a bunch of other columns, we can see my Filters list has grown further. So, remember, this is using columns that have been added to the appearance of the focused view, AND is also using columns that are included on the view the user was on when they clicked on Focus view. One thing to keep in mind, it doesn’t seem to add columns that are lookups or two options (Yes/No fields).
Using Sort By In The Focused View
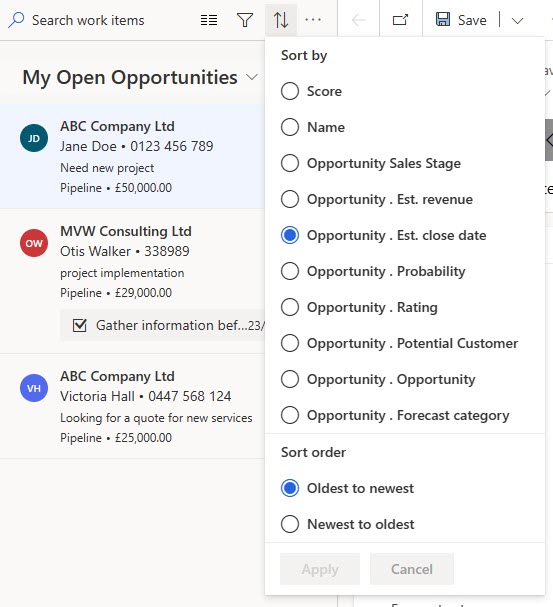
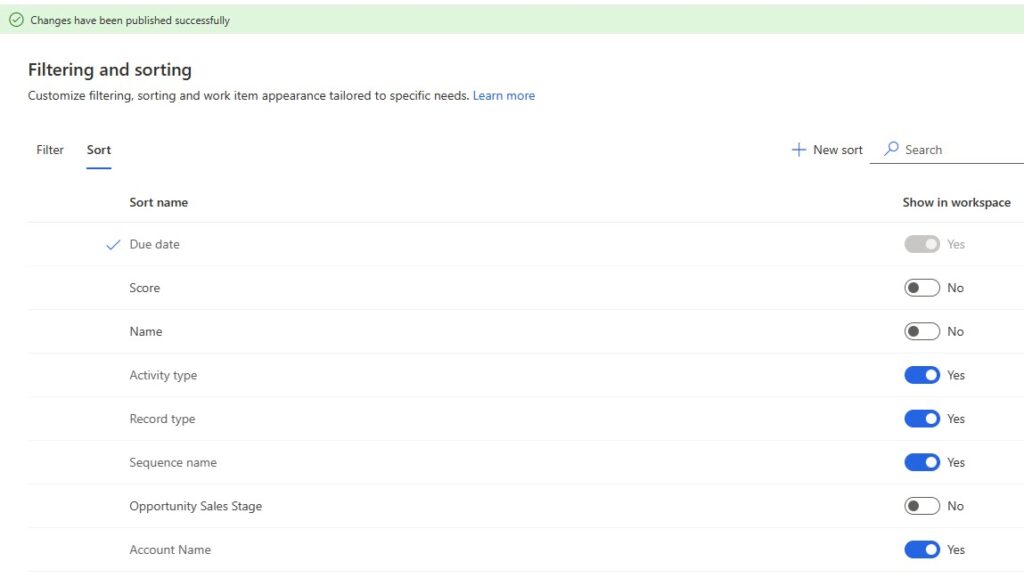
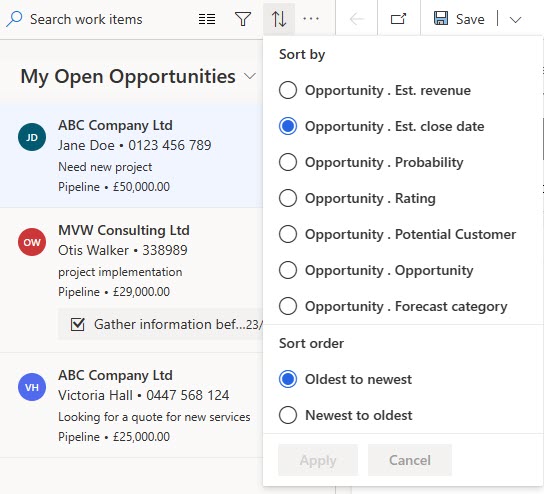
Finally, we have the ability to sort on the focused view. This also seems to be using the same logic as the filters, and includes columns that are either on the focus view appearance OR are coming from the columns on the view the user started from. However, you can see there are three items at the top that do not follow the same naming convention as the others, so where are they coming from?
This is where you will need to go back in to the Sales Hub app, then from the navigation at the bottom, click on Sales Insights Settings, then Global settings. From there, go to the workspace and then Sort. You should see several default options that you can then turn on and off.
After making changes, click Publish from the bottom to update those settings.
Now we can see we are just left with the sorting options based on the columns used in the appearance and view the user was on when they clicked on the Focus view button. Awesome!
What do you think? Are you going to start using this feature? Well, that was a trick question, because as I said at the start, this will be available for all users once Wave 1 2023 is rolled out, so please make sure you check it out!
Check out the latest post:
Create A Simple Event Session Registration Trigger
This is just 1 of 492 articles. You can browse through all of them by going to the main blog page, or navigate through different categories to find more content you are interested in. You can also subscribe and get new blog posts emailed to you directly.






Thanks, Megan – that’s really insightful and helpful. You mentioned adding to a custom app, I’d love to know more if you’re able to share.
Hi Fraser, you can edit the site map of or your custom app and use a URL as the content type. Add this in as the path – /main.aspx?&pagetype=control&controlName=MscrmControls.AcceleratedSales.AnchorShellControl&data={“OpenAdminSettings”:true,”PageId”:”WorkItemAppearance”}
Then you can also edit the priviledge to make sure it’s only seen by those with Write access to the Sales Accelerator settings table. That gives you quick access to be able to change the appearance of the different focused view areas without having to fiddle about remembering how to get to it. Hope that helps!
Thank you Megan for sharing!
Do you know exact permissions as well as their access level needed for a custom security role to be able to use this feature for both 4 entities (Account, Contact, Lead and Opportunity)? Thanks in advance
Hi Tuan, this link shows the security roles Microsoft identifies as needing, but the exact permissions, no. https://learn.microsoft.com/en-gb/dynamics365/sales/focused-view?WT.mc_id=DX-MVP-5003395#license-and-role-requirements – you would need to review and figure out what is included in those roles and make sure you add those to your own custom security roles. Just not something I have had the time to dig in to!
How do I disable this Focussed View button?
As per the documentation, it’s enabled for everyone automatically – https://learn.microsoft.com/en-gb/dynamics365/release-plan/2023wave1/sales/dynamics365-sales/prioritize-engagement-sales-entity-working-focus-mode?WT.mc_id=DX-MVP-5003395 – you would need to contact Microsoft directly to ask if there is a way to disable it, but I am guessing there isn’t.
Hi, do you think it’s possible to enable a particular form for users who selects focused view?
Hi Alessandro, I don’t know. Would need some JavaScript but I have no idea if it would be possible. You would need to engage with a developer to review that requirement.
Hello Megan
Focused Views also appear in Dynamics Customer Service (they look to be a recent addition). Are you aware of whether they are available as solution components? I’ve made changes in admin mode and added Work List View Configuration and Work list user settings to a test sitemap, but no records are shown. As there aren’t any records, I haven’t as yet tested deploying this in a solution as it doesn’t look to me that it would work.
Many thanks, Alex
Hi Alex, they are available as a view control component, so yes, I would expect you could add to a view, and then move across from one environment to another. It would then appear in the ‘Show As’ drop down when on a view. Hope that helps!
Hi Megan
An update on the deployment question – Focused Views don’t deploy any of the set up that’s done by users, even in the Focused View admin mode.
All the best, Alex
That’s not brilliant, but it is what it is! Thanks for the update and sharing with others Alex!