*** NOTE: ALL INFORMATION IS ACCURATE AT DATE OF PUBLISHING ***
In the guide to creating and managing a webinar event using Dynamics 365 Marketing, we’ve come to one of my favourite parts, the Marketing Emails. I enjoy constructing the content, thinking of how to communicate with clients in an engaging way, and trying to appeal to them in a way that is informative and friendly without being cheesy. Not always easy! In this post I have a few different types of emails that I am suggesting might be needed. Use this as inspiration rather than gospel. Let’s get started!
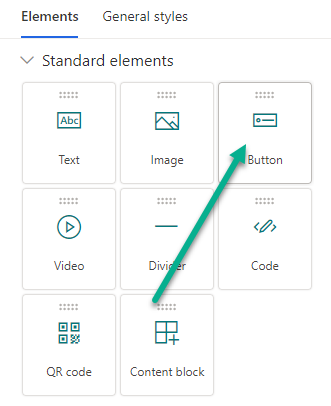
Add your first new email, making sure you customise it in accordance with your organisations brand guidelines. Add whatever components you need, but for all of our emails, we are going to be using a button element.
Email 1 – Inviting People To The Webinar
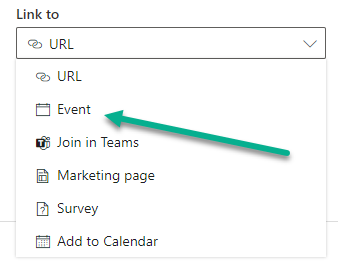
Once your webinar is ready to go, you’ll need to promote it. Of course, you can simply share the custom URL for your registration page, but surely you want to invite people you already know right? Consider creating an email you can use to invite people to go and register for the event. In theory, you could just link a button to the direct URL…. BUT if someone adjusts that URL, it will break the email button for anyone you sent it to. Instead, change the link to option to be Event.
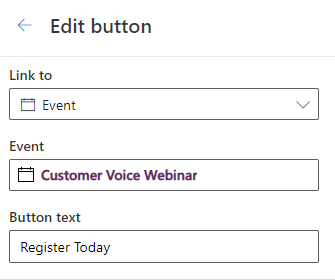
Once you change this, you will then need to populate the lookup field to the Event you created for your webinar. This means if the URL gets changed at any point, we can still make sure people get to the right place. Adjust the button text to say whatever makes the most sense for your requirements.
Combined with the details of the webinar and a nice header image, we have ourselves a lovely email inviting people to register for the upcoming webinar.
Email 2 – Auto Response For Registrations
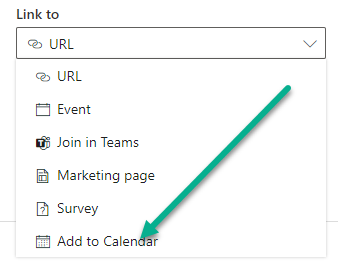
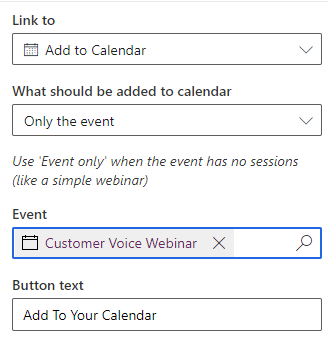
Next, we want to make sure that once someone has registered we are sending them an autoresponder email. We can thank them for registering AND provide them with the ability to download an invitation to add to their calendar. We create our email and make sure to add a button. This time, we will link to the “Add to Calendar” option. Note that there is an option for Join in Teams, but that will not be linked to the same Contacts Event Registration record, so stick to Add to Calendar for this scenario. The related Registration record ID is appended to the join link in the calendar invite so we know who actually joins the webinar.
Once we pick this option, we can then set what should be added to the calendar. For this, there is only one event so we select “Only the event”. Then we pick the Event that the calendar invitation should be related to, and adjust the text on the button.
Now we have an email saying thanks and giving them an option to add the webinar to their calendar. This will be the calendar invite we customised when we set up the Event.
Email 3 – Reminder Email
Although not needed, a reminder is often useful for people. After they’ve registered for the webinar it could go forgotten, so letting them know it’s next week or tomorrow can be helpful. This one doesn’t need much on it, but might be worth including the Add To Calendar button again just in case they missed it on the first email.
Email 4 – Thanks For Attending
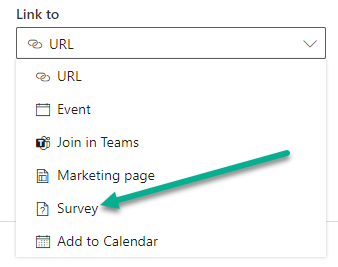
After the event, it’s nice to follow up with anyone who attends and say thank you. And why not include the option for them to provide feedback? We can add a button and link to the “Survey” option.
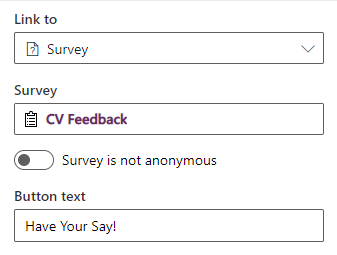
This is related to a Customer Voice survey, so make sure you’ve set that up first (if indeed you do want to ask for feedback). Search for the correct survey, then change the button text to something meaningful.
Now we have a nice thank you email for anyone who attended with an option for them to complete a survey with feedback about the webinar.
Email 5 – Sorry You Missed It
Don’t miss out on an opportunity to engage with people who registered but didn’t actually attend. You can use this as an avenue to promote your next webinar or give them the ability to contact you in a variety of ways.
Once you’ve got all your emails set up, we then need to put it all together in a Customer Journey. That’s next in the series!
- Part One – Creating Your Registration Form
- Part Two – Adding Team Members & Speakers
- Part Three – Adding Your Webinar Event
- Part Four – Creating Your Marketing Emails
- Part Five – Building Your Webinar Customer Journey
- Part Six – Understanding Event Registrations
- Part Seven – Reviewing Insights Post Webinar
Check out the latest post:
Create A Simple Event Session Registration Trigger
This is just 1 of 492 articles. You can browse through all of them by going to the main blog page, or navigate through different categories to find more content you are interested in. You can also subscribe and get new blog posts emailed to you directly.






Hi megan,
Did you test also this scenario
When you send out the event webinar teams event calender, and the receipient forwards the email to another not registred person can this person join the webinar with the ID of the registered person?
If someone forwards the email and it has the calendar invite, and that other person joins, then it will certainly show that they have joined as the original registered person as it will pass through the event registration ID. Always good to point that out in the email, that this is a unique registration just for them.
Hi Megan,
As you have shown the scenario of Inviting People to the Webinar. I also tried linking the Register button to the event. but somehow it is not working. When I tried linking Register button with URL, then its working but I wanted to link the Register Button to the event that I created. Please let me know if I am missing something.
Thanks so much!
Hi Kawal, when you say ‘it’s not working’ what do you mean? Are you saying the registration is never created once you fill out the form?