*** NOTE: ALL INFORMATION IS ACCURATE AT DATE OF PUBLISHING ***
Near the end now! We need an Inbox page to display the list of messages, so we can add one right from the Home page (assuming you are logged in to the portal as a user with the Administrator Web Role). Make sure it has the partial URL of inbox. If you don’t that’s fine, but you will then need to edit the Header Web Template and change the link for the Inbox so it goes to your partial URL when it’s clicked on. The page template is Full Page without Child Links, and then set the Entity List as the Portal Messages one we just created.

From the Inbox page, add a child page. Call this one Message (or whatever you want displayed as the header. You can select the Full Page without Child Links page template, and set the Entity Form as the Portal Message we just created.

Finally, go back to the Portal Messages Entity List, and scroll to the Web page for Details View field and add the Portal Message web page you created, and make sure the ID Query String Parameter Name is id. This will make sure when the user clicks on a message from the list they will be taken to the correct message on the Portal Message page.

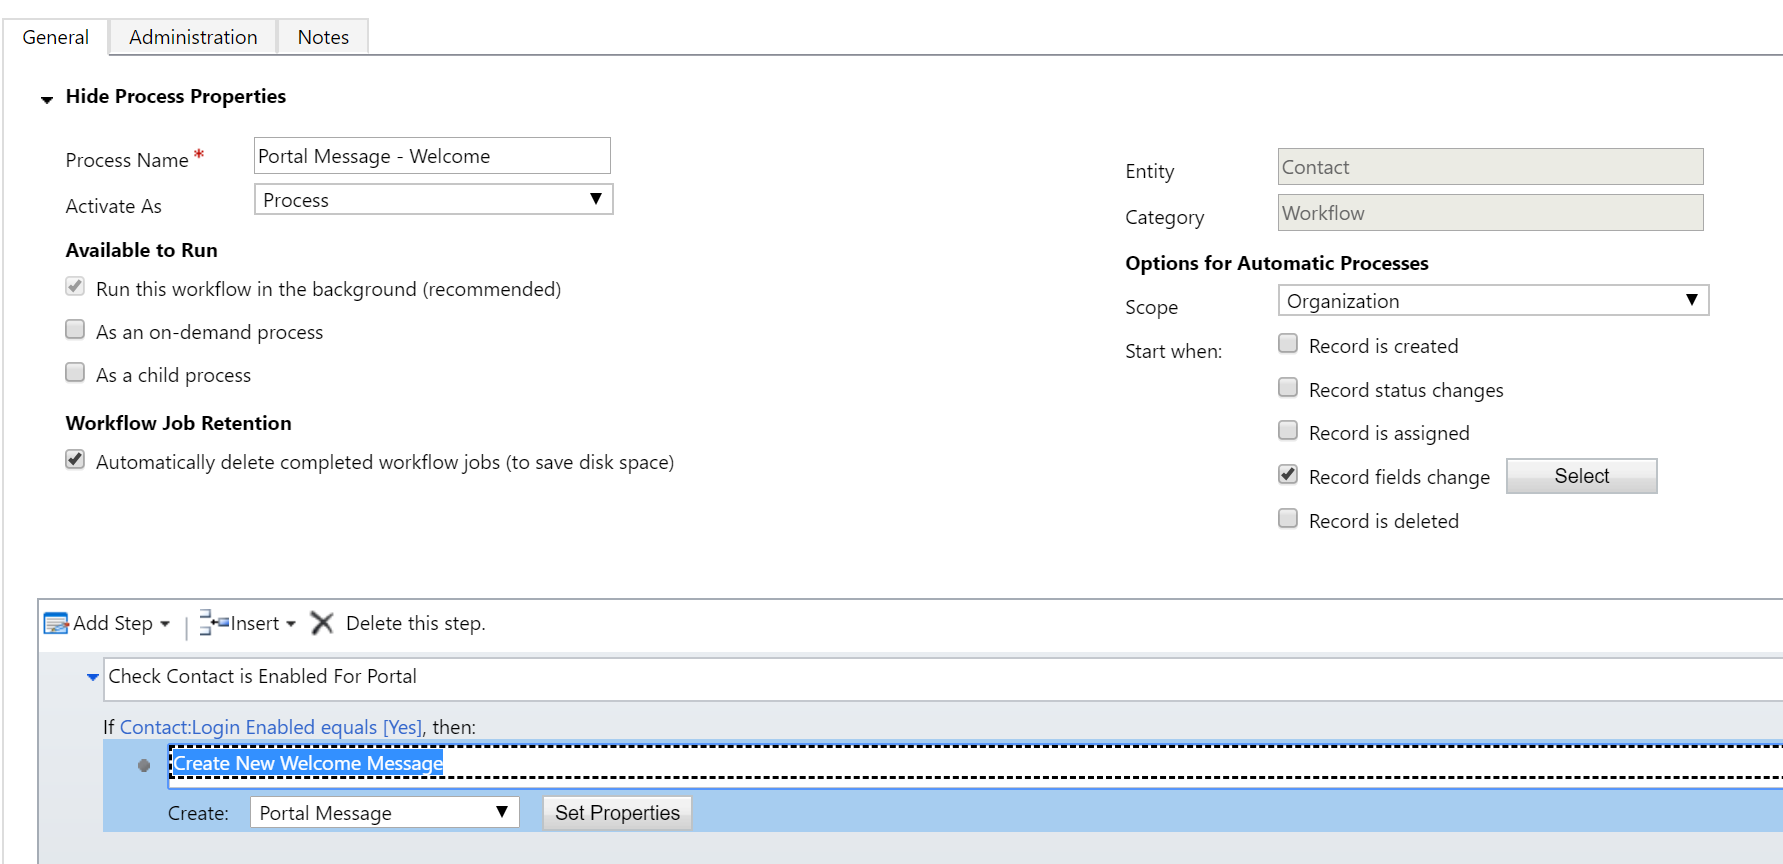
Now that we have everything set up, let’s see how to use it. First things, you will probably want to add in a new workflow for some kind of welcome message. Maybe it’s something that you use to add details on how you want people to use the portal. This is something pretty simple. The workflow will run on change of the ‘Login Enabled’ field. If it’s Yes, then a new Portal Message will be created. So that will always give us our first message for the user. Your messages could then be generated when a case is closed, or when an order is placed, letting them know about business closures, telling them about a new product or a sale. The possibilities are kind of endless!
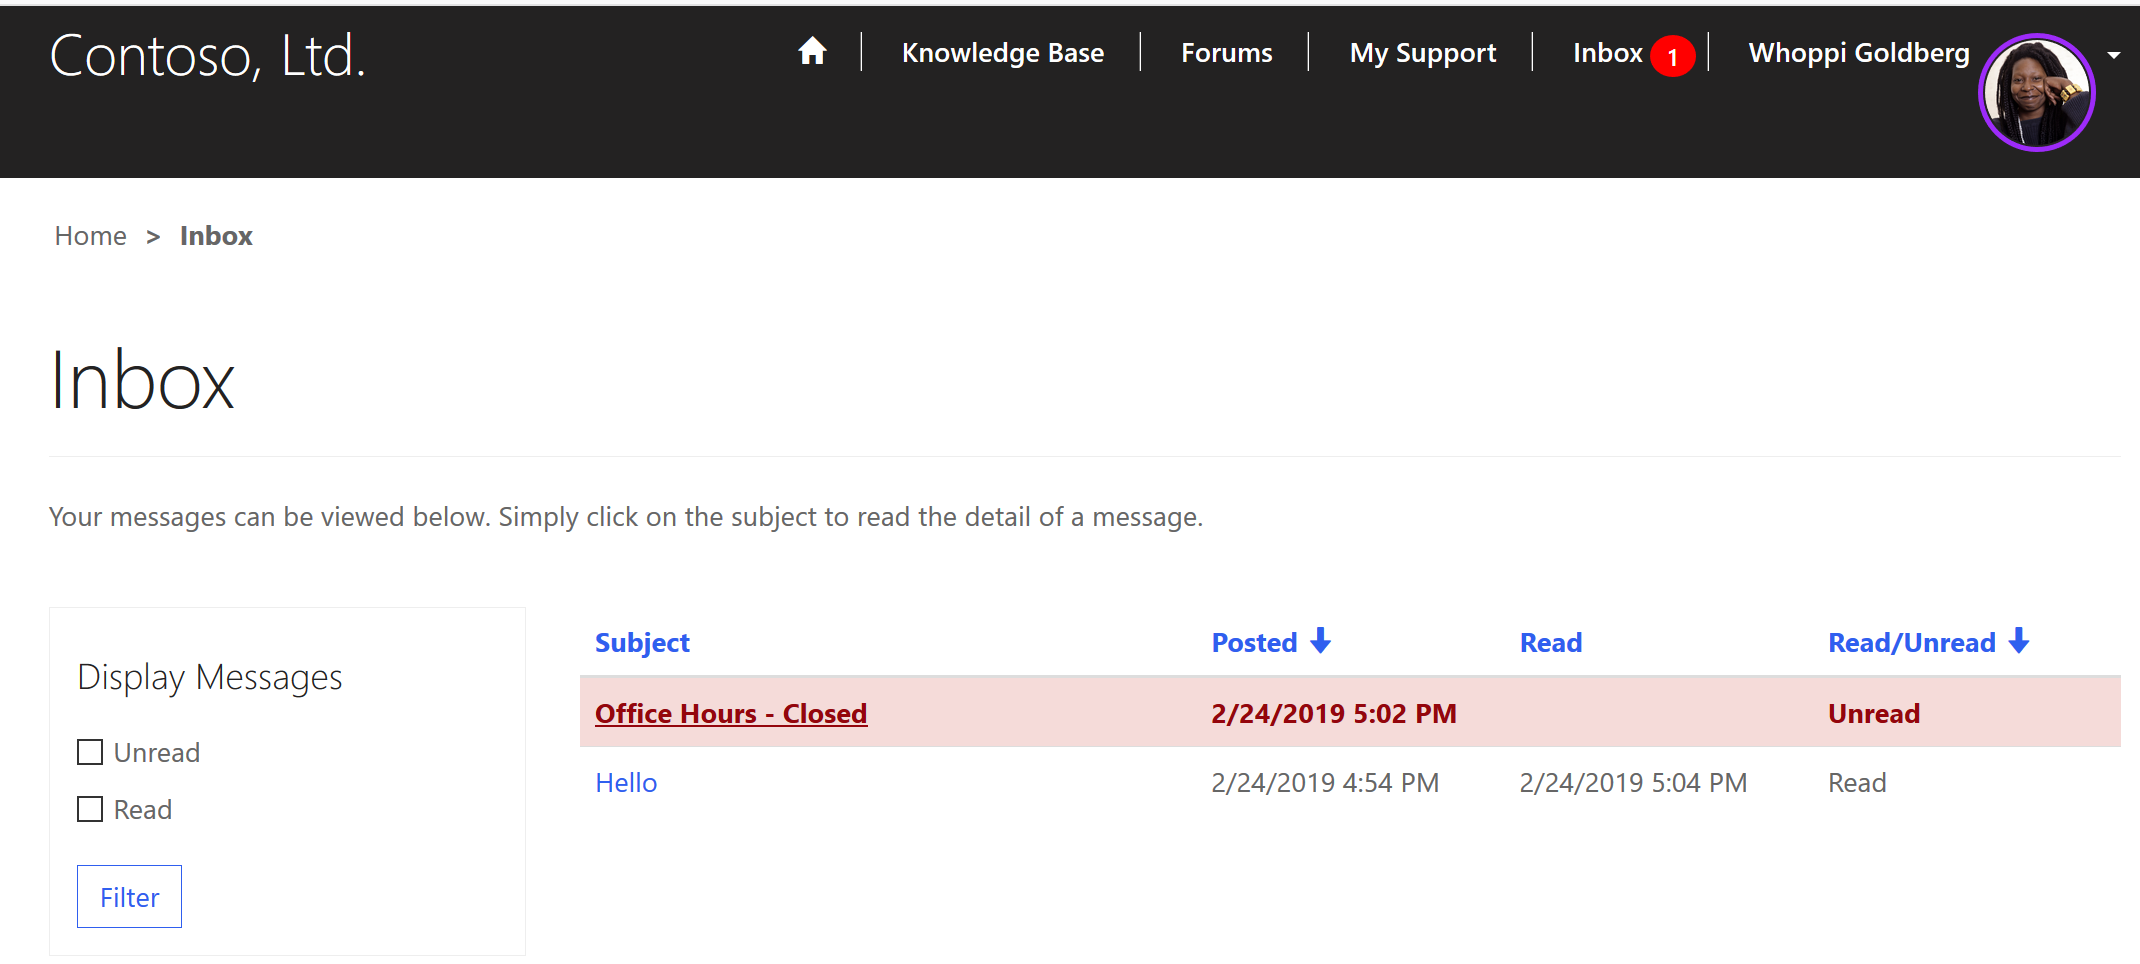
So now we can see a user logged in. The notifications at the top show there is one unread message. We can see the metadata filter we added to the Entity List on the left. We can also see that the unread message is highlighted in red.

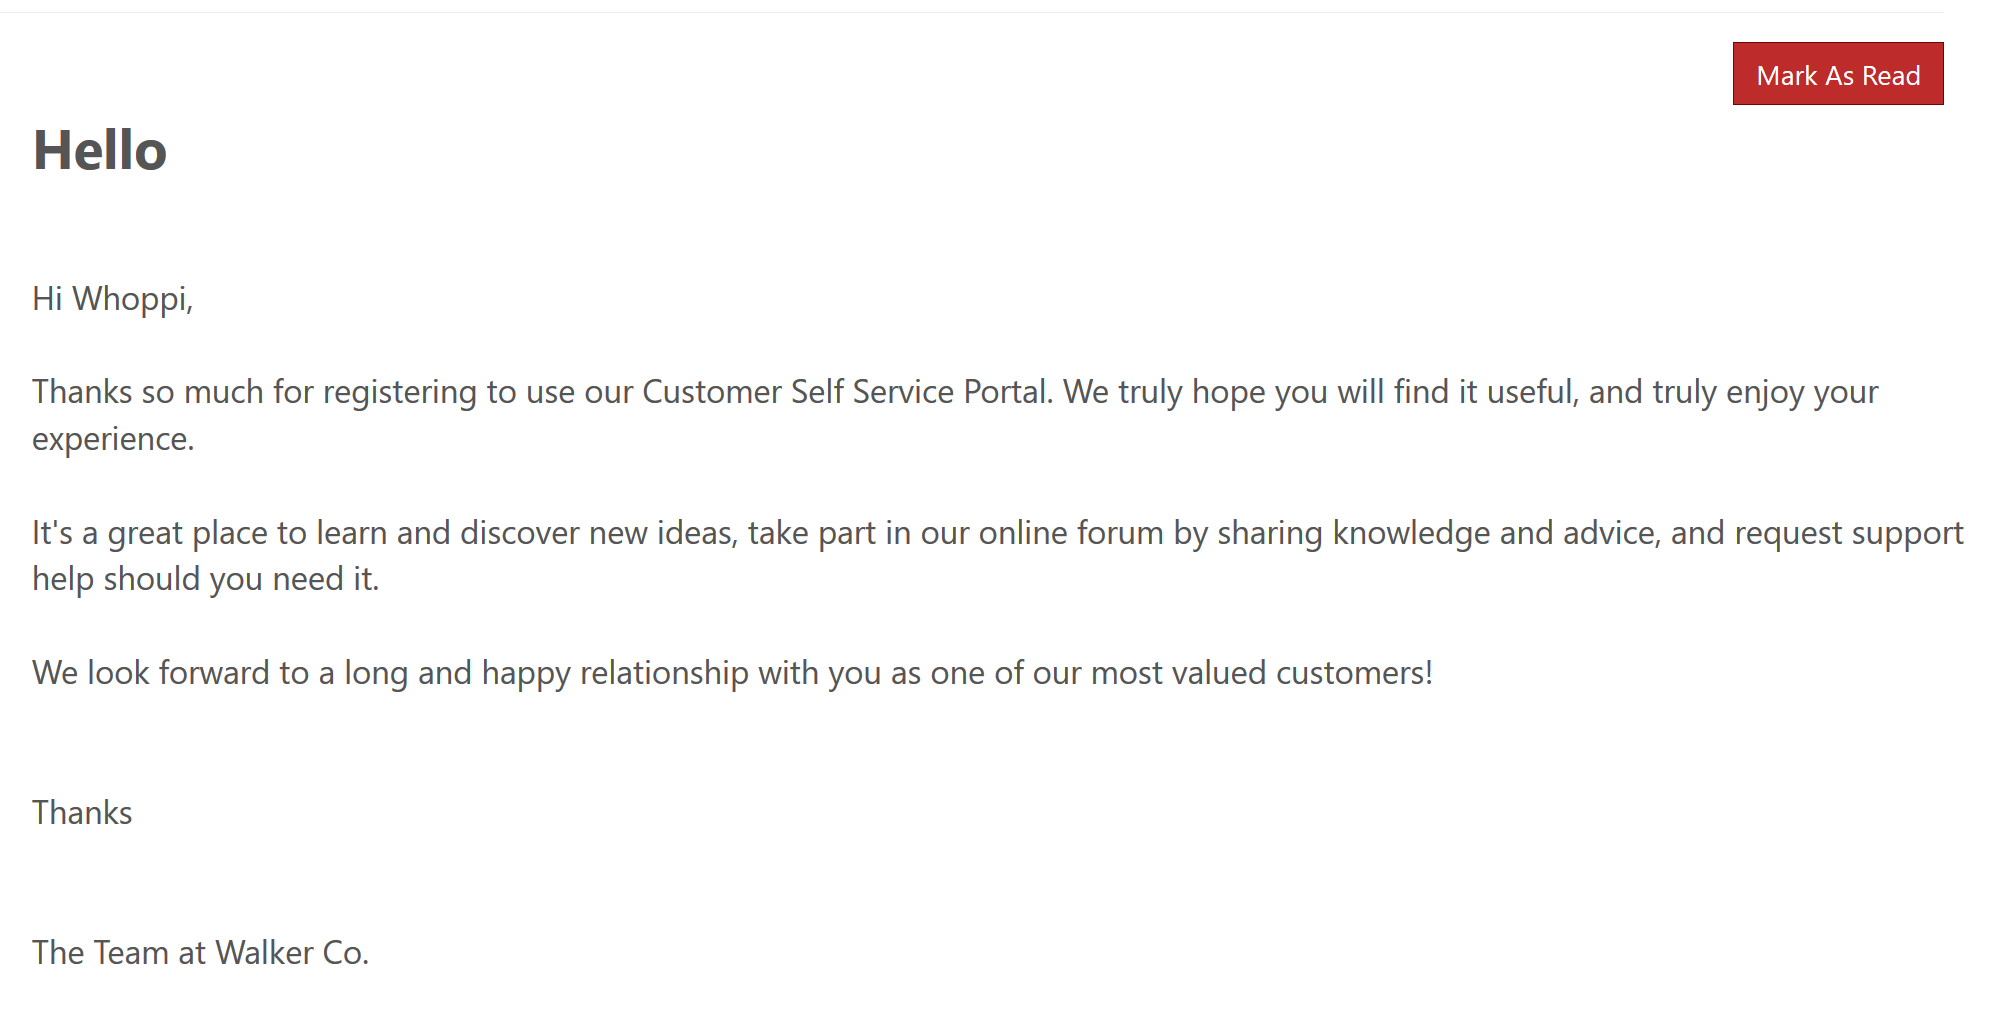
If we click on the subject of the message, we see the Mark As Read button at the top right which we added to the Entity Form for the Portal Message. We can also see the formatting we added to the Entity Form Metadata to use specific CSS classes for the subject and the description.
If we mark the message as read, then go back to the Inbox we can see that it’s no longer highlighted in red, and there is now a date and time in the Read column, and the status shows as Read. Awesome!
What other uses can you come up with for sending out messages to your portal users? Let me know in the comments below!
Check out the latest post:
Use Custom Event Registration Questions To Branch Your Journeys In Customer Insights
This is just 1 of 603 articles. You can browse through all of them by going to the main blog page, or navigate through different categories to find more content you are interested in. You can also subscribe and get new blog posts emailed to you directly.
Hi Megan. I hope you are fine. Im trying unsesfully replicate this on my trial, but well so Im still triying.
The question is, Why not using the portal comments ? I dont know if you say something about it on some youtube video.
Portal comment have note too.
The count of the message Inbox is visualy wonderfull. Is not posible make this with the Portal Comments Entity?
There are few places to look for information about the portal and this is one of the best.
Thanks.
Hi Javier, thanks for the lovely comment! Good question. You could certainly use the portal comment as the entity to count and display with the number unread, however, you would need to do quite a lot to the entity to change it with the change to the status etc. Also, the portal comment is used predominately on the case entity in the portal. I wanted a way to keep the messages completely separate from the comments as they go back and forth both ways (from a user to a contact record). It would have been a bit of a challenge to try and find the right query to keep it all apart from one another. Hope that makes sense!
Hi Megan,
This is a superb article but unfortunately, I am able to fully complete this in my environment. What contact field needs to be updated in first workflow and what would be updated value. Your kind response would be appreciated. Thanks
Hi Qasim, just add the step to update the entity, you don’t need to update any specific field.