*** NOTE: ALL INFORMATION IS ACCURATE AT DATE OF PUBLISHING ***
Now we need to create a new Entity Form to display the Portal Message for the portal user to review. Set the Entity as the Portal Message, and then pick the form you want to use. It’s a good idea to create one specifically to use in the portal, and a different one to use within D365. For the Portal Message, I don’t want the labels of Subject and Description to be displayed, so I have two forms for that purpose. Set the Mode as Read Only, and the Records Source Type as Query String, with the Record ID Query String Parameter Name as id. Finally, tick the box to Enable Entity Permissions.

Move along to the Additional Settings tab. Just a note, I was doing all of this in the new UI Portal app, but when I got to this, the Additional settings showed an error where I should have been able to add an Action button. I went back to the classic interface and it was fine. We are going to add a Workflow action. We can cause a workflow to be kicked off when the user clicks on a button. So here we are going to add the ondemand realtime workflow we added which marks the portal message as read. On Complete we will refresh the page and display a success message. The button label will be Mark As Read.
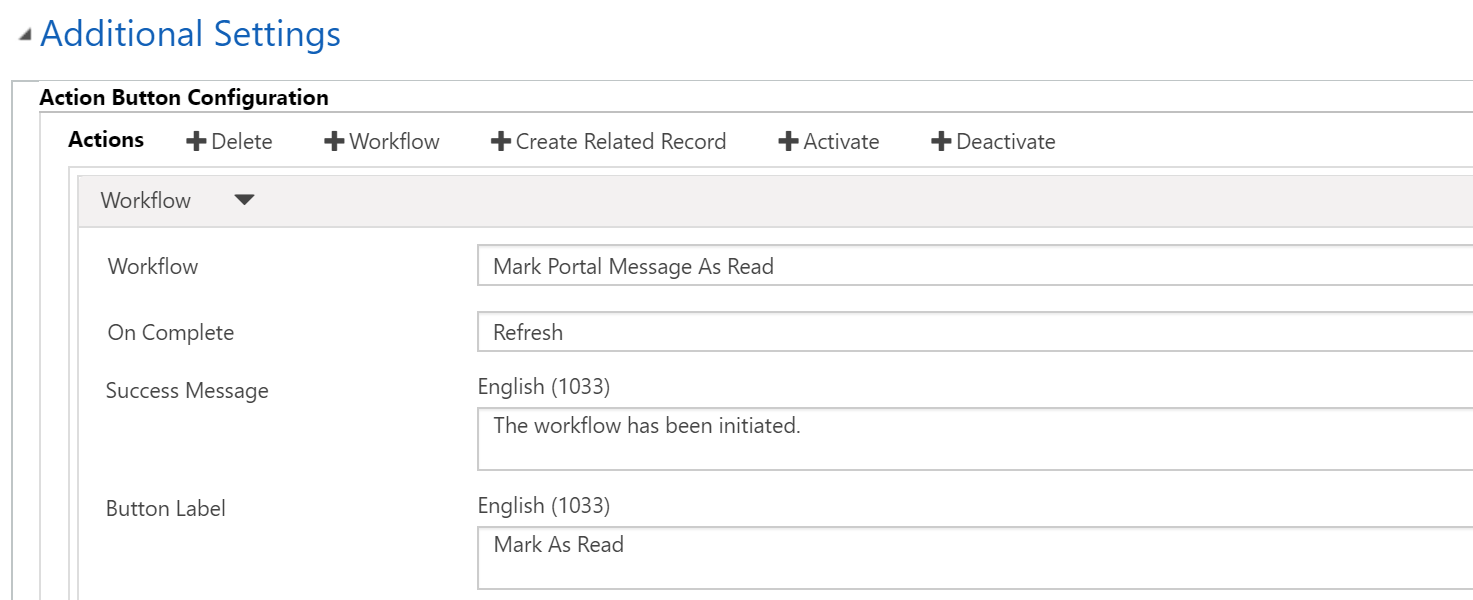
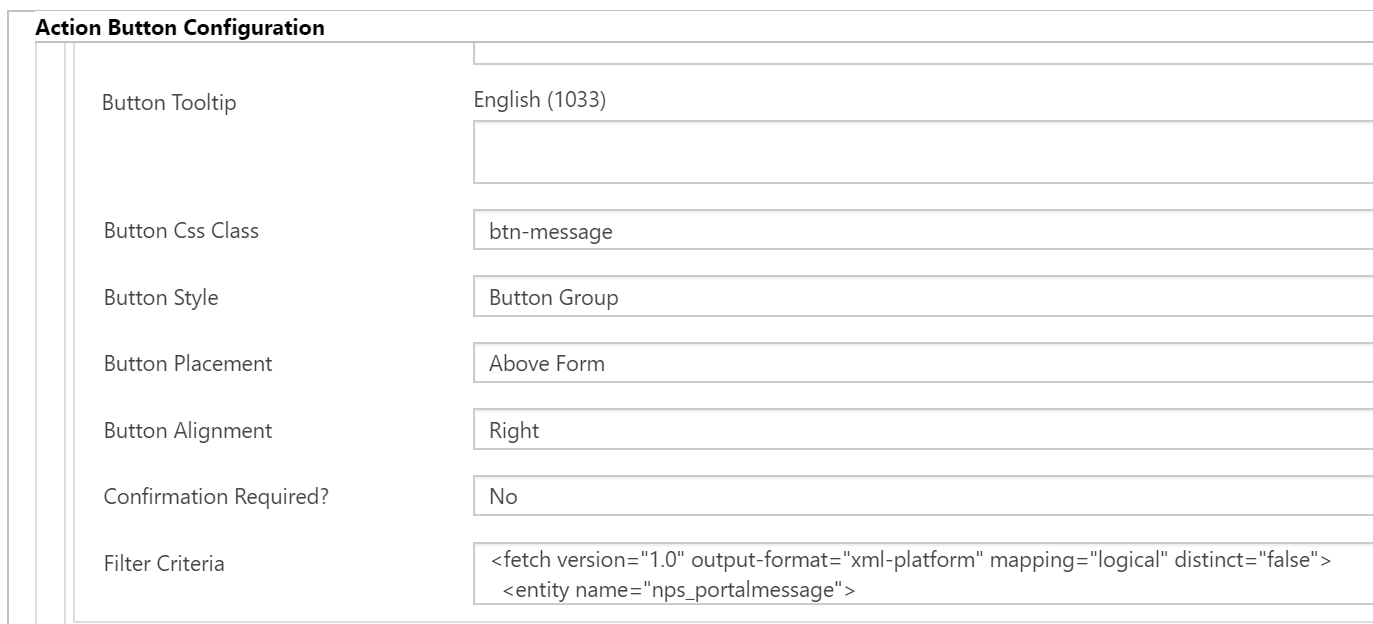
Scrolling further down, we are going to use some styling for the button so adding in btn-message as the class. I want to display it above the form and to the right. Finally, we have to add in some Fetch XML to determine when the button displays. Otherwise it won’t display at all. For this, just go to your Advanced Find, create a simple search for Portal Messages, where the Status Reason equals unread. Then click the button to download the FetchXML, then paste it in the Filter Criteria field.
On the Entity Form Metadata we need two added, one for the subject attribute and one for the description attribute. The only thing you need to add for each one is to scroll to the control style section and add in the CSS. We are using styles from the new CSS created, so add message-subject and message-description in the CSS Class fields on the appropriate Metadata record.

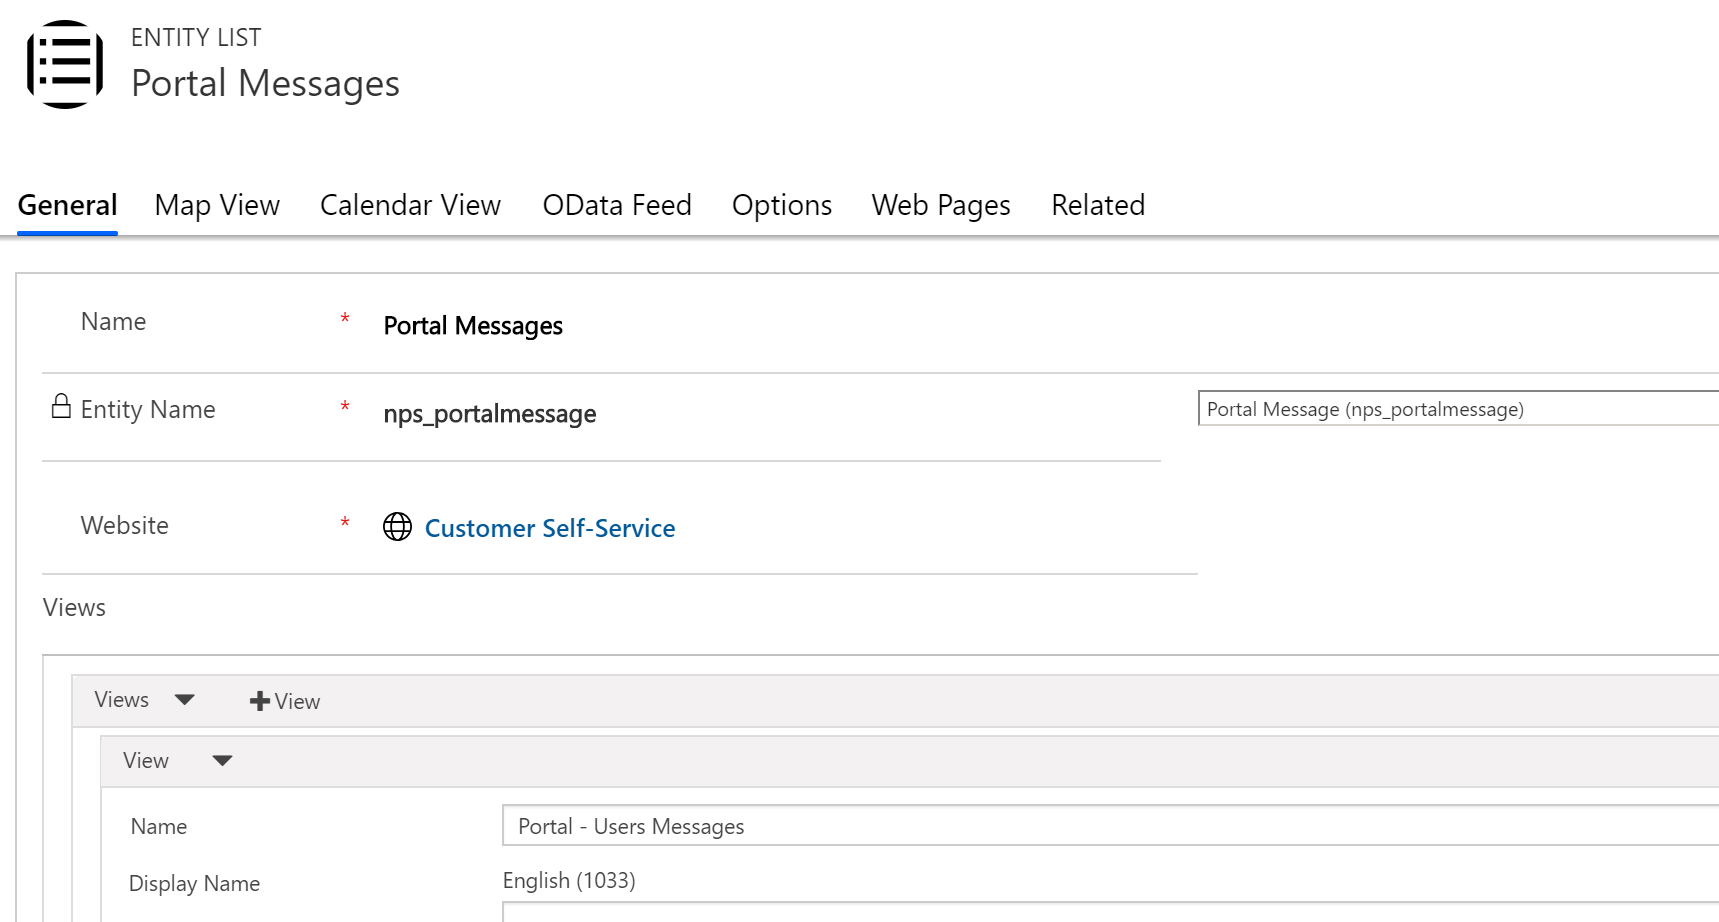
Now we need a new Entity List to display the Portal Messages. Select a view that is displaying all of the fields you want the user to see. In this, we have a view called ‘Portal – Users Messages’ which will show the subject, the create date, date read and the activity status reason.
Scroll down the page and tick the box to enable metadata filtering. Set the Orientation as Vertical and add the word you wish to appear as a button for the user to filter their messages.

Now we can set the filter based on the Status Reason attribute. Let’s allow the user to show all read or unread messages. By default the filter will be off so they will see all of their messages. After you’ve selected the attribute, choose check boxes as the selection mode, and then the display name as Display Messages (or whatever you wish to show). For the options, it will show all of the values in the Status Reason field. You can remove any you don’t wish to display by clicking the x next to them. Here we are just going to show the Unread and Read values.

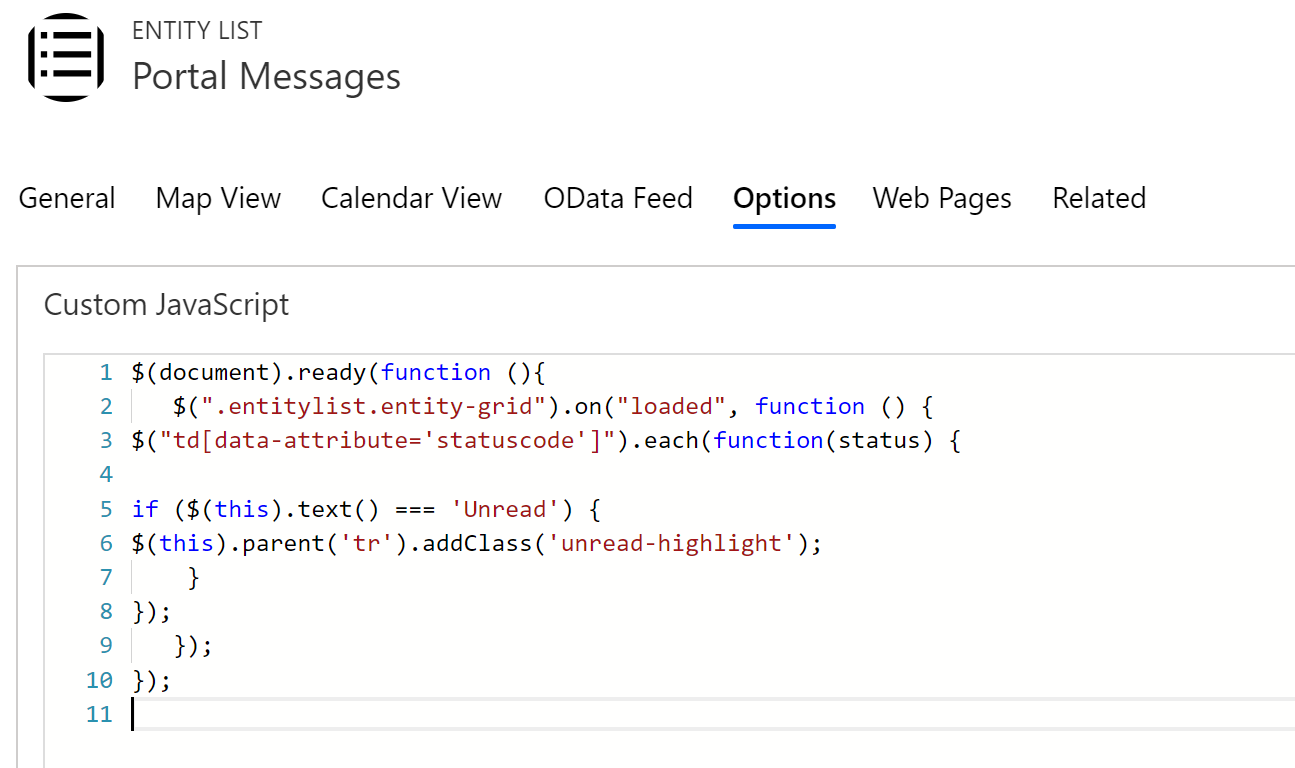
Moving on to the Options tab, we can add in a bit of javascript (thanks to my brother Owen Rumney for helping me figure out how to do this!) to do some conditional highlighting. For any rows where the Status Reason is Unread, some additional css will be applied to them, making them stand out in red.
Scrolling down further we can make changes to the columns headers under the Grid Configuration section. You can override the display name for each attribute as required.

You can copy and paste the javascript below.
$(document).ready(function (){
   $(".entitylist.entity-grid").on("loaded", function () {
$("td[data-attribute='statuscode']").each(function(status) {

if ($(this).text() === 'Unread') {
$(this).parent('tr').addClass('unread-highlight');
    }
});
   });
});
Check out the latest post:
Use Custom Event Registration Questions To Branch Your Journeys In Customer Insights
This is just 1 of 603 articles. You can browse through all of them by going to the main blog page, or navigate through different categories to find more content you are interested in. You can also subscribe and get new blog posts emailed to you directly.
Hi Megan. I hope you are fine. Im trying unsesfully replicate this on my trial, but well so Im still triying.
The question is, Why not using the portal comments ? I dont know if you say something about it on some youtube video.
Portal comment have note too.
The count of the message Inbox is visualy wonderfull. Is not posible make this with the Portal Comments Entity?
There are few places to look for information about the portal and this is one of the best.
Thanks.
Hi Javier, thanks for the lovely comment! Good question. You could certainly use the portal comment as the entity to count and display with the number unread, however, you would need to do quite a lot to the entity to change it with the change to the status etc. Also, the portal comment is used predominately on the case entity in the portal. I wanted a way to keep the messages completely separate from the comments as they go back and forth both ways (from a user to a contact record). It would have been a bit of a challenge to try and find the right query to keep it all apart from one another. Hope that makes sense!
Hi Megan,
This is a superb article but unfortunately, I am able to fully complete this in my environment. What contact field needs to be updated in first workflow and what would be updated value. Your kind response would be appreciated. Thanks
Hi Qasim, just add the step to update the entity, you don’t need to update any specific field.