*** NOTE: ALL INFORMATION IS ACCURATE AT DATE OF PUBLISHING ***
Next we need to add some CSS. If you haven’t done this before, just copy and paste the code below in to Notepad, then save as something like ‘custom-styles.css’. Make sure you change the file type to All when you are saving otherwise it will just save as a .txt file which won’t work. Then navigate to the Home page while logged in as someone with an Administrator Web Role and create a new file. Upload it and save. You won’t see any changes yet as you’ve not added the css styling to anything, but keep in mind if you use Google Chrome, you might not see your style changes until you delete your cache. I tend to use Firefox for refreshing and seeing the changes displayed a bit more easily.
.notification {
  color: white;
  text-decoration: none;
  padding: 15px 26px;
  position: relative;
  display: inline-block;
  border-radius: 2px;
}

.notification:hover {
  background: red;
}

.notification .badge {
    position: absolute;
    top: 16px;
    right: -14px;
    padding: 5px 10px;
    border-radius: 50%;
    background: red;
    color: white;
}
.notification .badge-zero {
    position: absolute;
    top: 16px;
    right: -14px;
    padding: 5px 10px;
    border-radius: 50%;
    background: #9a9292;
    color: white;
}
.divider-inbox {
    height: 21px;
    margin: 0 4px;
    margin-top: 14.5px;
    border-right: 1px solid #fff;
    border-left: 1px solid #666;
    margin-left: 20px;
}
.btn-message {
    color: #ffffff;
    background-color: #bd2b2b;
    border-color: #6d0705;
}
.btn-message:hover {
    color: #5a4645;
    background-color: #dec4c4;
    border-color: #2b2b2d;
}
.btn-message:active, .btn-message.active, .open>.btn-message.dropdown-toggle {
    color: #e60707;
    background-color: #e6e6e6;
    border-color: #8a0c0a;
}
Now let’s go ahead and add some code to the top navigation of the portal so we can see the notifications. Here is what it’s doing. We are checking to see if the logged in portal user has more than 0 unread messages using the rollup field as the value (nps_unreadmessages in my example). If it is greater than zero, we are using the css class of badge, then showing the value from that field. The badge css will make the notification icon have a red background. If it equals zero, we are using a similar css class but this time badge-zero, which instead of red will be grey. Finally, if the user doesn’t have anything in that field which would be the case when you first create the field, just show zero and use the same badge-zero css. That way there will always be a number, and it won’t be so prominent in red if there are no unread messages.
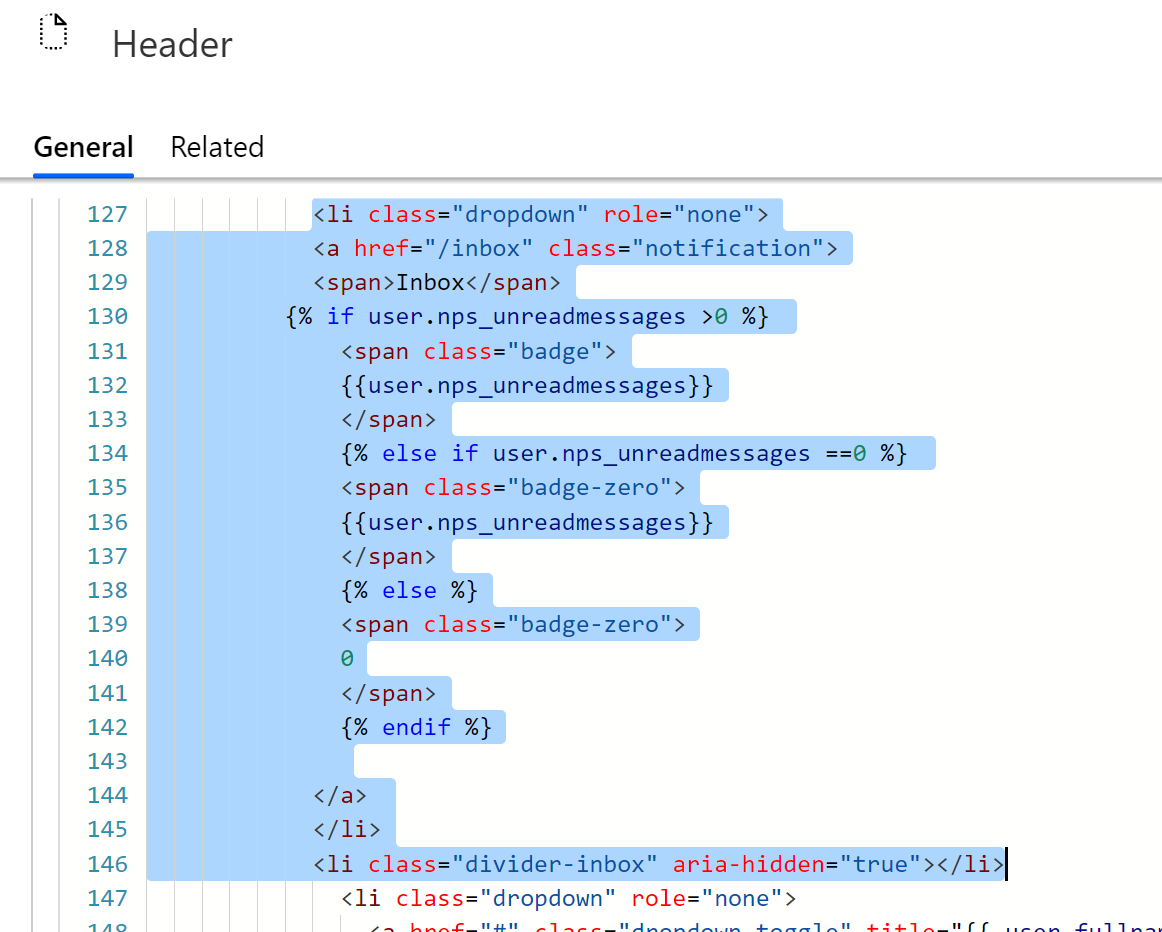
Here is the code used above, you can simply copy it and paste in to your Header web template.
 <li class="dropdown" role="none">
            <a href="/inbox" class="notification">
            <span>Inbox</span>
          {% if user.nps_unreadmessages >0 %}
              <span class="badge">
              {{user.nps_unreadmessages}}
              </span>
              {% else if user.nps_unreadmessages ==0 %}
              <span class="badge-zero">
              {{user.nps_unreadmessages}}
              </span>
              {% else %}
              <span class="badge-zero">
              0
              </span>
              {% endif %}

            </a>
            </li>
            <li class="divider-inbox" aria-hidden="true"></li>
Now we need to add some Entity Permission records to make sure the portal user can actually see the new Portal Message entity we created. You should already have an Entity Permission for the Contact entity with the Scope of Self that is installed with the Portal. If not, you can create one, but check first, no point in having two!
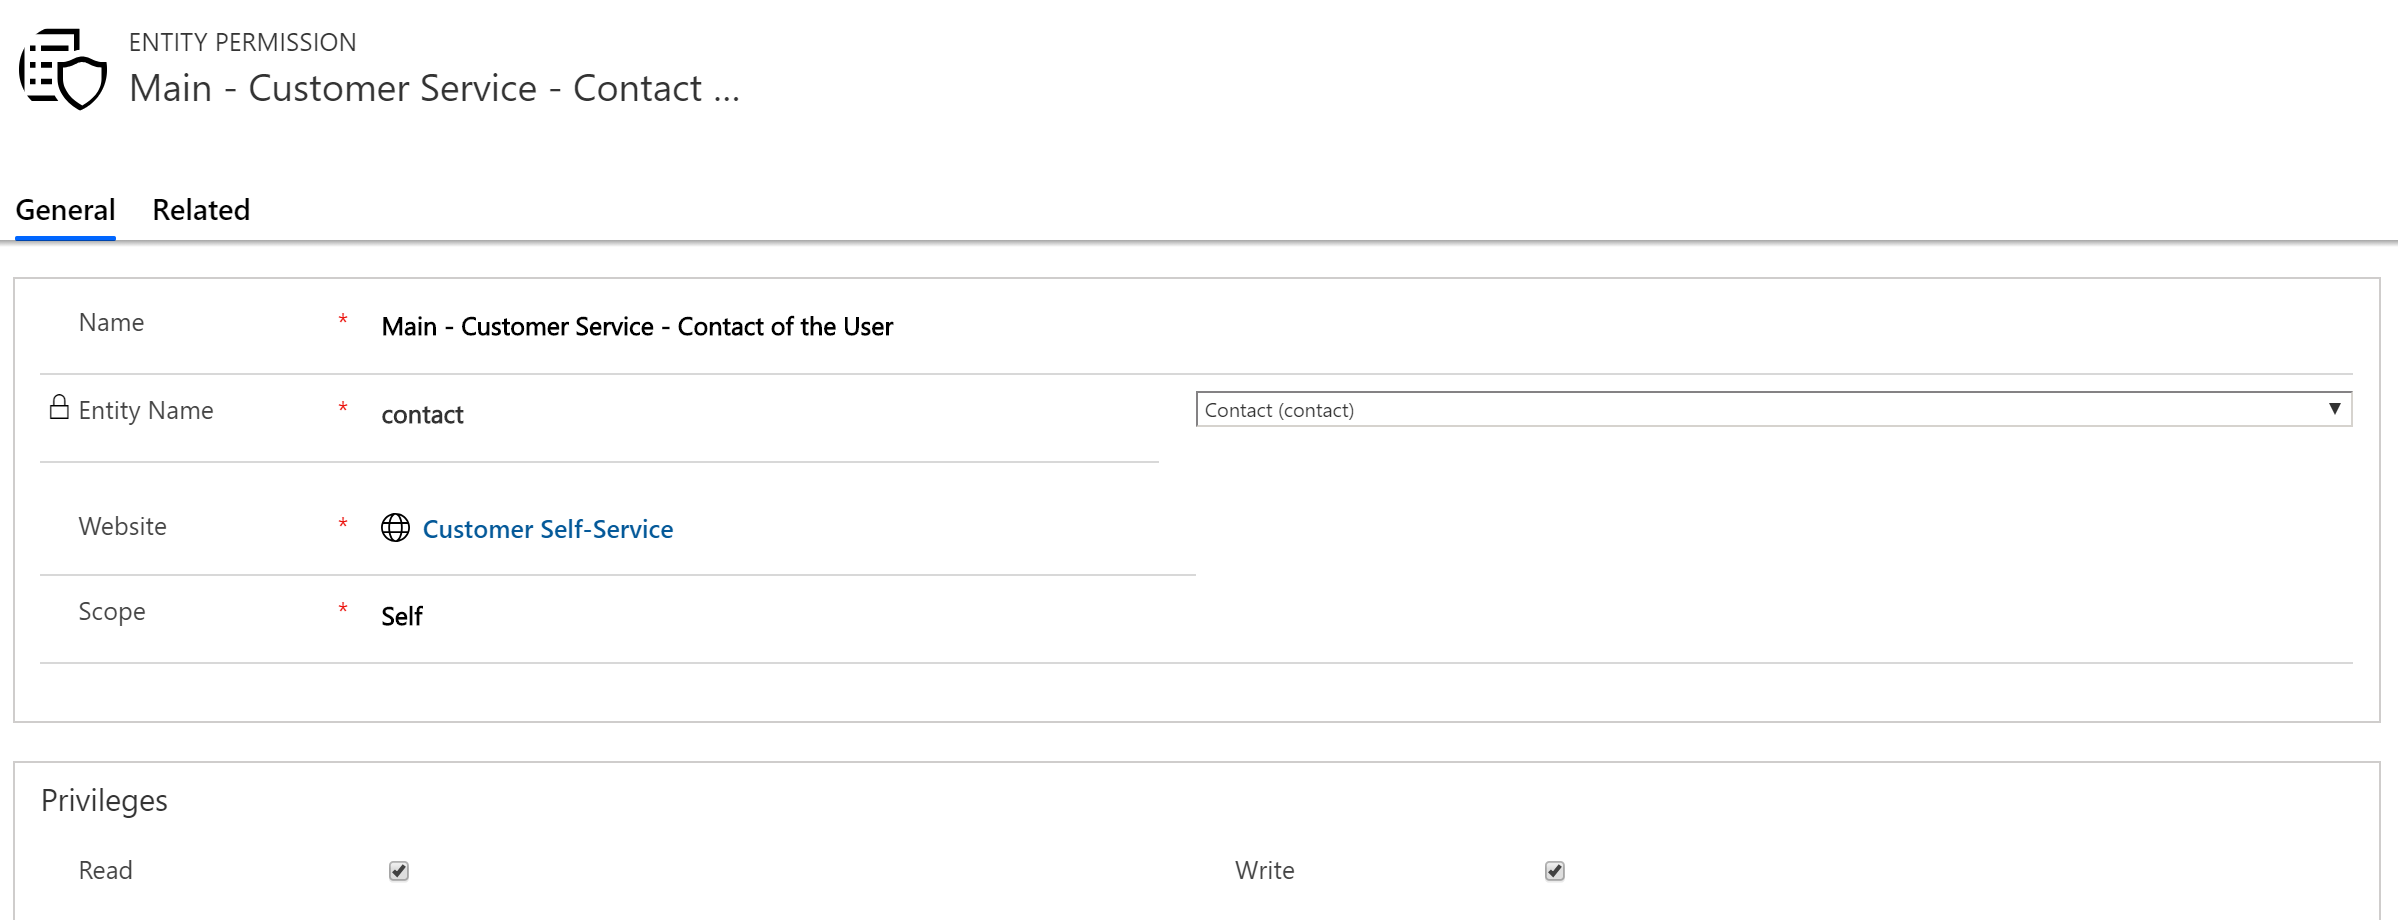
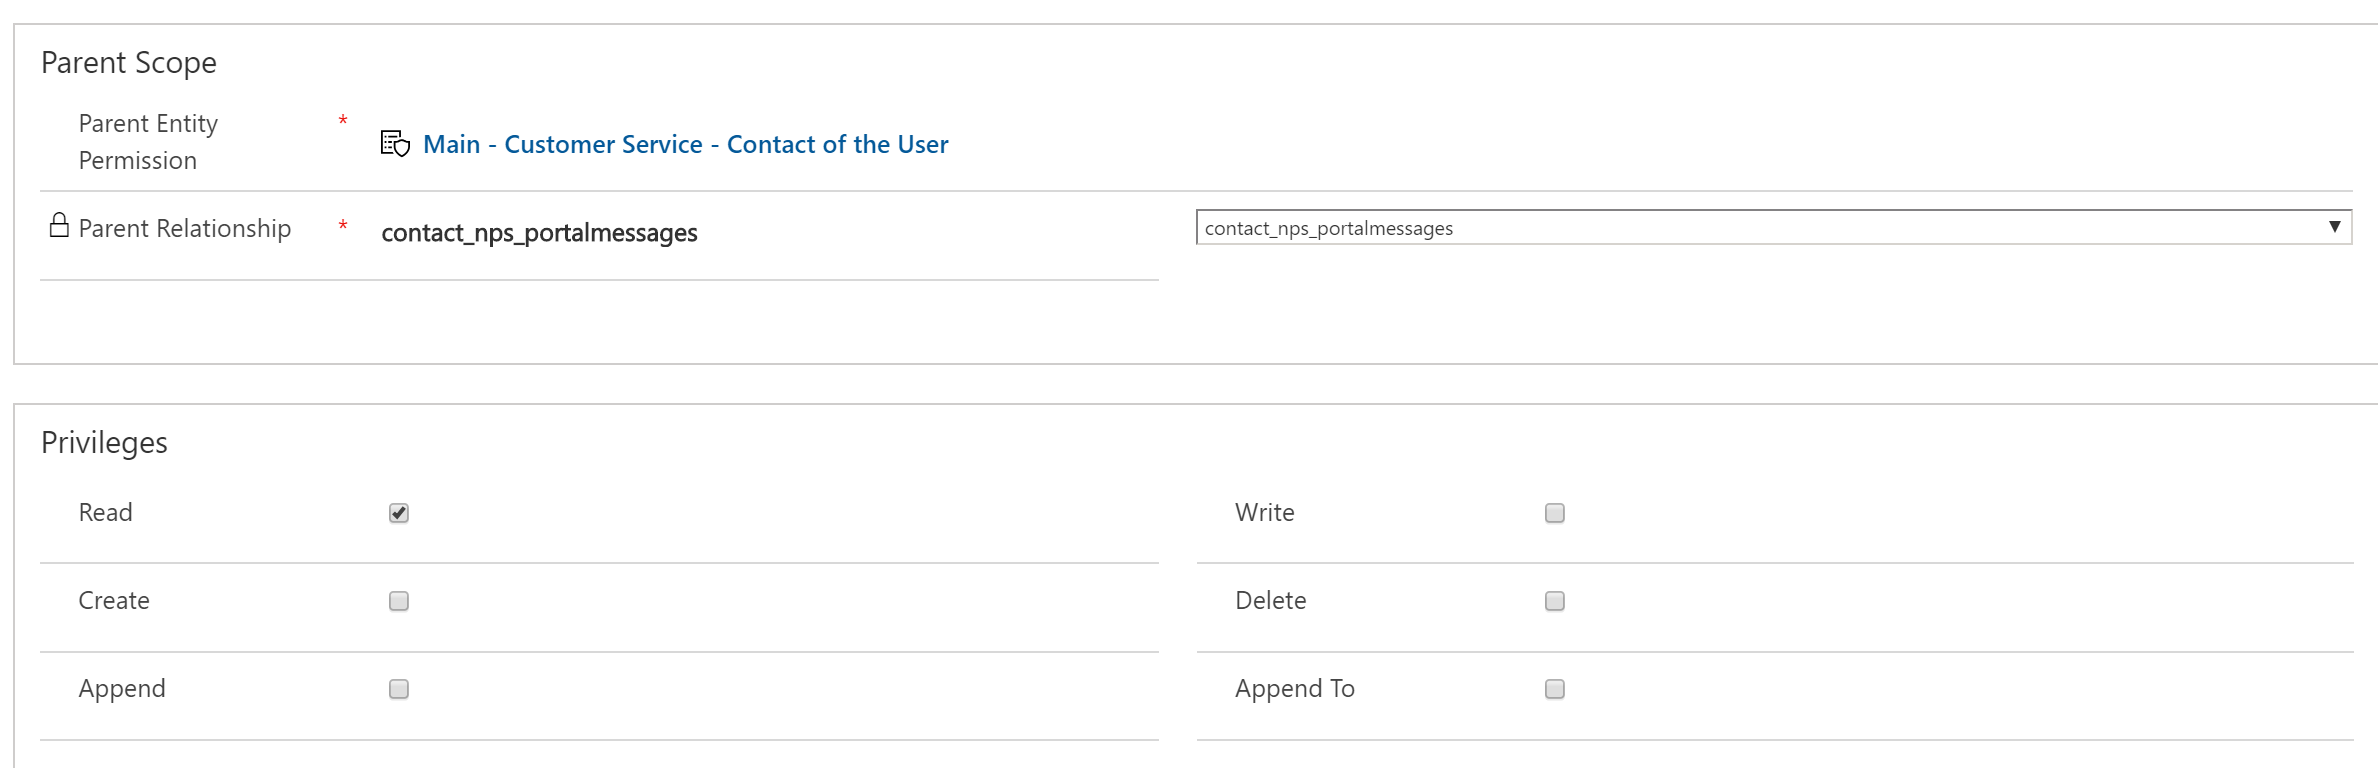
Now create a new Entity Permission record for the Portal Message entity. Set the Scope as Parent.

Set the Parent Entity Permission as the Contact ‘Self’ entity permission and set the Parent Relationship to be the one that shows the Contact and Portal Messages in the name. Set the Privileges to be Read only.
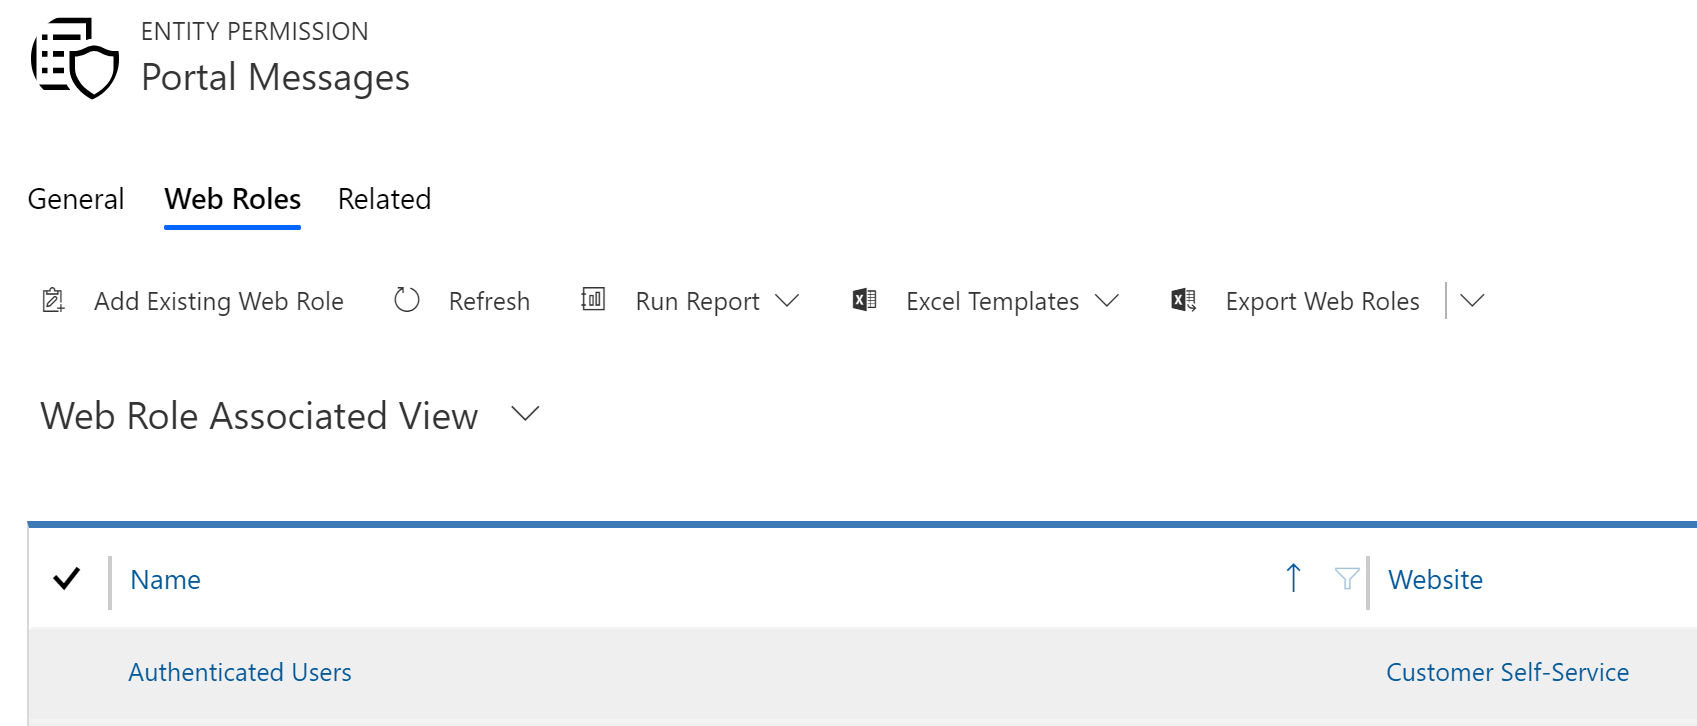
For the Web Roles, make sure you add any you currently use for any Contact that is logged in.
We are going to add to our CSS file now. The following will be used to determine how our Portal Message is displayed in the portal, and add some conditional formatting on the list of messages in the inbox to highlight those that are Unread.
.message-subject {
    display: block;
    width: 100%;
    height: 35px;
    padding-bottom: 15px;
    font-size: 30px;
    line-height: 1.42857;
    color: #555;
    font-weight: bold;
margin-left: 60px;
}
.message-description {
    display: block;
    width: 100%;
    height: 35px;
    padding: 6px 12px;
    font-size: 18px;
    line-height: 1.42857;
    color: #555;
    font-weight: normal;
    margin-left: 60px;
}
.unread-highlight {
color: #94050c;
font-weight: bold;
background-color: #f5dbd9 !important;
}
.unread-highlight a {
    color: #94050c;
    text-decoration: underline;
}
.form-custom-actions {
    margin-bottom: 10px;
    margin-top: -50px;
}
.pull-right {
    float: left !important;
}
Check out the latest post:
Create A Segment For People Searching On Your Website
This is just 1 of 602 articles. You can browse through all of them by going to the main blog page, or navigate through different categories to find more content you are interested in. You can also subscribe and get new blog posts emailed to you directly.
Hi Megan. I hope you are fine. Im trying unsesfully replicate this on my trial, but well so Im still triying.
The question is, Why not using the portal comments ? I dont know if you say something about it on some youtube video.
Portal comment have note too.
The count of the message Inbox is visualy wonderfull. Is not posible make this with the Portal Comments Entity?
There are few places to look for information about the portal and this is one of the best.
Thanks.
Hi Javier, thanks for the lovely comment! Good question. You could certainly use the portal comment as the entity to count and display with the number unread, however, you would need to do quite a lot to the entity to change it with the change to the status etc. Also, the portal comment is used predominately on the case entity in the portal. I wanted a way to keep the messages completely separate from the comments as they go back and forth both ways (from a user to a contact record). It would have been a bit of a challenge to try and find the right query to keep it all apart from one another. Hope that makes sense!
Hi Megan,
This is a superb article but unfortunately, I am able to fully complete this in my environment. What contact field needs to be updated in first workflow and what would be updated value. Your kind response would be appreciated. Thanks
Hi Qasim, just add the step to update the entity, you don’t need to update any specific field.