*** NOTE: ALL INFORMATION IS ACCURATE AT DATE OF PUBLISHING ***
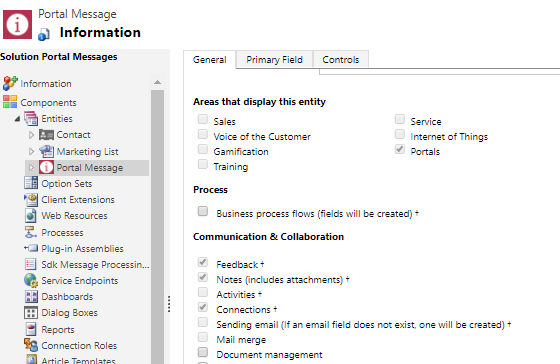
In a previous post, I walked through adding a portal inbox and messaging process. This provides the ability to create messages for portal users to log in and access, along with a nifty unread message indicator like you would find on many social media sites. What if you want to include documents attached to the message? This post will show you exactly how to do that, assuming you followed the initial post on creating the portal message process. First, if you didn’t create your portal message as an activity entity, make sure the Notes field is selected on the entity like you see below. This will allow us to use the Notes section and add documents that way.
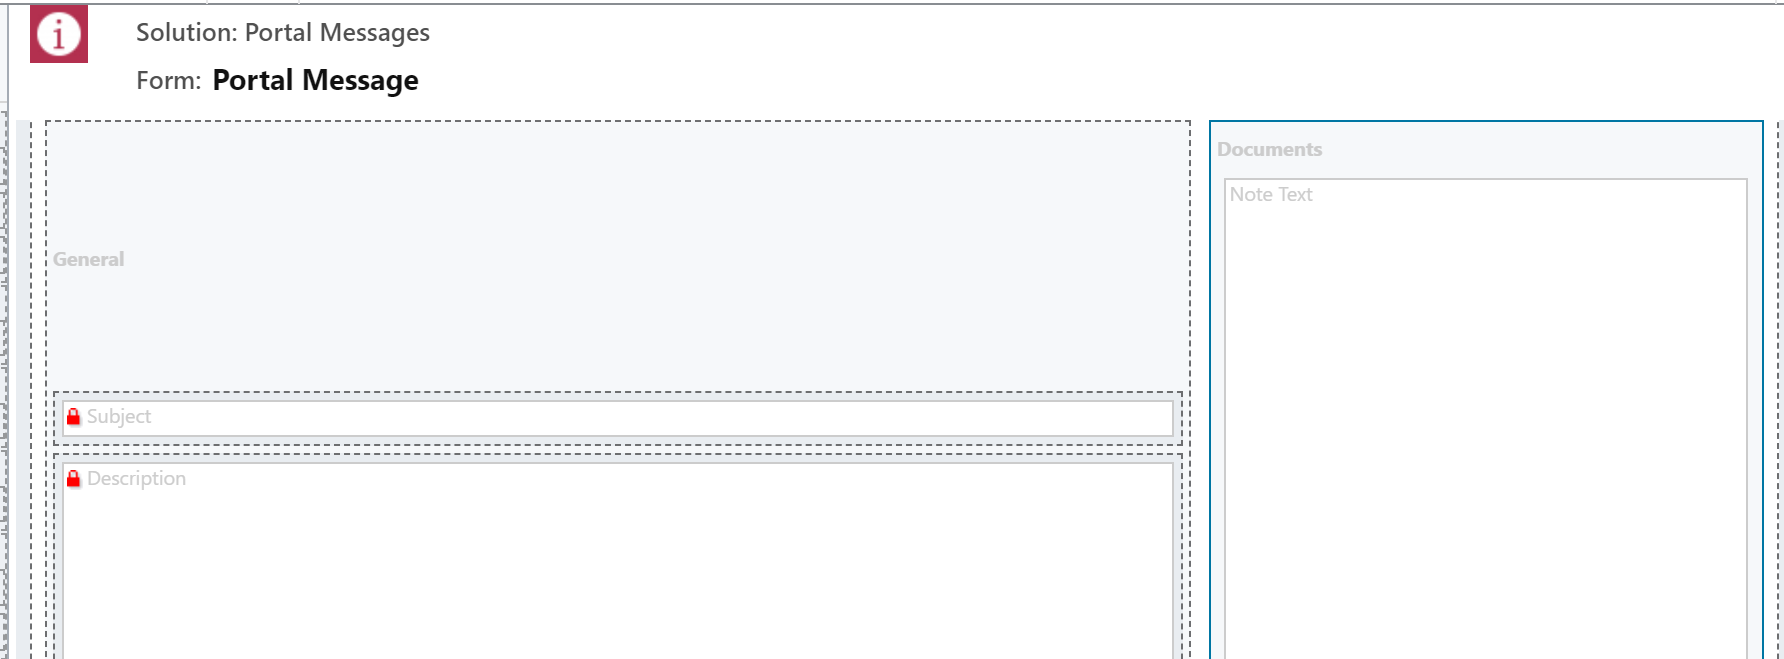
Next, open up your Portal Message form (or do the same on all forms you are using, and add on the timeline control. I’ve added it to the right of the main message area, and set the sizes to 55 % and 45% for each column.
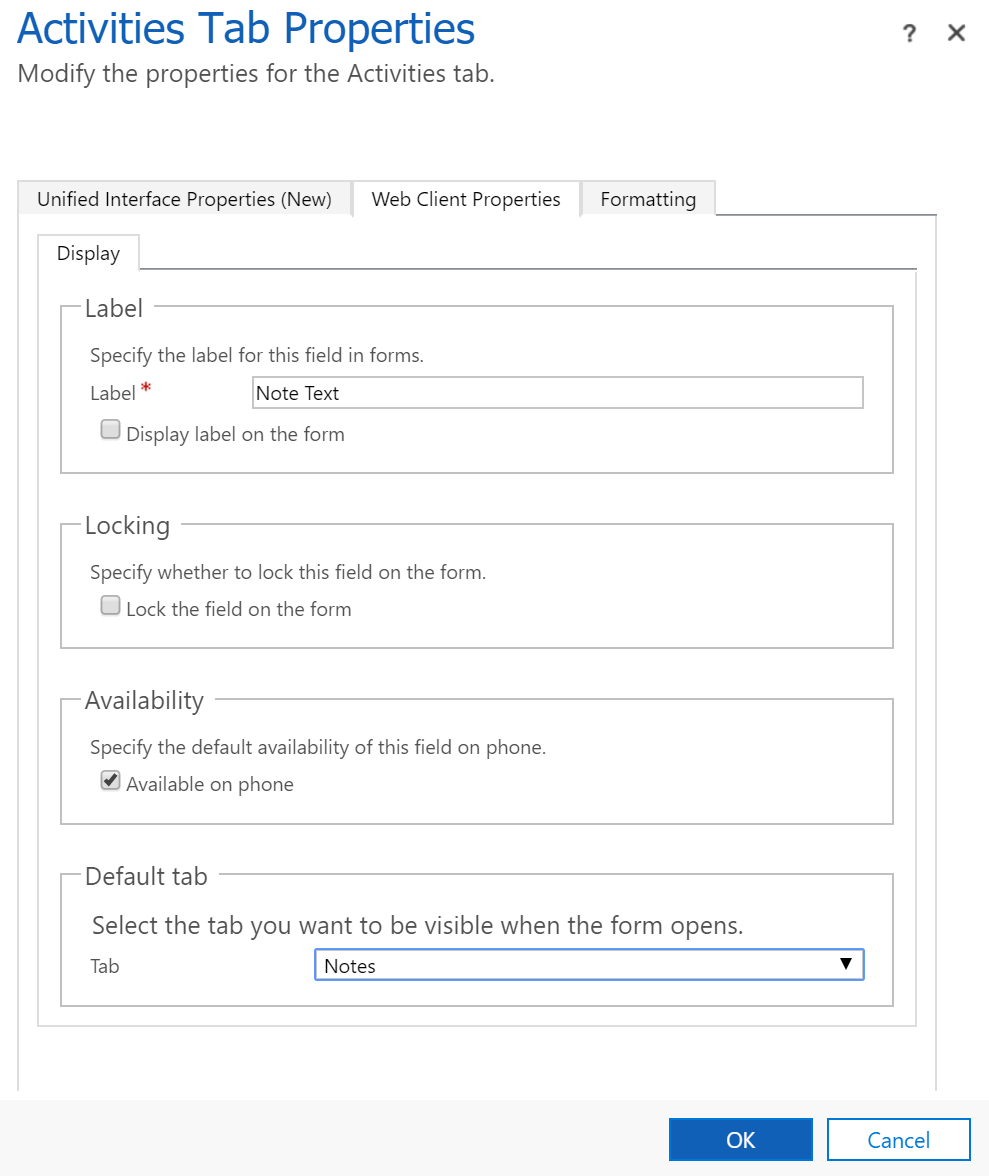
Open up the properties of the timeline and on the Web Client Properties tab, untick the box for the label (so that it won’t show) and set the Default tab as Notes.
To make sure the portal users can access the notes, we need to look at a couple of Entity Permissions. The first one should already exist, and that’s a Global scope record against the Activity (or activitypointer). If not, go ahead and create one, and set to Read on the Privileges.

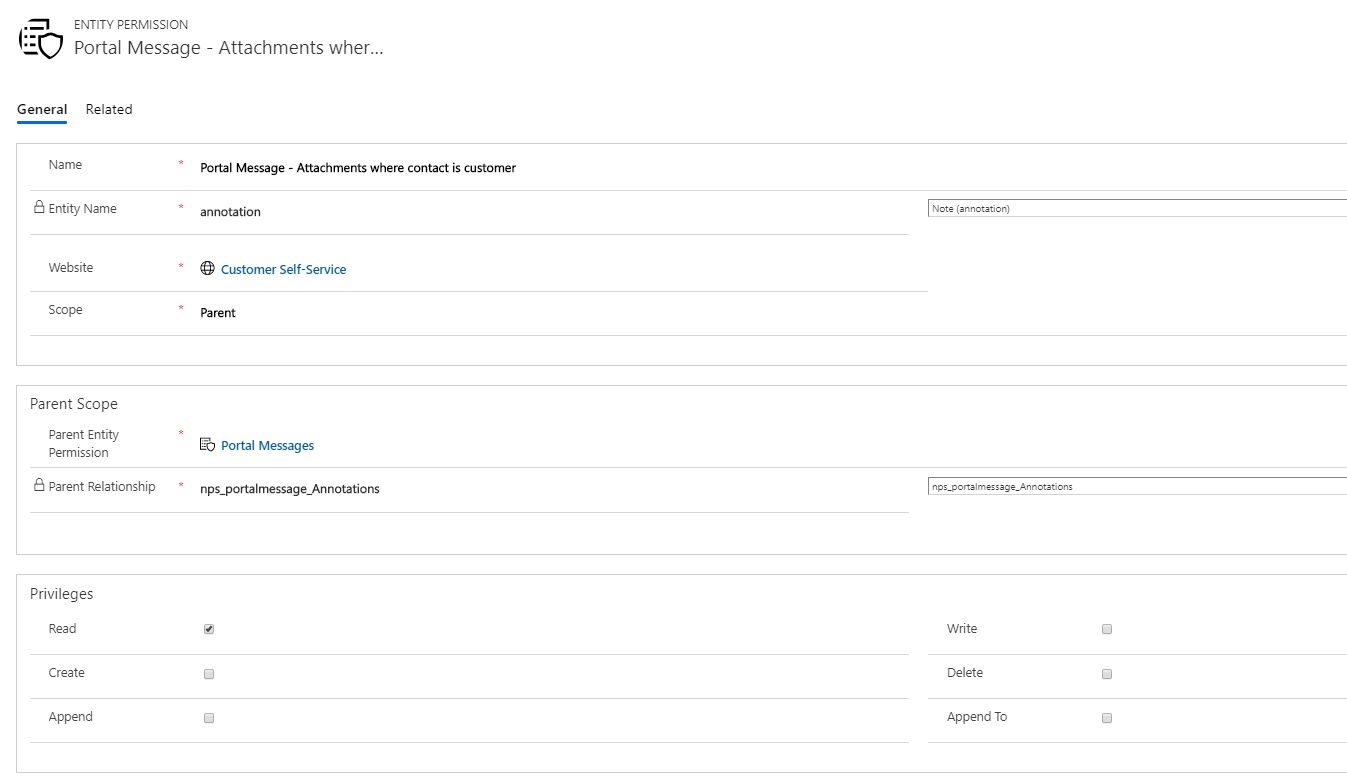
The second one is going to have the Scope of Parent and be linked to the Portal Messages entity permission record you created when you set the inbox and messaging process up. This will link the note entity to the parent relationship of portal message annotations. Again, just make sure the privileges are set to read.
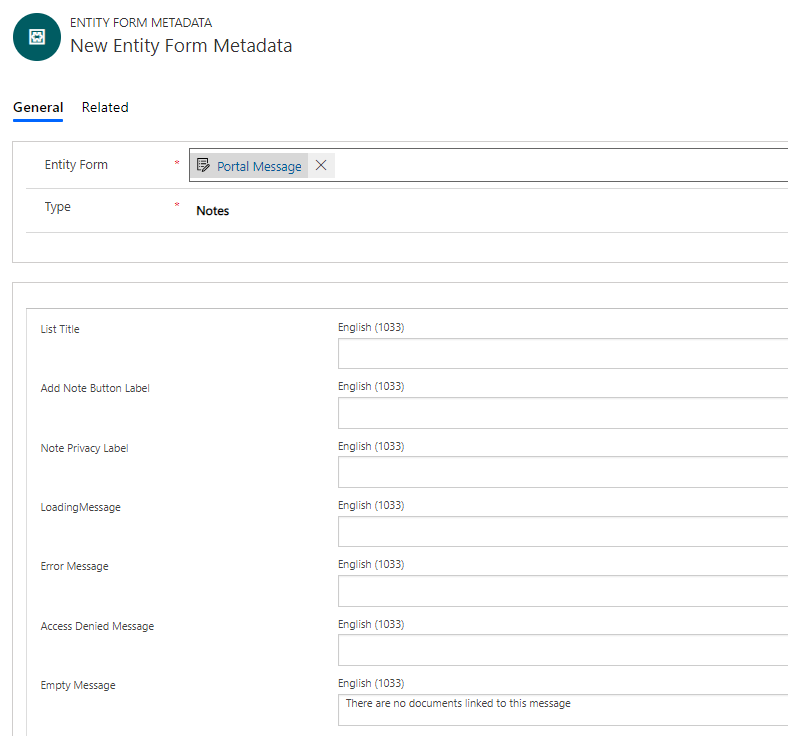
Next, from the Portal Message Entity Form, add a new Entity Form Metadata record. This should have the Type of Notes. The only thing we need to set is something in the Empty Message field, so if you haven’t added a document against the Portal Message, it will let the portal user know there aren’t any to review.
Now we need a workflow to run against a Note when it’s created. The only way notes will display in the portal is if it starts with *WEB*. Otherwise they won’t be shown (or at least I couldn’t find a way to get them to display! -let me know ‘nicely’ in the comments if there is one). What a pain for the internal users if they have to remember to add this to every single note they create right? So we are going to create a real time workflow to take care of this for them.
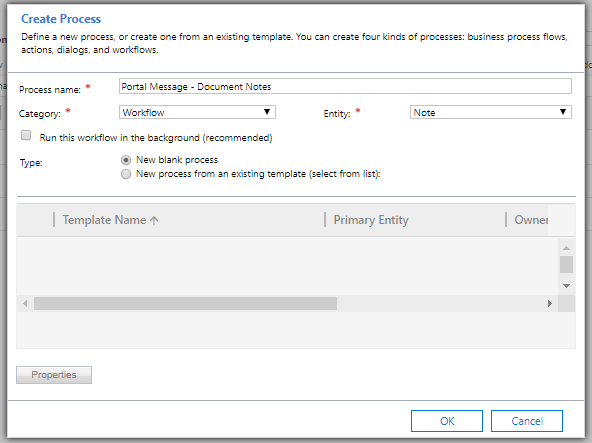
First, we need to check if the Note being created is regarding a Portal Message. If it isn’t we will just end the workflow. If it is we will add the word *WEB* to the text and set a title of ‘Portal Document’ on the note (just to be neat and tidy 🙂 ). There isn’t a way out of the box to run a workflow to adjust a note, but Jason Lattimer comes to the rescue with his CRM Note Workflow Utilities. Add one step for Update Note Text and one step for Update Note Title.
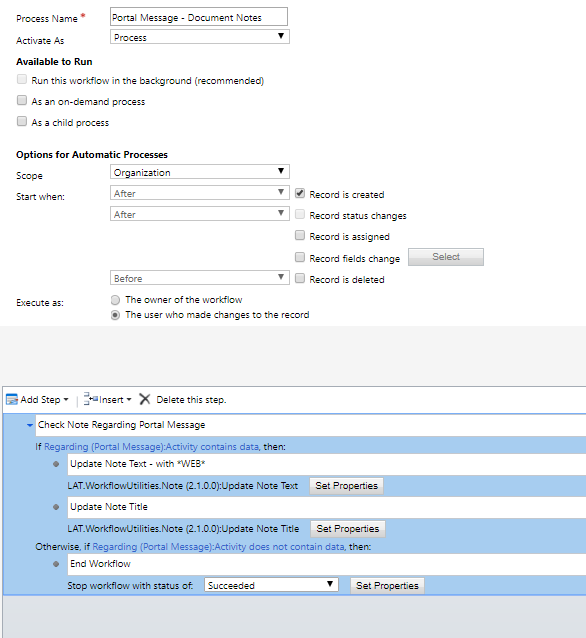
For the text, put the *WEB* prefix first, then use the Description from the Note record. This is what will be displayed in the portal.

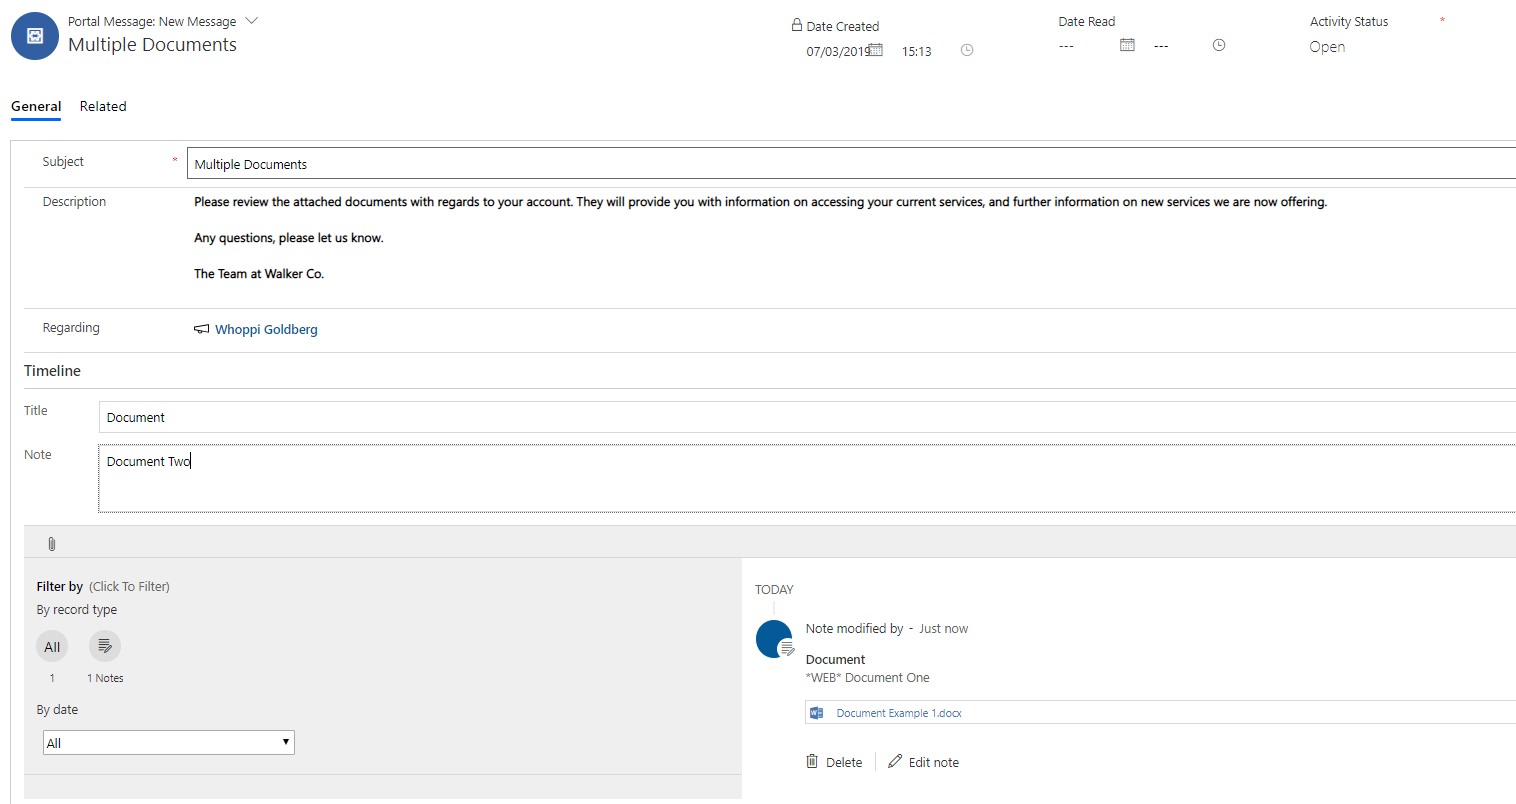
Now we can create a new Portal Message. Save it first, then add a note to the timeline. Browse out for your document and then save it. Immediately you will see that the title is added, and the *WEB* prefix is added.
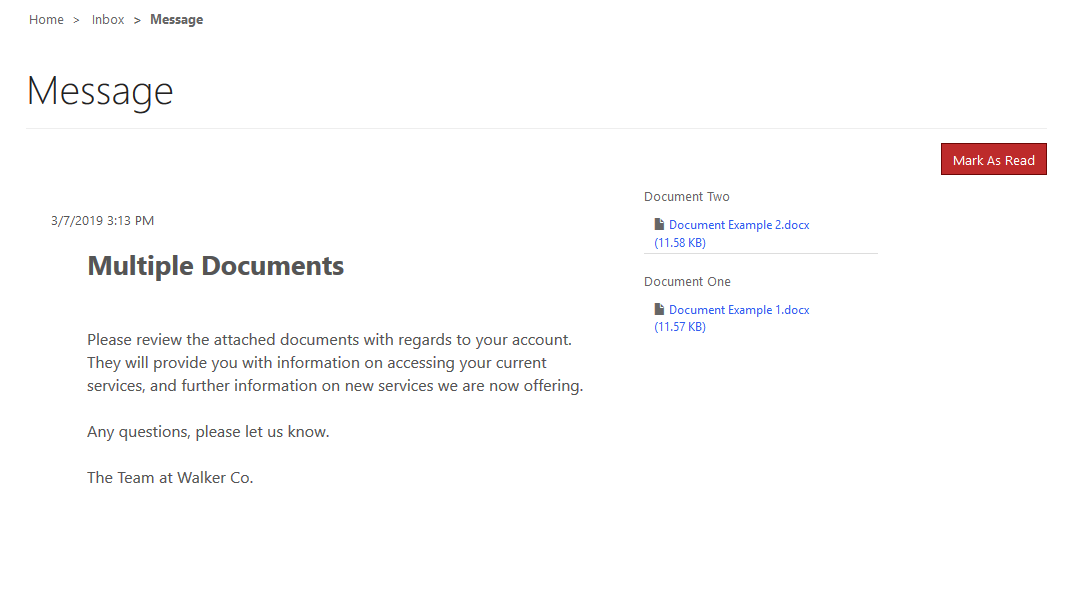
Now when we look in the portal, you can see the documents linked to the Portal Message. One thing you might want to do is change how the timeline is displayed. The only way we can do this is with a little CSS.
The CSS below is what I used to reformat things slightly, but most significantly, hide the date and time, and the user who added the note. These aren’t really relevant on the portal message, so let’s just not display them. Hope this helps!
.entity-notes .attachment {
    margin-bottom: 0;
    font-size: 0.9em;
}
.entity-notes .note .metadata {
    text-align: left;
    display: none;
}
.entity-notes .note {
    margin-bottom: 2px;
    margin-top: 2px;
}
.alert {
    padding: 0px;
    padding-left: 0px;
    margin-bottom: 21px;
    border: 1px solid transparent;
    border-radius: 0;
    padding-left: 10px;
}
If you want to see how to do this, you can just watch the video.
Check out the latest post:
Create A Segment Using Unmapped Fields On Marketing Forms in Customer Insights Journeys
This is just 1 of 601 articles. You can browse through all of them by going to the main blog page, or navigate through different categories to find more content you are interested in. You can also subscribe and get new blog posts emailed to you directly.
Brilliant! Worked perfect. Thanks a million.