*** NOTE: ALL INFORMATION IS ACCURATE AT DATE OF PUBLISHING ***
Often on web forms you will have the email address field, then another one to ask the submitter to confirm their email again. The two fields will be used to validate and make sure they are the same. I was asked if it could be done with a marketing form in D365 Marketing/Customer Insights and the answer is yes, with just a little bit of JavaScript! You will need to have an additional field to use to compare the two values then you are on your way. Let’s take a look to see how it can be achieved.
First, add the main email address field to your form. Most organisations use the emailaddress1 field but add what makes sense for your requirements. Make it required.
Then add in your second email address field that will be used for validation against the first one. In this case I am using emailaddress2 but you might want to add in a new field specifically for this purpose. Make this field required too.
Now we have our form looking pretty. We just need to edit the HTML to add in a script.
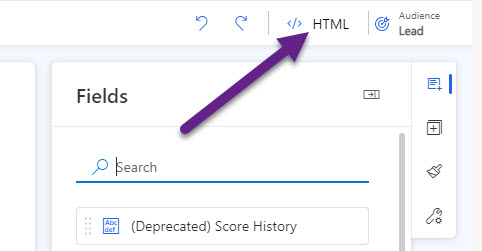
From the top right of the form, click on the HTML link.
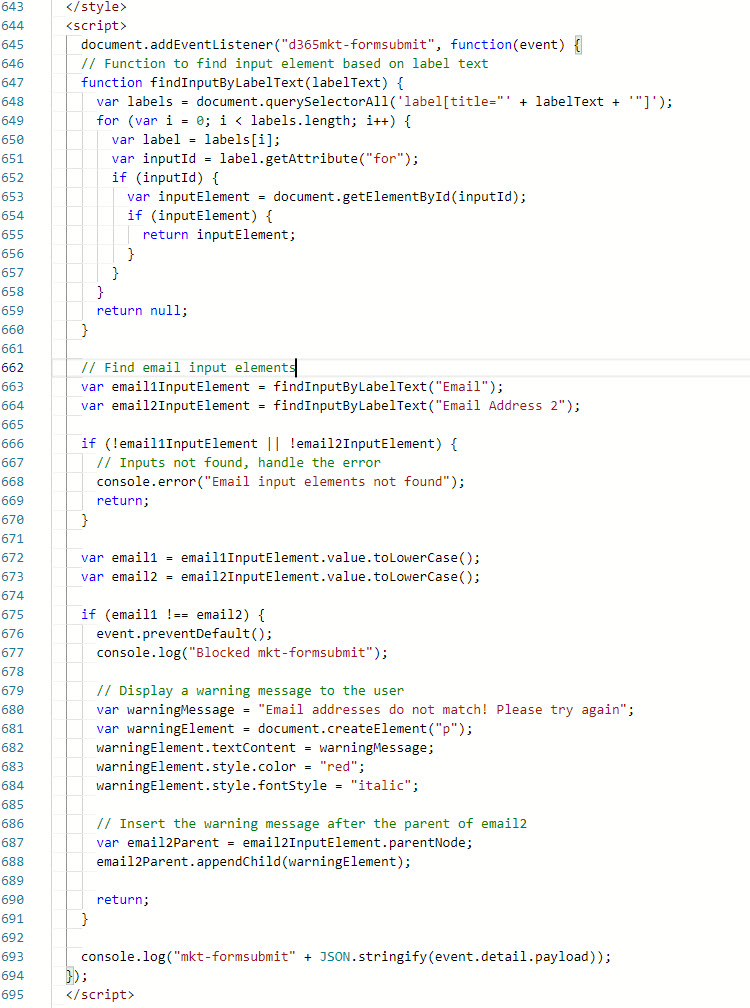
Once in the HTML, find the end of the style section which ends with </style>. We are going to add in a script that is doing the following things. Rather than having to use an id to find the fields each time (which ends up being different for each form), we are going to get all of the fields and then look for the Email and Email 2 fields using the label of the field. Most people don’t rename these, but just in case, if you have renamed the actual fields, be sure to use the correct field name instead of Email and Email Address 2. We are then doing a check to say if email1 and email2 are not equal, prevent the form from being submitted and display a message to the person trying to submit the form, and place the warning message under the email2 field.
You should be able to just copy this script and add it in to your form!
  <script>
    document.addEventListener("d365mkt-formsubmit", function(event) {
    // Function to find input element based on label text
    function findInputByLabelText(labelText) {
      var labels = document.querySelectorAll('label[title="' + labelText + '"]');
      for (var i = 0; i < labels.length; i++) {
        var label = labels[i];
        var inputId = label.getAttribute("for");
        if (inputId) {
          var inputElement = document.getElementById(inputId);
          if (inputElement) {
            return inputElement;
          }
        }
      }
      return null;
    }

    // Find email input elements
    var email1InputElement = findInputByLabelText("Email");
    var email2InputElement = findInputByLabelText("Email Address 2");

    if (!email1InputElement || !email2InputElement) {
      // Inputs not found, handle the error
      console.error("Email input elements not found");
      return;
    }

    var email1 = email1InputElement.value.toLowerCase();
    var email2 = email2InputElement.value.toLowerCase();

    if (email1 !== email2) {
      event.preventDefault();
      console.log("Blocked mkt-formsubmit");

      // Display a warning message to the user
      var warningMessage = "Email addresses do not match! Please try again";
      var warningElement = document.createElement("p");
      warningElement.textContent = warningMessage;
      warningElement.style.color = "red";
      warningElement.style.fontStyle = "italic";

      // Insert the warning message after the parent of email2
      var email2Parent = email2InputElement.parentNode;
      email2Parent.appendChild(warningElement);

      return;
    }

    console.log("mkt-formsubmit" + JSON.stringify(event.detail.payload));
  });
  </script>
Now when we fill out the email address fields and they are different, the message displays and the form cannot be submitted. Excellent!
If you have previously added a script to check for generic domains added in your email field (gmail, yahoo, hotmail etc.) then you can use this combined script which will check both things for you!
<script>
    document.addEventListener("d365mkt-formsubmit", function(event) {
    // Function to find input element based on label text
    function findInputByLabelText(labelText) {
      var labels = document.querySelectorAll('label[title="' + labelText + '"]');
      for (var i = 0; i < labels.length; i++) {
        var label = labels[i];
        var inputId = label.getAttribute("for");
        if (inputId) {
          var inputElement = document.getElementById(inputId);
          if (inputElement) {
            return inputElement;
          }
        }
      }
      return null;
    }

    // Find email input elements
    var email1InputElement = findInputByLabelText("Email");
    var email2InputElement = findInputByLabelText("Email Address 2");

    if (!email1InputElement || !email2InputElement) {
      // Inputs not found, handle the error
      console.error("Email input elements not found");
      return;
    }

    var email1 = email1InputElement.value.toLowerCase();
    var email2 = email2InputElement.value.toLowerCase();

    // Check if email1 and email2 match
    if (email1 !== email2) {
      event.preventDefault();
      console.log("Blocked mkt-formsubmit (Emails do not match)");

      // Display a warning message to the user
      var warningMessage = "Email addresses do not match! Please try again";
      var warningElement = document.createElement("p");
      warningElement.textContent = warningMessage;
      warningElement.style.color = "red";
      warningElement.style.fontStyle = "italic";

      // Insert the warning message after the parent of email2
      var email2Parent = email2InputElement.parentNode;
      email2Parent.appendChild(warningElement);

      return;
    }

    // Check against blocked domains
    var blockedDomains = ["gmail", "yahoo", "google", "hotmail", "btinternet", "live.com", "outlook.com"];
    var isBlocked = blockedDomains.some(function(domain) {
      return email1.includes(domain);
    });

    if (isBlocked) {
      event.preventDefault();
      console.log("Blocked mkt-formsubmit (Blocked domain)");

      // Display a warning message to the user
      var warningMessage = "Please provide a valid business email address to submit the form.";
      var warningElement = document.createElement("p");
      warningElement.textContent = warningMessage;
      warningElement.style.color = "red";
      warningElement.style.fontStyle = "italic";

      email1InputElement.insertAdjacentElement("afterend", warningElement);

      return;
    }

    console.log("mkt-formsubmit" + JSON.stringify(event.detail.payload));
  });
  </script>
Check out the latest post:
Assign Records To A User Or A Team From Your Custom Page
This is just 1 of 571 articles. You can browse through all of them by going to the main blog page, or navigate through different categories to find more content you are interested in. You can also subscribe and get new blog posts emailed to you directly.


Hi Megan,
this is exactly what I needed, thank you so much for this, absolute legend!!
Hi Sean, you are very welcome! When I saw your question I knew it was a great idea for a blog 🙂
Thanks again Megan,
One more puzzle for you, when submitting a Real-time form, an existing contact can update a lot of their details (depending on the form matching strategy). Is there any out-of-the-box way to lock down certain fields so they can’t be updated (for an existing contact) from a Real-time form?
And any idea if a custom image can be added on the ‘Thank You notification’ on Real-time forms?
Thanks,
Seán
Hi Sean,
Unfortunately there is not a way currently to prevent a form submission from a RTM form from updating data on an existing Contact or Lead record. Hopefully that option will be added in the future!
You can add a custom image on the thank you notification, yes! You would need to do this using custom CSS that you can add in to the HTML of the form. I have a blog post coming up in a few weeks that will show how to do this.
Thanks again for your help Megan,
I look forward to your blog on custom CSS in RTM forms.
Seán
Hi Sean, I’ve moved some scheduled posts around, and this one will be out tomorrow to show how to change the default image that shows after form submissions. Hope it helps!
Brilliant Megan,
I really look forward to seeing that post.
Thanks,
Seán
Hi Megan,
If the form is embedded as part of a website, will the email verification JavaScript still get triggered? I find that the JavaScript doesn’t work if I test in the browser with the digitalassets/forms/ url rather than the digitalassets/standaloneforms/ url. Maybe it needs to get embedded in a web page to work.
Thanks,
Sean
Hi Sean, I don’t think I am following your question…. can you expand or email me? This should work on Realtime Marketing Forms and the script should be added to the HTML of the form.
Hi Megan,
apologies for the confusion. My question was, will the JavaScript get triggered the same way for an embedded form and a standalone form?
thanks,
Seán
The JS is being added to the HTML of the form itself. So it shouldn’t matter if the form is standalone or embedded in to a web page. The check of the emails is done from code within the form itself if that makes sense.