*** NOTE: ALL INFORMATION IS ACCURATE AT DATE OF PUBLISHING ***
Forms Pro Survey records display some basic information about the survey you have created. You can navigate to the related records but have to do this in several steps to see all of the questions, the responses and the invites. A very quick and easy way to see all of this in one place is to use an old favourite in terms of D365 Customer Engagement (CRM) functionality, and that’s our friend the Word Document Template. This can also be used in a Model Driven App using CDS data only.
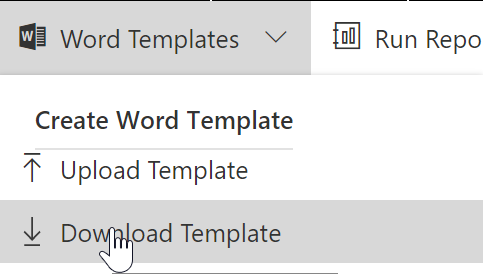
To get started, navigate to a Forms Pro Survey entity list, and click on a link for one of your surveys. From the top ribbon, click on Word Templates and then the Download Template option.
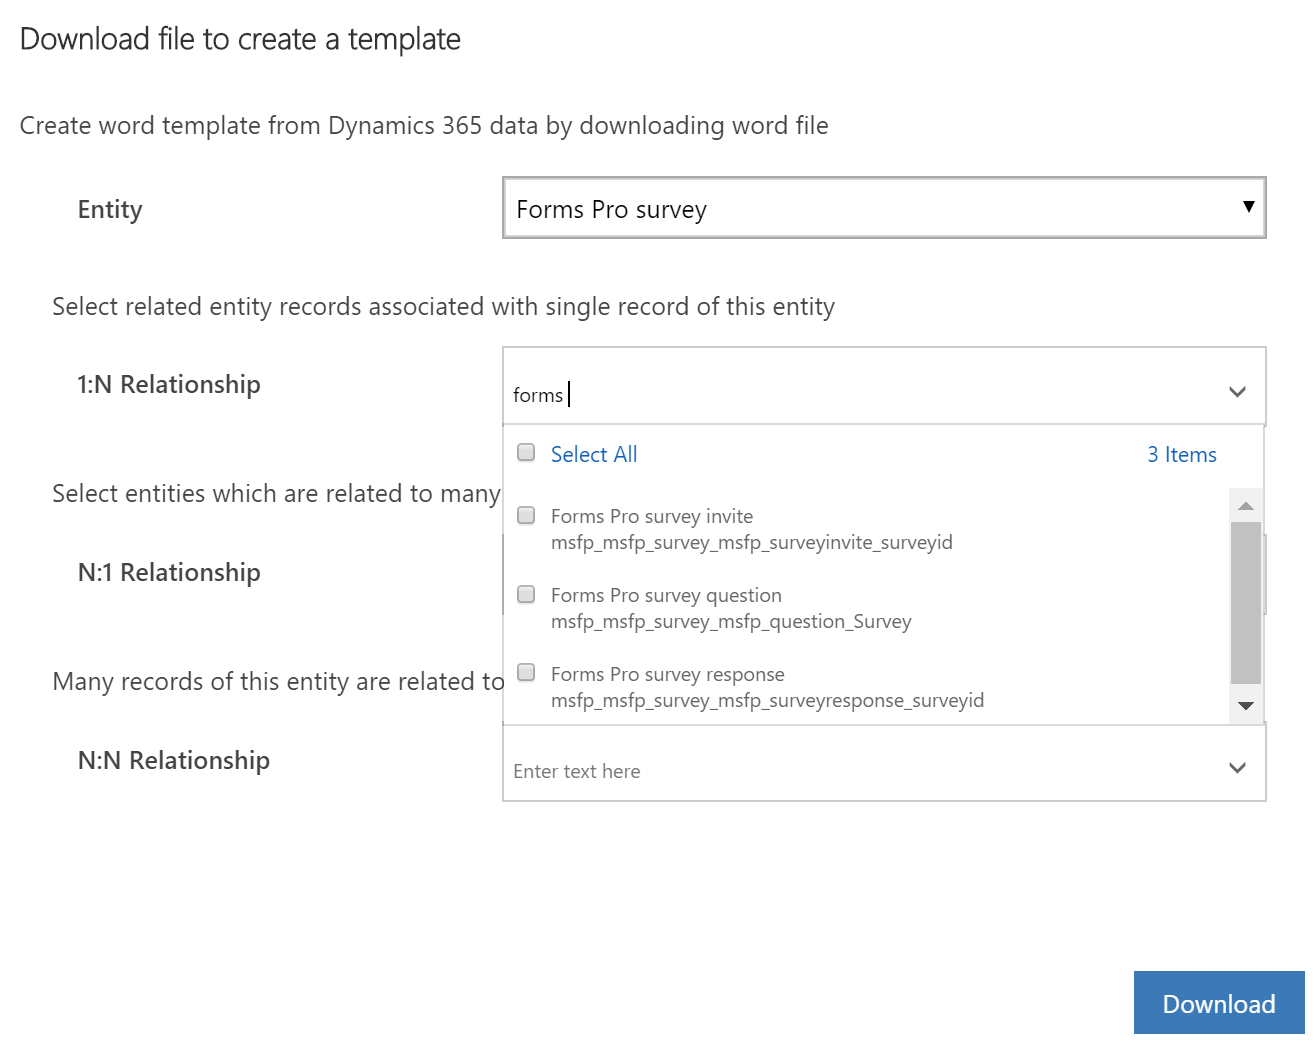
Now we will pick the entities to add to the template. In the 1:N Relationship section type the word Forms to filter and show the three related Forms Pro entities. You will want to add the Survey Invite, Survey Question and Survey Response entities. Once you have added them, click the Download button.
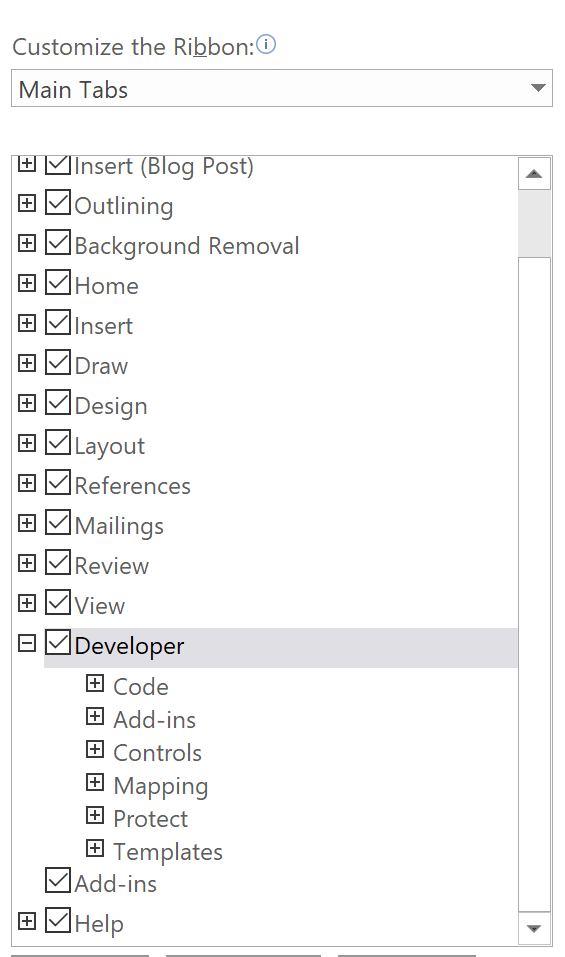
Now that you have the Word Template open, click on the Developer tab, and then on the XML Mapping Pane.

If you don’t see the Developer tab, right click on the top menu and then select Customize the Ribbon. From there, tick the box for Developer to make that option show up.
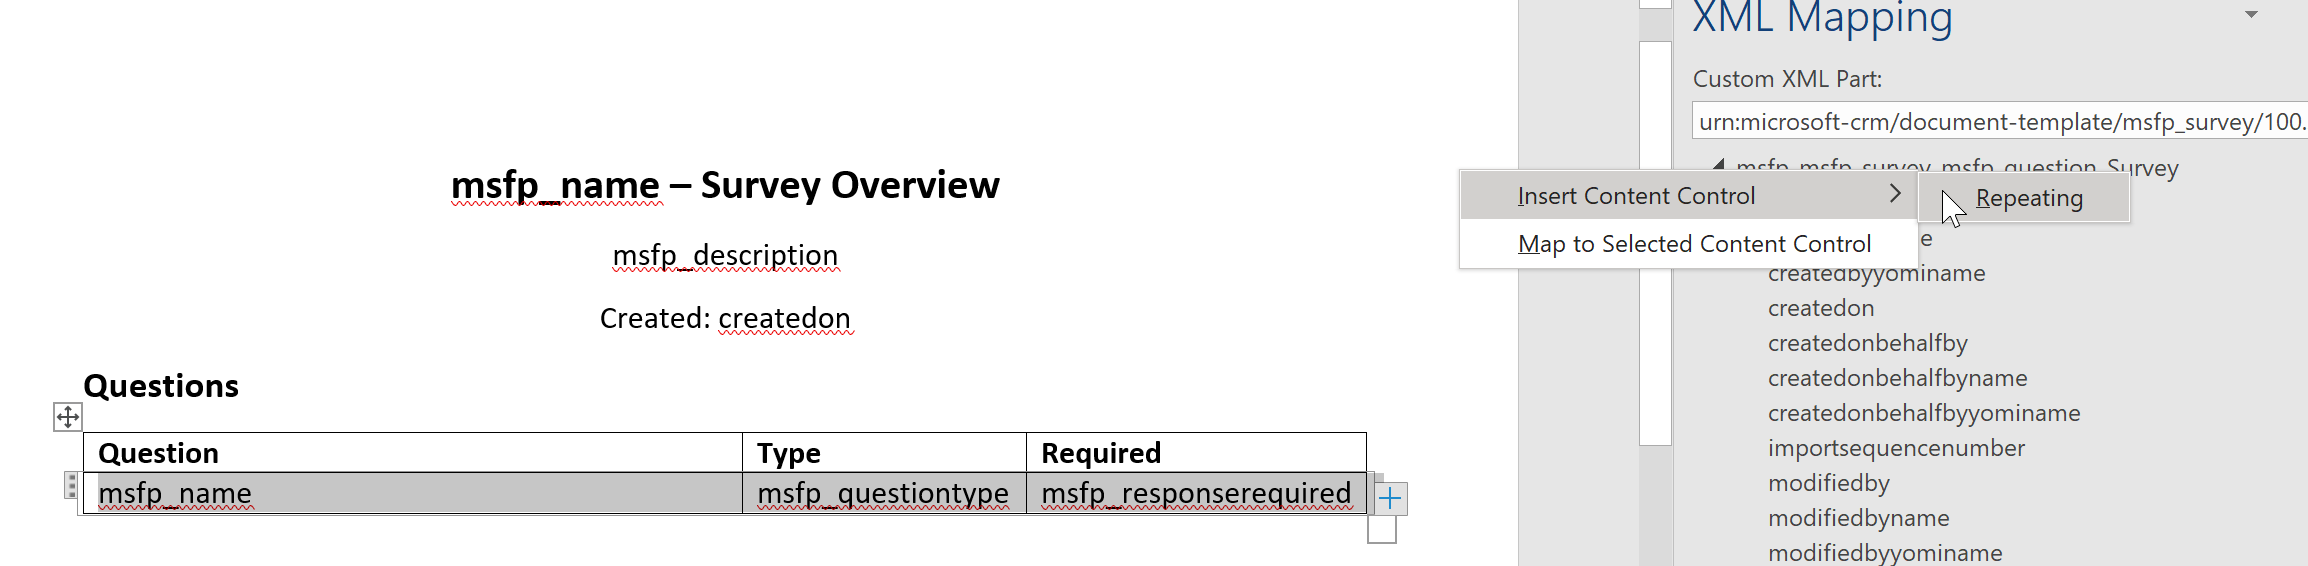
OK, so now you have the XML Mapping Pane option, click on the drop down list and look for the one that shows msfp_survey in the name (it should be the one at the bottom of the list).

From here you can open up the survey entity and see all of the fields that exist on the entity.

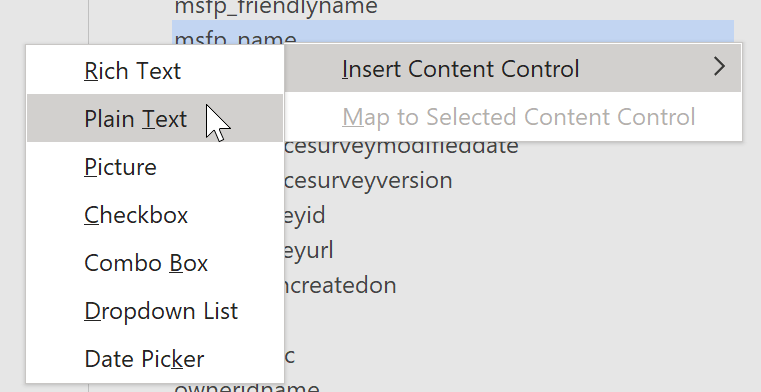
To add a field to the template simply right click on the field name and then select Plain Text. This will add the schema name of the field to the document. Keep adding the fields in a format you want. Think about how you would typically create a word document such as changing the font format (bold, italic, underlined) and the size and alignment.
Once you have added all of the Survey related fields, we will add in the related records for Questions, Responses and Invites. We start with the Questions and add a table with three columns and two rows. Add headings to the first row and the field values to the second row. Next, select the entire second row (do not select the first row). The navigate to the top level for the survey question entity then right click on it. From the Insert Content Control menu, select Repeating. This will make the row repeat one time for each question linked to the survey. You should see a plus sign added to the end of that row.
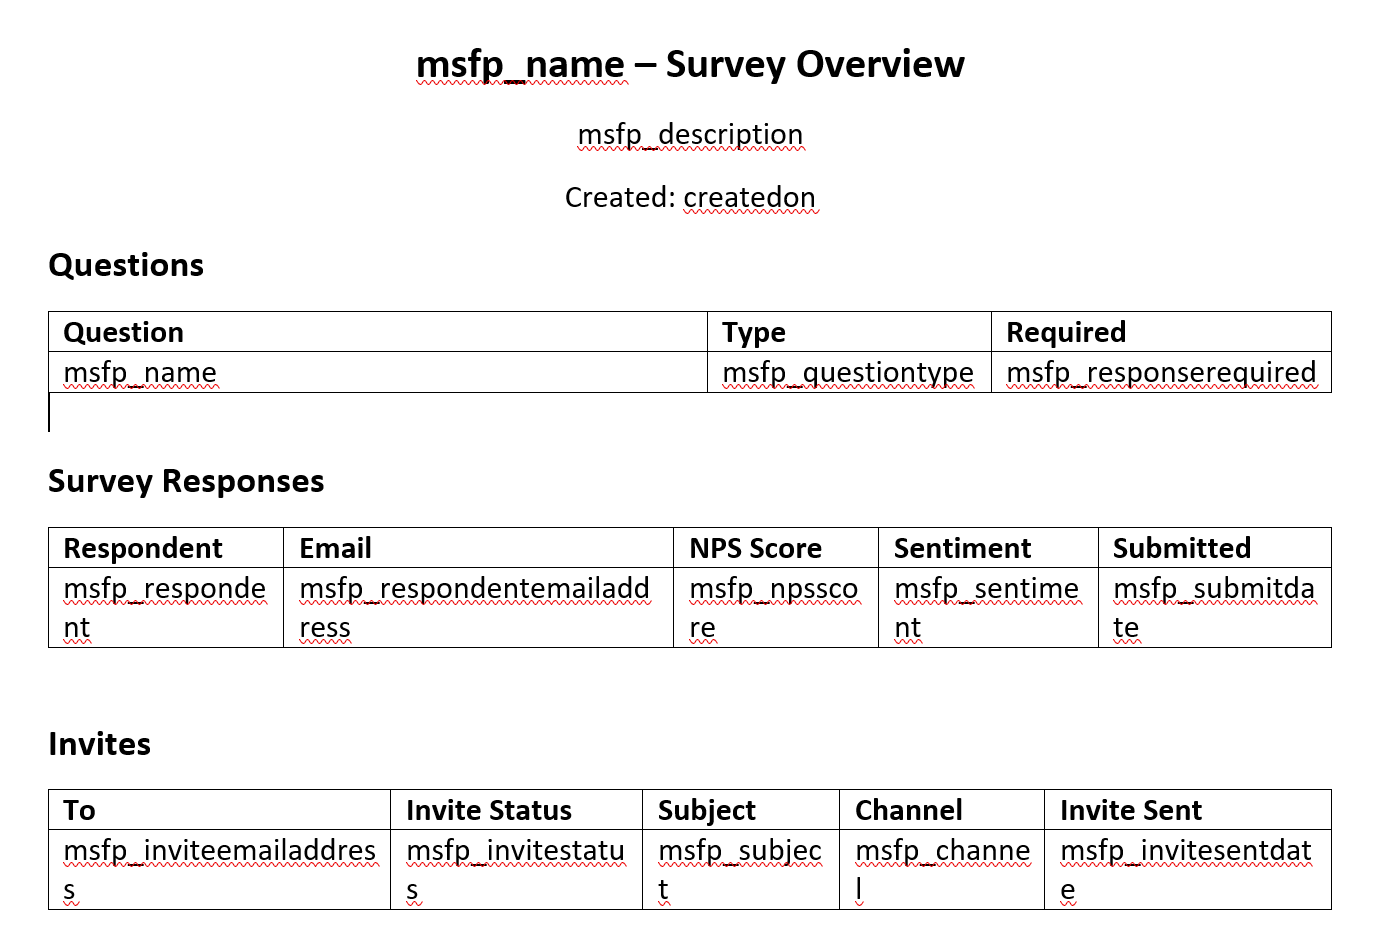
Here is an example for a finished template. We can see the three sections to show each of the related records linked to the survey. Of course you might be interested in different fields and a different layout, so create what is right for your own requirements.
Now we need to upload the template. You can navigate back to where you downloaded it from if you wish and use the Upload option to test things out a few times before you are happy. This makes it your own personal template though. To make it a global template for all users to access, navigate to the Settings area, then Templates, then Document Templates. Click on Upload Template and browse out for the document. Make sure you have closed the word document first before you try and upload or it won’t work.

Now you can go back to one of your Survey records, click on Word Templates and you will see your new document template available.
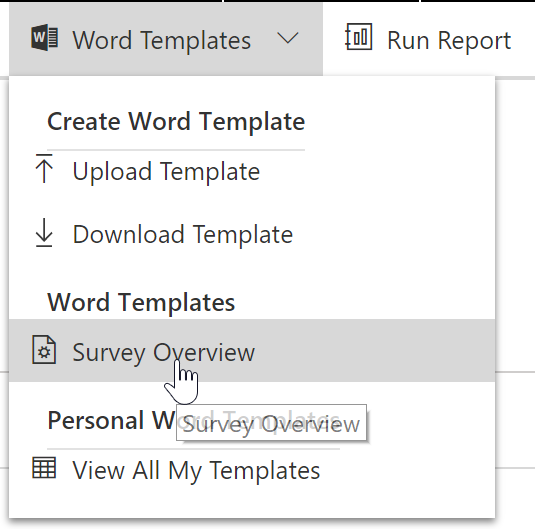
Here is an example of the finished template. This is a quick and easy solution for getting an overview of all of a surveys questions, responses and invites rather than needing to navigate back and forth between all of the related entities.

Want to just watch how to do this? Check out the video below:
Check out the latest post:
Use Custom Event Registration Questions To Branch Your Journeys In Customer Insights
This is just 1 of 603 articles. You can browse through all of them by going to the main blog page, or navigate through different categories to find more content you are interested in. You can also subscribe and get new blog posts emailed to you directly.
Excellent post, Megan. I currently have a client who will benefit significantly from this. Thanks again!!!
Thanks so much Paddy! Glad it’s helped ????