*** NOTE: ALL INFORMATION IS ACCURATE AT DATE OF PUBLISHING ***
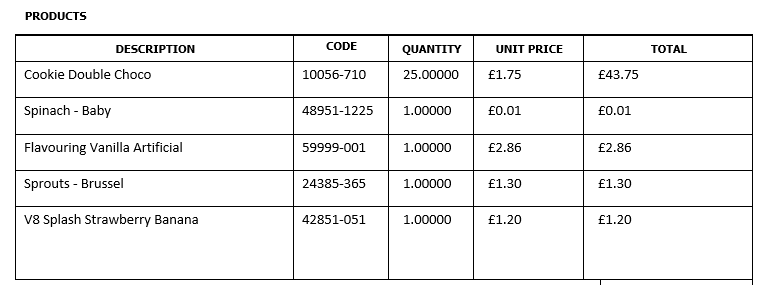
If anyone has ever used Word Document Templates in D365 you will know that they are really useful in many circumstances. You don’t need to be a developer or someone who knows SSRS to create them, and your end users can get really helpful documents out of the system when needed. Sending out Quotes is a pretty typical process for most businesses. If you are selling goods, most likely each item has a code/SKU or product id of some kind. This can be added to the actual Product record as you can see below.

However, when you create an Opportunity, Quote or Order (we will use Quote for the example moving forward) and add a new line item, the Product is used but a new record is created which contains the pricing and other information for that specific product for that specific Quote. The thing that it doesn’t bring over is the Product ID! So if you have ever tried to create a document template you will no doubt have had that bang head on desk moment where you realise the product id just isn’t accessible (even though it looks like it is by misleading field names). You can’t go back another level through the record relationships, which means that as the Quote is only connected to the Product record via the Quote Product record, it’s just not possible for you to add to your document template. Or is it…?

After MANY Google searches, a colleague finally stumbled across a comment buried deep on a thread in the Community forums. It was a comment by a guy named Chris Mahanes. He’s on Twitter as @CRMPortalDude and you can find him here on LinkedIn. After trying out his solution I contacted him to make sure he was OK with me detailing the steps on my blog, and he was more than happy for me to do so. So, thanks again Chris, you were a life saver! Here is his solution.
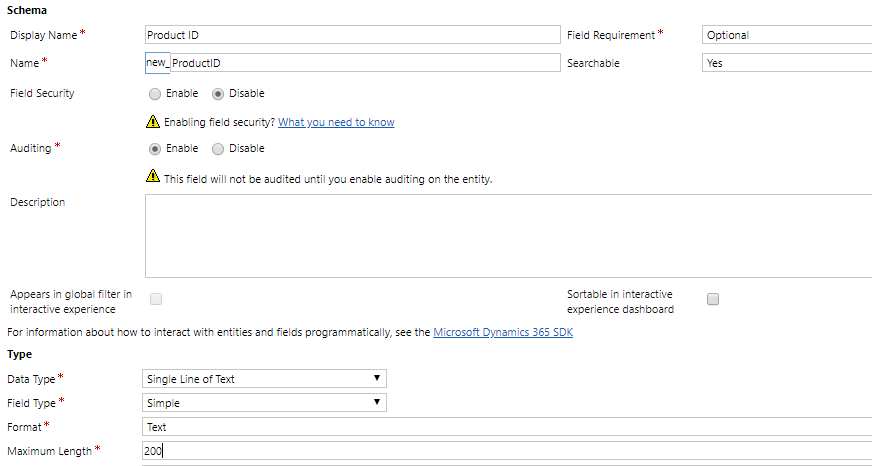
First, you will need to add a new single line of text field on the Quote entity. Call it something like Product ID, or Product Code, SKU etc. Whatever makes sense to you and your organisation. Add the field to your form.
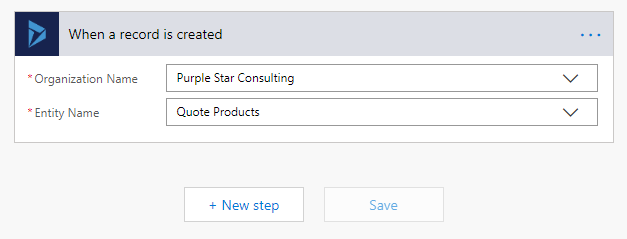
Next, you are going to use Microsoft Flow. If you haven’t jumped in to this world yet, don’t be nervous! This is a great one to get you started. Go to flow.microsoft.com to get started. Log in using your Office 365 credentials and then click to start a new flow. You will be selecting the option ‘Create from blank’. The first step is to find the Dynamics 365 connection and then select the ‘When a record is created’ option. Your Orgnisation(s) available should be in the Organisation Name list. Then, select the Quote Products entity. Note that depending on the version of D365 you are using, you might see Quote Lines as the option.
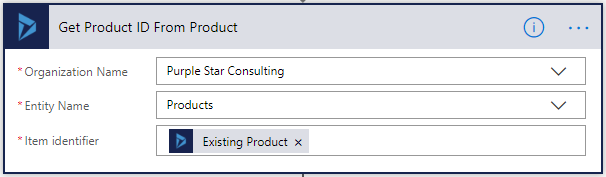
Then add a New Step, select Dynamics 365 again as the connector, then chose Get record as the step. Fill in the Org Name, then choose Products a the Entity. The Item identifier should be the Existing Product from the first step.
Your next step will be the Update record option. Your Record identifier is the Quote Product from your first step.

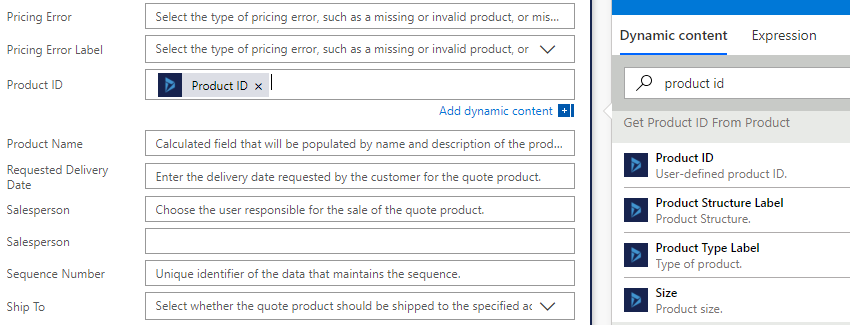
Also in the third step click on show advanced options so you can see all of the fields. Find the Product ID field and click in it. When you do this, you will see a window open to the right. Type in product id, and make sure you look for the Product ID under the second step of the flow you created. Click on the Product ID field and it will be passed through to the field on the left.
Now, go ahead and add a new product to a quote. Your flow should run, and populate the new Product ID field on the Quote product record. Once you’ve got it sorted, you can make the field read only so it’s only ever populated via the flow.

Lastly, you can update your word document template. If you have trouble with the new field showing up while editing your existing template, create a new one from scratch and it should be there. Add it to a new document, then just copy the field and paste it on to your existing template. Re-import (using the Document Template Manager found in XrmToolBox – thanks @crmdevjim for creating it!) your template, and then check it out from a new Quote. Keep in mind that any old quotes created will not display the code as that’s ONLY being populated when a new line is added. So thanks again Chris, awesome use of Microsoft Flow to solve a real business world issue.
Check out the latest post:
Use Custom Event Registration Questions To Branch Your Journeys In Customer Insights
This is just 1 of 603 articles. You can browse through all of them by going to the main blog page, or navigate through different categories to find more content you are interested in. You can also subscribe and get new blog posts emailed to you directly.
I have come up against this problem on multiple occasions with word templates. My solution was to use calculated fields.
https://www.d365geek.co.uk/single-post/2018/06/04/The-Missing-Link—Get-data-without-mappings
That’s awesome Matt! Another thing I love about this community. Different ways to achieve the same thing. Nice approach!
Exactly and I love how open everyone in this community is. Everyone helps everyone else and sometimes it’s great to get a new perspective on a problem.