*** NOTE: ALL INFORMATION IS ACCURATE AT DATE OF PUBLISHING ***
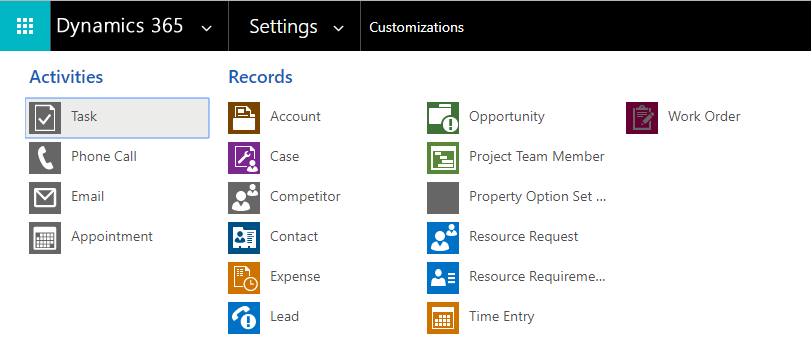
The plus sign at the top right of Dynamics 365 CRM provides access to ‘quick create’ records. This can make it…. well…. quick to add new records with the minimum amount of fields and get on to your next task. It’s certainly a handy way of adding records in to your database. However, if it looks anything like the menu below, it can get messy, cluttered and full of options you don’t need or don’t want people to use.

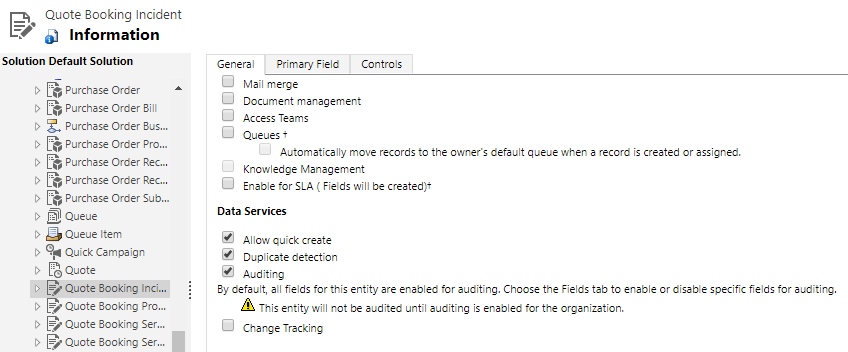
These are displaying when an entity is set up specifically to allow quick create. Open up your solution and navigate to the entity you wish to remove from the quick create menu. Untick the ‘Allow quick create’ box in the Data Services area, then publish the customisations. If you want to add entities to the quick create menu, make sure you tick the box then publish.

Once you have done this for all of the entities you wish to remove from the quick create menu, it will look a lot clearer and easier to use. Consider removing any entity that you want users to always add directly from another type of record. For example, if you always want Opportunities added directly from a Contact, you might want to remove it from the quick create menu.

But what about custom entities? Simply ticking the ‘Allow quick create’ box on the entity properties isn’t enough. Custom entities don’t have a Quick Create form by default, so we need to add one.

Click on the new form button from the menu and then click on Quick Create Form.

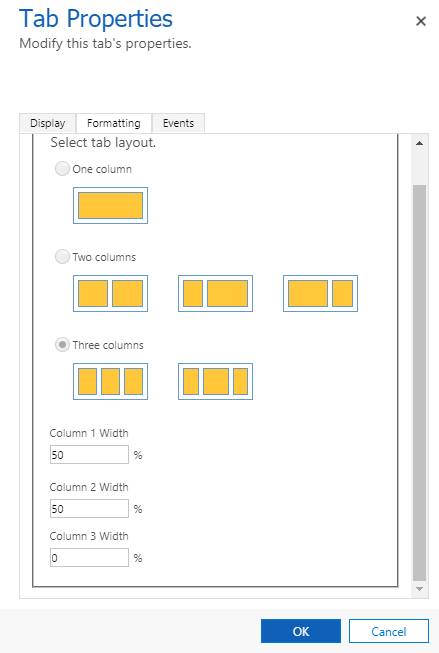
The form has 3 columns as the layout which you can’t change, but you CAN change the width of the columns to make it a 1 or 2 column form if needed. Add the fields you wish to have completed on the quick create form, then save and publish the form.

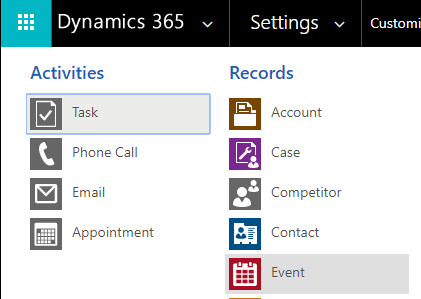
That’s it! The custom entity will now show in the quick create menu.

Check out the latest post:
Wave 2 2024 Customer Insights Journey Chat With Amey Holden
This is just 1 of 462 articles. You can browse through all of them by going to the main blog page, or navigate through different categories to find more content you are interested in. You can also subscribe and get new blog posts emailed to you directly.

Super helpful, thanks! One question. I was unable to remove the Quick Create option for “Property Option Set”. The Allow Quick Create check box was grayed out, and would not allow me to uncheck it.
Any advice is appreciated!
Hi Eva, that’s interesting. I just looked in a version 9 instance and see the same as you, not able to disable the allow quick create. So at the moment it looks like you can’t take that out of the Quick Create menu. However, it is in the Sales tab in a Security Role, so you could make sure no role other than the System Administrator has access to it. At least then they shouldn’t see it in the Quick Create menu.
Megan, thanks for this! Works exactly as you indicated.
You are very welcome Eva. Glad you found it useful.
Under my Service Hub, I can only see a quick create for the following entities: Account, Case and Contact. I don’t see the section to add certain Activities such as Phone Call, Task, Email or Appointment. Is there somewhere that I turn this on so that it is available? Thanks so much for your help.
Hi Doug. Not sure I follow. The options for creating activities would show when you click on the plus sign at the top right of the screen next to the advanced find icon. You mention ‘under my service hub’ which makes me wonder if you are looking at the navigation rather than the top bar? If that is the case, you would need to edit the site map rather than modifying the quick create menu which is a different thing.
Hi Megan,
Can we re-arrange quick create entity list in other than alphabetic order? For example, let say I want to display in below order.
1. Account
2. Lead
3. Contact
4. Case
Regards,
Hardik Chauhan
Hi Hardik, unfortunately at the moment there is no way to re-arrange the quick create entity list. It’s alphabetical order only.