*** NOTE: ALL INFORMATION IS ACCURATE AT DATE OF PUBLISHING ***
In my Events Portal series so far, we’ve looked at how an Events Overview page can be created, how to pass through values to an individual Event record to display the right details, and added a section to display any speakers that might be a part of the event. What about the person hosting the event who will do an introduction and maybe moderate questions? We might want to show their information too. In this post we will look at an an event team member to show who is hosting the event. Let’s get started!
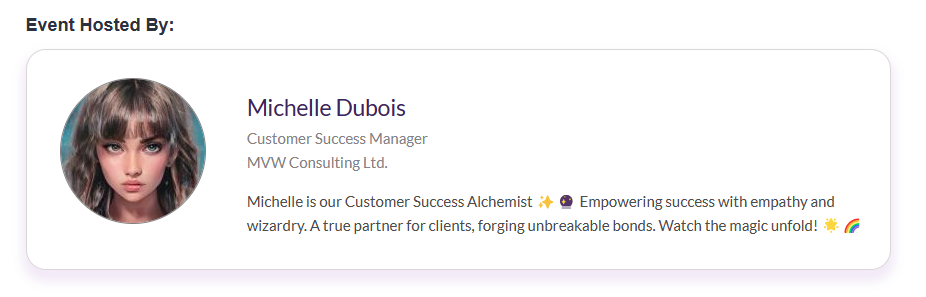
This is our end goal, to have a nice formatted card to show the name, title and company of the host, along with their bio and photo.
The first thing is to set up your Event Team Members and add your records.

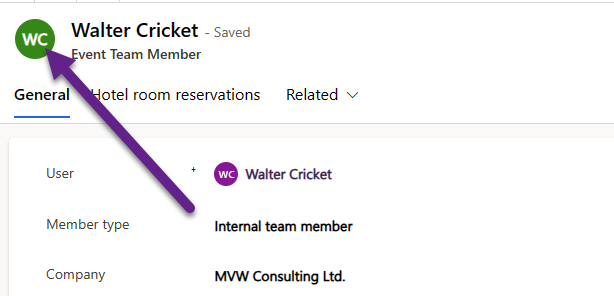
In this post I am focusing purely on internal team members who exist already in our system as a user record. You can of course include any type of team member but your queries to get the right details on to the portal page would need to be adjusted from my provided examples. In this case I am adding Walter Cricket as an internal team member and Walter is a user. I added a new value to the Role field for Event Host (it doesn’t exist out of the box) and I’ve added a description for what Walter does at our company.

As an Event Team member could be a User or a Contact, we really need a central place for their profile photo to be stored. The Event Team Member record does not have an entity image by default, but we can easily add one. Add a new column of the data type Image. Make sure the Primary image box is ticked. You can call the field whatever you like, but for consistency with other tables I’m going to call it Entity Image.

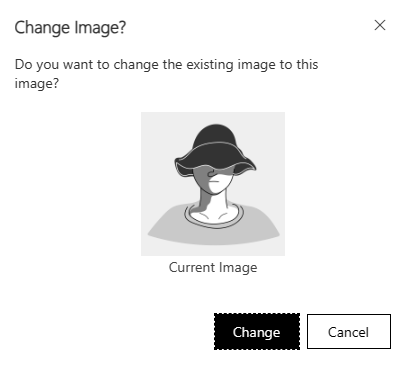
Once you’ve published your changes, you should then see an image next to the name on an Event Team Member record. You can click on the initials that are displayed.
Then browse out to find the right image and change it to update on their record.
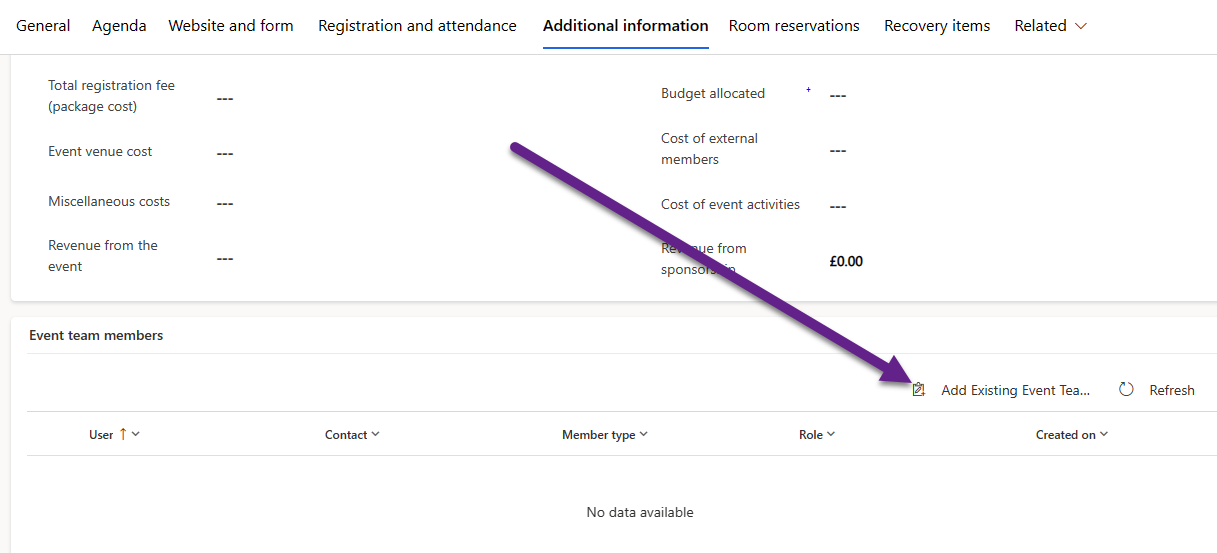
Once you have your Event Team Members set up, each time you wish to add one to an event, just click on the Additional Information tab on the record, then click on Add Existing Event Team Member. You can then select from the list of records and save the Event. Simple!
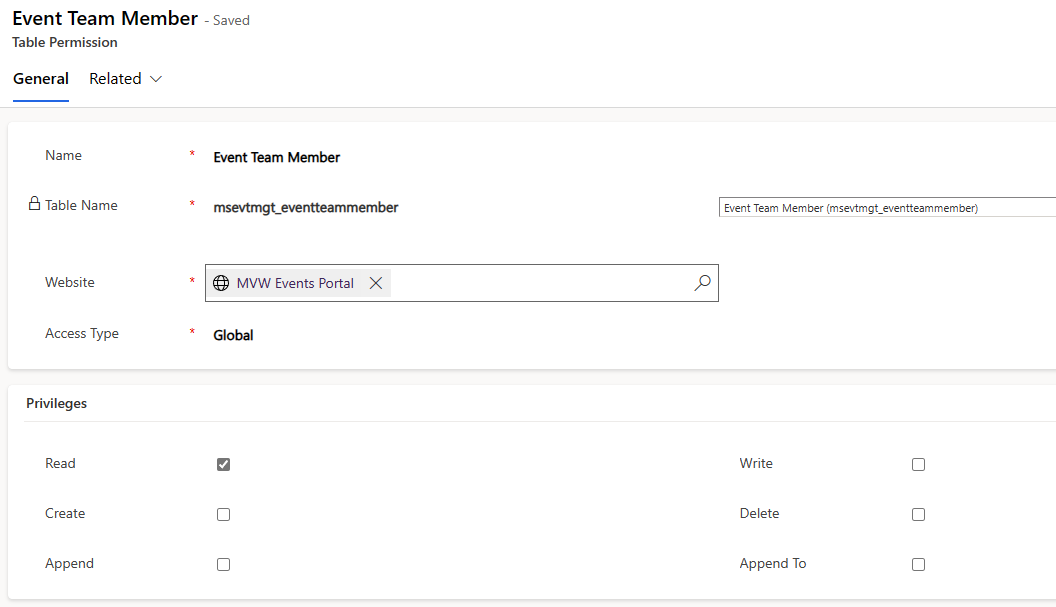
You will need to add a Table Permission record to allow users of the portal to see the Event Team Member information. Set it as Global and Read only for the privileges. If you didn’t do it previously, make sure you have a Table Permission record for the Image Descriptor table if you want to show the entity image for the host in the portal too.
Now let’s look at what we need to do to add it to the individual Event custom Web Template. This is the same template that was created initially to display the event, and then updated to display the speakers. We need to add a new FetchXML query in to the top of the template, this time to find any Event Team Member records that are linked to the Event via a very poorly named table linking events to event team members via the Event Team Member ID. We are also making sure we return the total record count of all records found. Finally, in my case, I only want to return the Event Team Members if their role is Event Host.
{% fetchxml hosts %}
<fetch version="1.0" output-format="xml-platform" mapping="logical" distinct="true" returntotalrecordcount='true' >
  <entity name="msevtmgt_eventteammember">
    <attribute name="msevtmgt_company" />
    <attribute name="msevtmgt_description" />
    <attribute name="msevtmgt_role" />
    <attribute name="msevtmgt_eventteammemberid" />
    <attribute name="mvw_entityimage" />
    <filter>
      <condition attribute="msevtmgt_role" operator="eq" value="916780001" />
    </filter>
<order attribute="msevtmgt_name" />
    <link-entity name="systemuser" from="systemuserid" to="msevtmgt_user" alias="user">
      <attribute name="fullname" />
      <attribute name="title" />
      <attribute name="internalemailaddress" />
    </link-entity>
    <link-entity name="msevtmgt_msevtmgt_event_msevtmgt_eventteammember" from="msevtmgt_eventteammemberid" to="msevtmgt_eventteammemberid" intersect="true">
      <filter>
        <condition attribute="msevtmgt_eventid" operator="eq" value="{{requestid}}" />
      </filter>
    </link-entity>
  </entity>
</fetch>
{% endfetchxml %}
Then the next part you can add wherever you want to display the Host card on the page. I’ve added it underneath the description of the Event, and right above the Speakers section. As with the speakers, I first only want to display something if the count of records returned is more than 0. If not, we won’t even bother and the Event just won’t have an Event Hosts section. If there is at least one, we are then creating a grid but in the case the grid will only have 1 per row. I’m pulling in the entity image from the Event Team Member record. I am pulling in some values directly from the Event Team Member record, then others where I am going from the Event Team Member record through to their related User record and gathering things like their Full Name and Title.
For the entity image, we need to create a URL string by combining the name of the entity with the image (msevtmgt_eventteammember), the name of the attribute that holds the image (mvw_entityimage is the new custom field I created) and the id of the event team member record (msevtmgt_eventteammemberid). All of that combined will then allow us to display the image in the portal.
{% if hosts.results.total_record_count > 0 %}
   {% block hosts %}
<br><br>
<h3>Event Hosted By:</h3>
<div class="host-grid">
{% for msevtmgt_eventteammember in hosts.results.entities %}
<div class="host-item">
<div class="host-image">
<img class="hostimage_small" src="/Image/download.aspx?entity=msevtmgt_eventteammember&attribute=mvw_entityimage&id={{ msevtmgt_eventteammember.msevtmgt_eventteammemberid }}">
</div>
<div class="host-details">
<div class="host-name">{{ msevtmgt_eventteammember['user.fullname'] }}</div>
<div class="host-title">{{ msevtmgt_eventteammember['user.title'] }}</div>
<div class="host-company">{{ msevtmgt_eventteammember.msevtmgt_company }}</div>
<div class="host-bio">{{ msevtmgt_eventteammember.msevtmgt_description }}</div>
</div>
</div>
{% endfor %}
</div>
 {% endblock %}
{% endif %}
That’s it for this one! Once you start to see the pattern of gathering the records with your FetchXML query and then building out the block section to display the data, hopefully it starts making sense and you can see how you could repeat this for other things. I’ve used a slightly different colour and gradient for the Host card compared with the Speaker cards just to differentiate between the two sections.

I’ve shared the CSS that I used for the Hosts section below so feel free to use as a starting point if it might help!
.host-content {
    font-family: 'Lato', sans-serif;
    font-size: 1.3em;
    padding-top: 1em;
}
.host-grid {
    display: grid;
    grid-template-columns: repeat(1, 1fr);
    grid-gap: 1em;
    padding: 1em 0em 4em 0em;
	width: 120%;
}
.host-item {
    box-shadow: 0 8px 10px 4px rgb(127 51 176 / 10%);
    background-color: white;
    padding: 2em;
    margin: 0em;
    border: 1px solid #dbd7d7;
    border-radius: 20px;
}
img.hostimage_small {
    border-radius: 50%;
	border: #808080 1px solid;
}
.host-image {
    width: 20%;
    float: left;
	display: flex;
    align-items: center;
    justify-content: center;
    height: 90%;
}
.host-details {
    width: 76%;
    font-size: 1.2em;
    font-family: 'Lato', sans-serif;
    float: right;
    padding: 1em 0em 0.5em 0em;
}
.host-name {
       color: #3c245c;
	   font-size: 1.5em;
}
.host-title {
       color: #838286;
    font-size: 1em;
}
.host-company {
       color: #838286;
    font-size: 1em;
}
.host-bio {
    color: #4d4d4d;
    font-size: 1em;
    padding-top: 1em;
}
Check out the latest post:
Use Custom Event Registration Questions To Branch Your Journeys In Customer Insights
This is just 1 of 603 articles. You can browse through all of them by going to the main blog page, or navigate through different categories to find more content you are interested in. You can also subscribe and get new blog posts emailed to you directly.