*** NOTE: ALL INFORMATION IS ACCURATE AT DATE OF PUBLISHING ***
Recently I was working on a project that called for displaying invoices in a Dynamics 365 Portal. We can easily add the ability to show the Notes entity on the Invoice entity, allowing a user to add a PDF of the invoice which could then be displayed on the portal. However, I wanted something that looked better than that, and also was less manual. This process can be followed exactly, or you can take bits and pieces and created something that works for you. Let’s see how we can display a PDF version of an invoice embedded in a portal.
The invoice is generated using a word document template against the Invoice record. We can get this document manually, but I have written previously about using Power Automate (formerly Microsoft Flow) to email word document templates as PDF’s, using a process I saw on Bruce Sithole’s website. Make sure you read either of those posts first before you carry on.
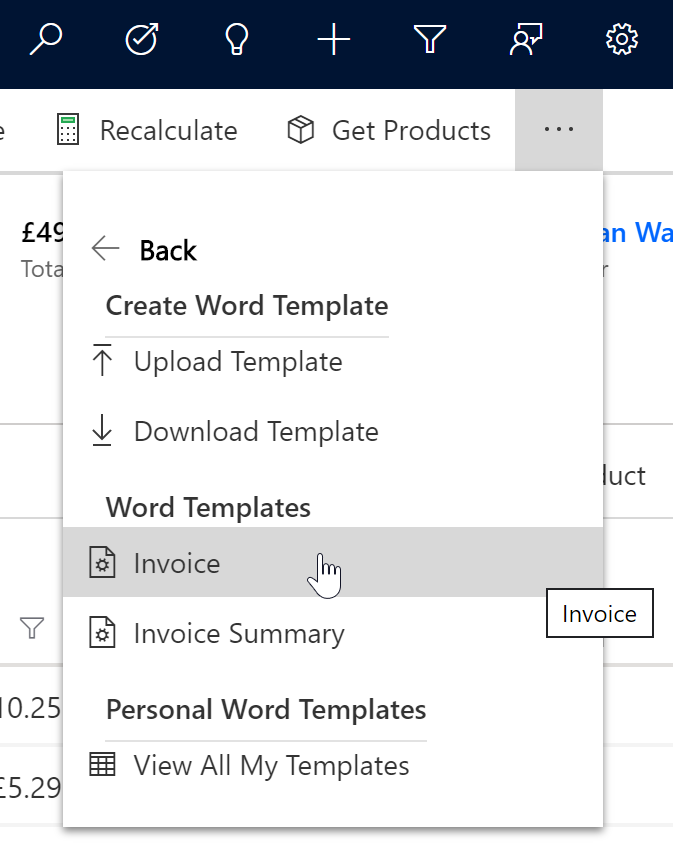
For the trigger to generate the Word Document Template, I added a field added to the Invoice entity called ‘ Expose to Customer’. When this changes, a workflow will run. If it is set to Yes, the Invoice word document template will be generated and set against the invoice record. If it is No, the workflow ends. Other fields added to the invoice entity are:
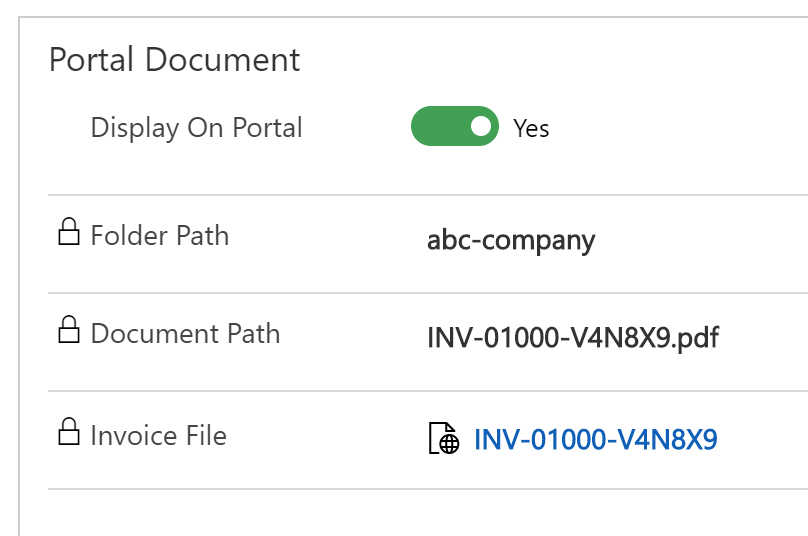
- Folder Path – single line text field – this is the path to a Web Page on the portal
- Invoice Path – single line text field – this is the name of the PDF that will be generated
- Invoice File – lookup field – a link to the Web File that is created to be displayed one the portal. This record will contain the final generated PDF of the invoice
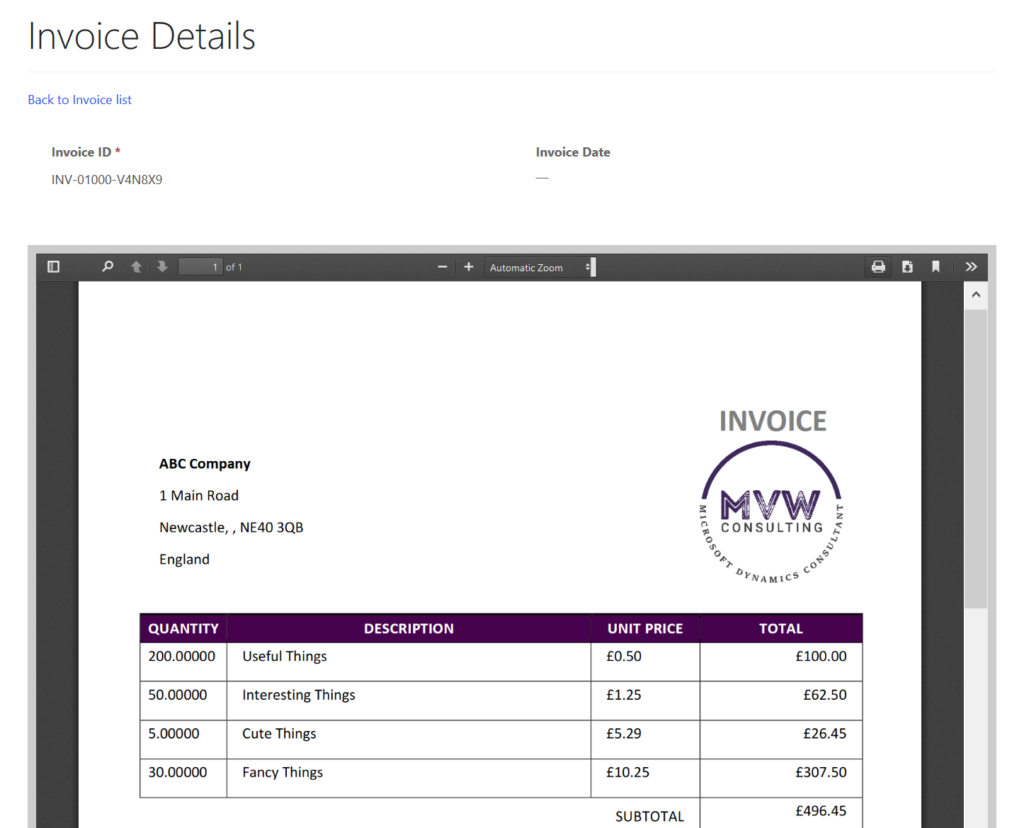
For the customer, they can then log in to the portal and access invoices from the Overview menu. From here they can view a list of invoices. Clicking on the invoice ID will take the user to the invoice details. The invoice is then displayed embedded in the page. The PDF can be downloaded or printed from here.
So how does it all work? We need a place to store the invoice pdf once it’s generated. For this, you can store it anywhere that makes sense to your organisation. In this example, we will use the notes entity to add our PDF to. First, for each account record you want to display invoices for, a web file for each Account record needs to be created. You can easily create a process for this using Power Automate (I guess this is for a different blog post 😉 ) but for this, I will just explain the manual process. Ideally you will want to have some kind of folder/file structure for the Accounts and their Invoices. Make sure you have a parent page for your Account pages to live under.
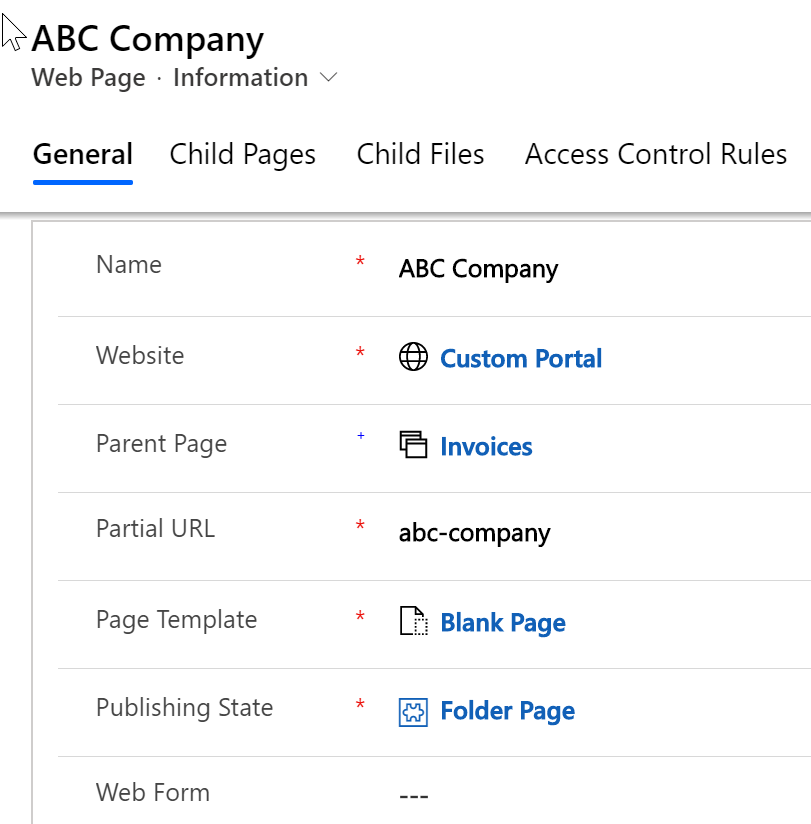
Navigate to the Web Pages section and click New. The Name of the page should be the naming convention you wish to use for the Account record (ideally you use an Account ID). Link it to your portal website, and set the Parent page as the Invoices page (or whatever parent page you have decided to use). The partial URL cannot contain spaces, and should ideally be the same as the name of the page. Set the Page Template as the Blank Page, and the Publishing State as a draft publishing state. I created a publishing state called Folder Page. This page is ONLY used to create a URL in which to access the PDF of the invoice, and is not designed to be navigated to, so the publishing state is in fact a draft page and not public. Save the web page, and make note of the partial URL.
Next, navigate to the related Account record. You will need to have one new field to add to the form. This should be a lookup field to the Web Page you just created.
The process of generating the invoices works using Power Automate (formerly Microsoft Flow). The trigger of the flow occurs when a new Note is created and uses the Common Data Service connector. When the ‘Expose to Customer’ field on an invoice record is set to yes, this triggers our workflow (if you missed that part, go back and read this) which creates the Invoice Word Document Template and adds it as an attachment to a Note record on the invoice. So when the note is created, this will run the flow. We then have a condition check to make sure that the note created is linked to an invoice. This is done with the following formula.
equals(and(endsWith(triggerBody()?['filename'], '.docx'), and(equals('invoice', triggerBody()?['objecttypecode']), equals(triggerBody()?['isdocument'], true))), true)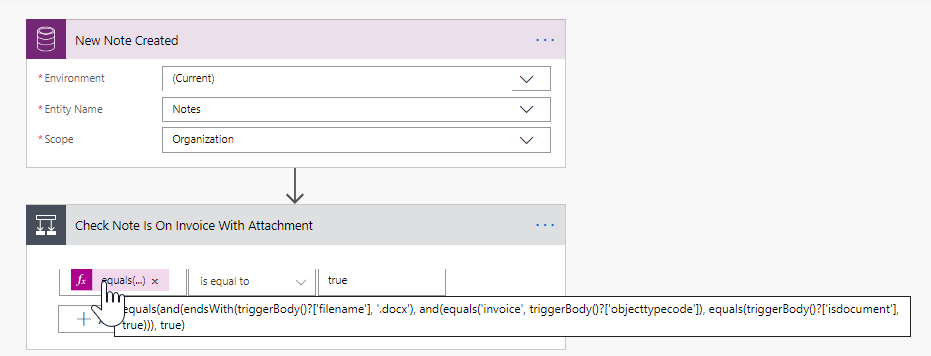
Next we are getting the Invoice record that the Note is linked to using the regarding value from the initial trigger step.
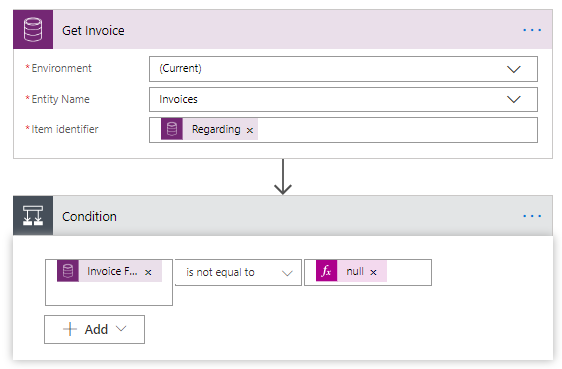
Now we have another condition. The Invoice might have been produced previously but then removed from being displayed on the portal. So, if the user makes a mistake and needs to adjust the invoice, they can change the Expose to Customer field to No, fix the invoice, and then change back to Yes. If this happens, we want to remove the original invoice Web File that was created. So, we are checking to see if this field contains a value.
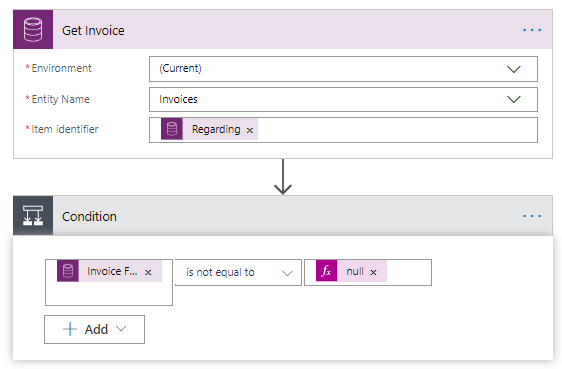
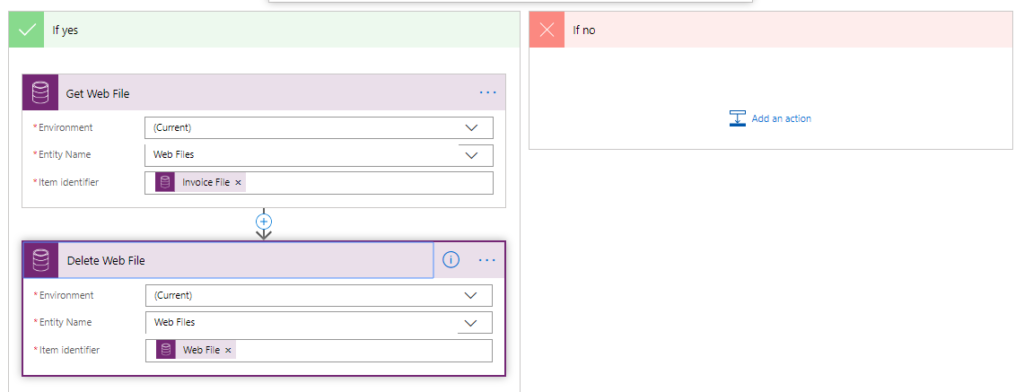
If there is nothing in that field, we don’t do anything. If there is, we are going to get the Web File record using the Invoice File id, and then we are going to delete that Web File using the Web File id we just got in the previous step. This means we are now starting the process from scratch to create the new invoice.
Now we move on to the next part of the process. We need to get the Portal Invoice folder from the related account records web page, get the Word Document template and convert it to a PDF, create a new Web File and then link the PDF to that so it can be shown on the portal. The first step is to get the Customer Account record by adding a Get Record step from the CDS Connector. We use the Customer from the Get Invoice record step earlier.

Next we can get the Web Page linked to the Account.

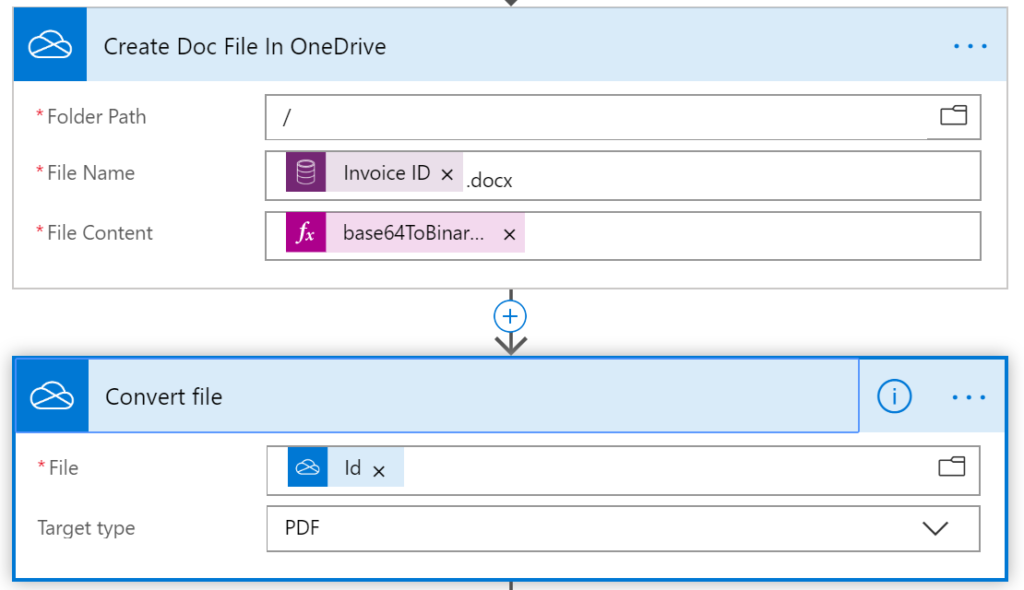
We now have two OneDrive for Business actions. The first is to take the Word Document Template and add it to OneDrive as a file. We set it to the route folder (although you could have it go somewhere else) because eventually it will get deleted anyway. The File name is the Invoice ID followed by .docx. The File Content needs an expression to convert the content correctly.
base64ToBinary(triggerBody()?['documentbody'])Then we use a Convert file step from OneDrive for Business and use the File Id from the previous create step, and change it to a PDF.
We are then creating a new web file record in the portal that we will use to link the PDF to. We are setting the fields as you see below. The Publishing State uses the GUID for the value for Published, and the Website uses the GUID for the Partner Portal website.
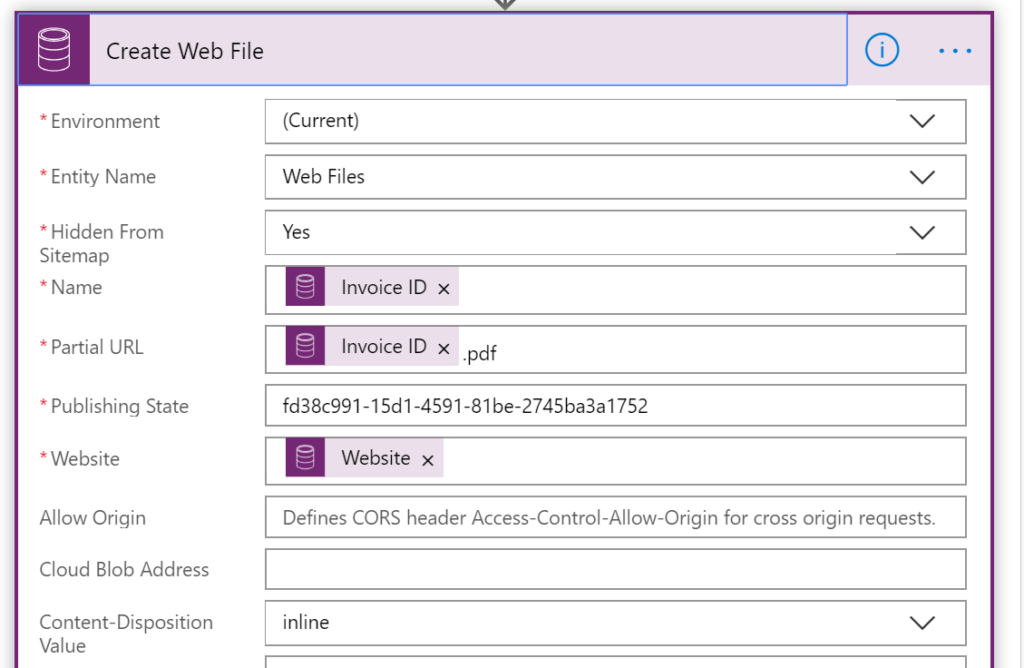
At the bottom of the action, we will link this new Web File to the Accounts related Web Page.

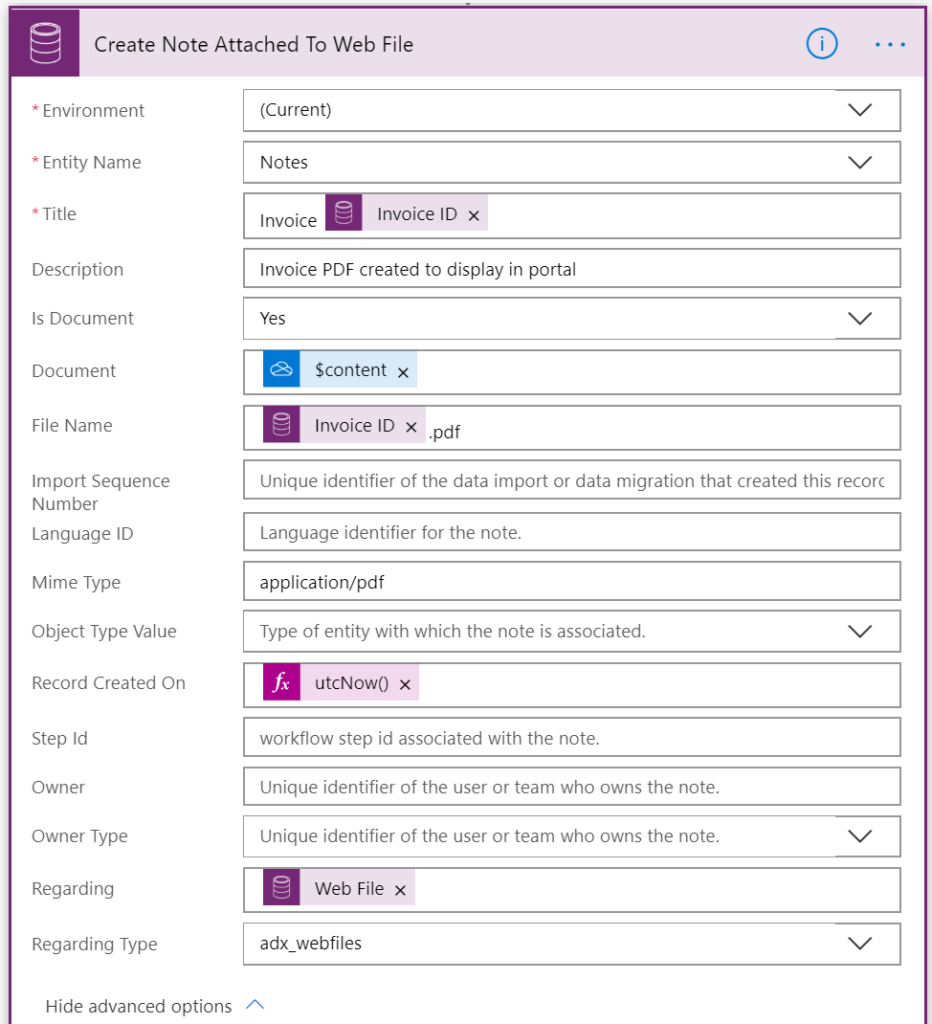
Next we will create a new Note record to add the PDF to, and link it to the Web File record we just created. We give it a title and a description, and set the Is Document field to yes. The Document expression used is:
body('Convert_file')['$content']We then give the file a name using the Invoice ID then .pdf. The Mime Type is set as application/pdf, and the created date is set to utc(Now). Finally we set the Regarding as the Web File and make sure the Regarding Type is set as the entity of Web Files.
We then need to make sure the original invoice record is updated to include the path to the PDF which includes the folder path from the Account Web Page, and the name of the PDF. This is so that the full path to the PDF on the portal can be generated.

These three fields need to be populated. The Invoice Id from the original Get Invoice step (plus .pdf), the Partial URL from the Account Web Page and the Web File from the Create Web File step.


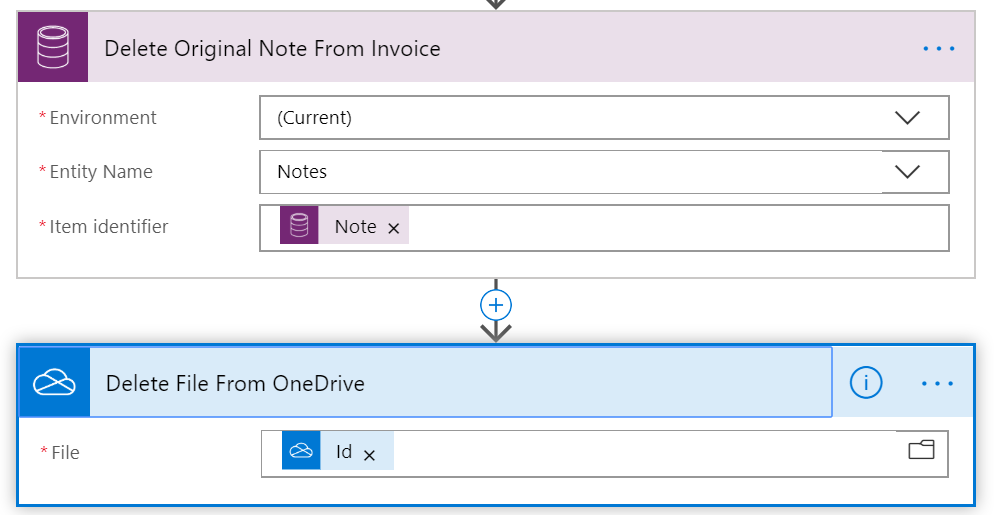
Finally, we have a delete step to remove the original note from the Invoice (the one that includes the Word Document Template) and a delete step to remove the File added to OneDrive for Business.
To display the invoice as an embedded PDF, we need to create a new Web Template. For more detail on creating web templates using FetchXML, check out my previous post for creating a Forms Pro Library, and also this post from Nick Doelman whose awesome instructions helped with my own learning on the subject. This template is doing a quick query and getting the folder path (the partial url from the Account Web Page) and the document path (or the invoice PDF document name). We can then generate the full path to the PDF using the folder and invoice paths.
/invoices/{{ invoice.mvw_folderpath }}/{{ invoice.mvw_documentpath}}
Then, using an open source JavaScript utility called PDFObject, we can embed the PDF in to the webpage. Once you have linked the web template to a page template, you can then use it on a web page to display your invoice detail.
Here is the Web Template in full:
{% extends 'Layout 1 Column' %}

{% block main %}
<a href="/invoices/">Back to Invoice list</a>

<!--Displays anything you have on the Page Copy for your Web Page-->
{%include 'Page Copy' %}

<!--Replace Invoice Details with the name of your own Entity Form if you wish to display one-->
{% entityform name: 'Invoice Details' %}

<!--Be sure to use the correct field names, and not those with a prefix of mvw-->
{% fetchxml invoicedetail %}
 <fetch version="1.0" mapping="logical">
  <entity name="invoice" >
    <attribute name="invoiceid" />
    <attribute name="mvw_documentpath" />
    <attribute name="mvw_folderpath" />
    <attribute name="invoicenumber" />
    <filter>
      <condition attribute="invoiceid" operator="eq" value="{{ request.params['id'] | xml_escape }}" />
    </filter>
  </entity>
</fetch>
{% endfetchxml %}

 {% for invoice in invoicedetail.results.entities %}
 <!--Start of PDFObject Code-->
<div id="my-pdf" class="pdfobject-container">
  <embed class="pdfobject" src="/invoices/{{ invoice.mvw_folderpath }}/{{ invoice.mvw_documentpath }}" type="application/pdf" style="overflow: auto; width: 100%; height: 100%;">
</div>
<script src="/pdfobject.min.js"></script>
<script>
  PDFObject.embed("/invoices/{{ invoice.mvw_folderpath }}/{{ invoice.mvw_documentpath }}", "#my-pdf");
</script>
<!--End of PDFObject Code-->
{% endfor %}
{% endblock %}
Want to just watch how to do this? Check out the video below:
Check out the latest post:
Wave 2 2024 Customer Insights Journey Chat With Amey Holden
This is just 1 of 462 articles. You can browse through all of them by going to the main blog page, or navigate through different categories to find more content you are interested in. You can also subscribe and get new blog posts emailed to you directly.

Hi Megan,
There’s an endpoint in the Web API to create PDF’s based on the selected Word document template.
I wrote a blog post about it:
https://2die4it.com/2019/08/20/generate-pdf-from-document-templates-in-cds-dynamics-365-ce-using-native-web-api-with-flow/
Awesome, thanks Stefan! This will hopefully be helpful to others. So many good ways to resolve issues and challenges.