*** NOTE: ALL INFORMATION IS ACCURATE AT DATE OF PUBLISHING ***
Potentially one of the coolest features in Microsoft Dynamics 365 CRM is the ability to have Editable grids. Yes, those lists of records you look at each day and usually have to go in to each individual record to make changes to…. you can do this directly from the list or grid itself. It’s not immediately obvious, so here is how to enable it, along with a few cool features.
Getting started with Editable Grids
First, editable grids must be enabled on an entity basis. In this example the Opportunity will be enabled. Navigate to Settings, Customisations, then find the entity in the list. Click on the Controls tab, then Add Control.
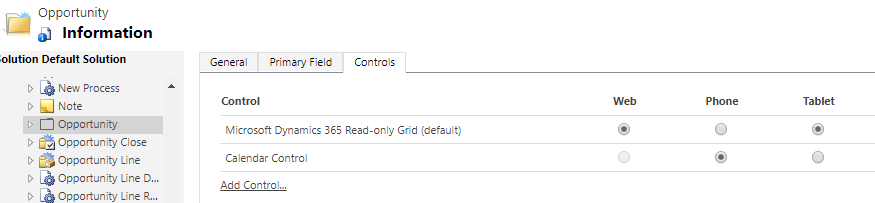
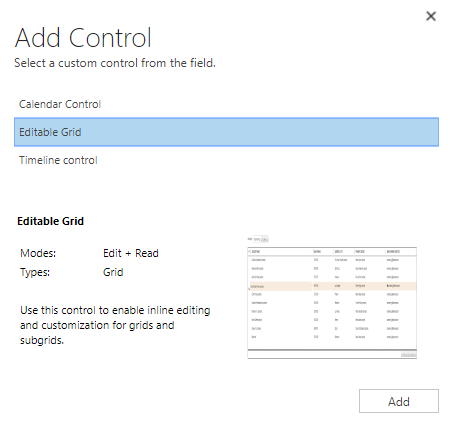
Select Editable Grid from the list, then click the Add button.
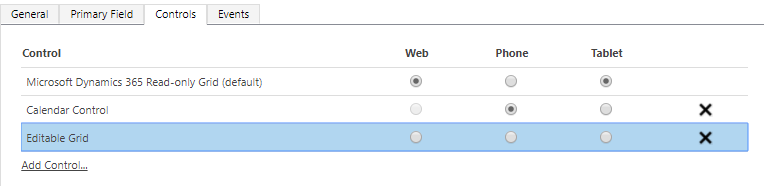
Once you have done this, you have the option to make the Editable Grid the default way of having the views displayed to end users. It might seem tempting to do so, but also could be frustrating or confusing for users who wish to just look at their lists without making changes. Make the decision that is right for your users based on testing and getting feedback, then determine the default by selecting the appropriate Web (or Phone or Tablet) radio button.
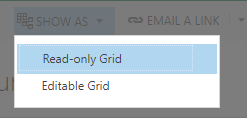
Now on to the fun stuff! We head in to the Opportunity section and select our All Opportunities list. At the very top there is now a Show As option. Clicking on this allows it to be changed from a Read-only Grid to an Editable Grid and back again.
So what can we do?
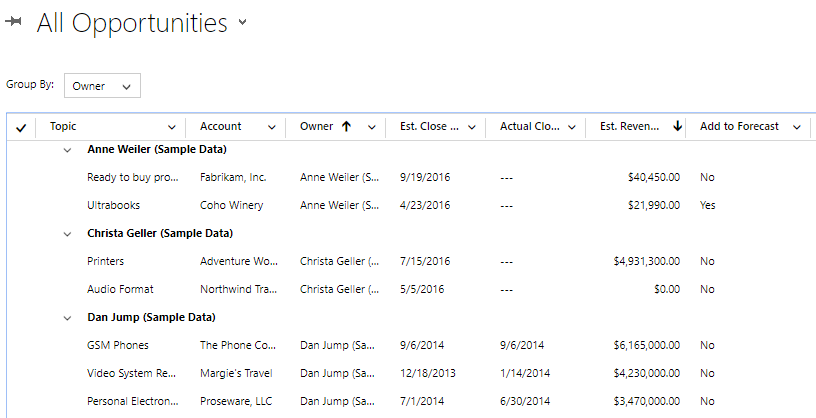
One of the first things to notice is the Group By drop down menu above the view. This gives the option to group by any of the columns in the view. Grouping by Owner would be handy for the Sales Manager to take a look at all of the Opportunities in the Sales Team in one list, but give a clear definition between Sales Reps. You can then also minimise a group using the arrow next to the Group heading.
We can also use the familiar sorting by clicking on a column header. Holding down your Shift key and clicking a second column header allows you to have two sets of sorting criteria.
Columns can even be moved around in to different places by clicking on a column header and dragging it to where you want it to be.
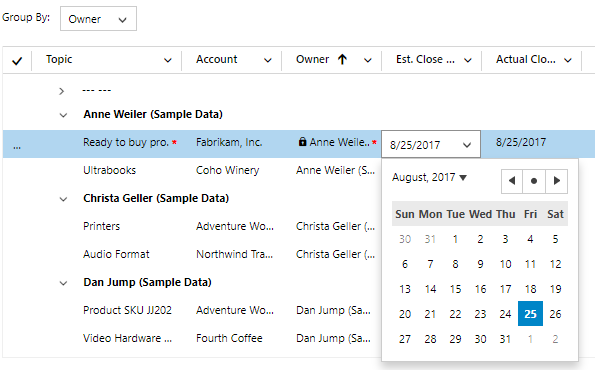
Finally the really exciting part, fields can be edited directly within the grid itself. You can see below where the Estimated Close Date can be edited within the view. It uses the auto save process so will be updated on the record quickly. You can click the save button at the top right of the grid if needed, but time will take care of that for you.
A few things to note
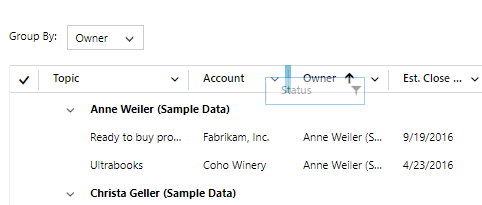
Editable grids are subject to the usual field security level settings. Some fields are always going to be protected as and when it makes sense. The status of a record cannot be changed within an editable grid, nor can the Owner of a record. The assign command should be used for this instead.
If you are using Dynamics 365 and haven’t enabled this yet, check it out and get editing those records quickly! I can see this being great for a sales rep needing to update their open Opportunities before an internal sales review, or going through scheduled activities for the day. Where are you finding the most use from this feature? Let me know in the comments below!
Check out the latest post:
Use Custom Event Registration Questions To Branch Your Journeys In Customer Insights
This is just 1 of 603 articles. You can browse through all of them by going to the main blog page, or navigate through different categories to find more content you are interested in. You can also subscribe and get new blog posts emailed to you directly.