*** NOTE: ALL INFORMATION IS ACCURATE AT DATE OF PUBLISHING ***
This series is looking at building your own custom Events Portal using a Power Pages website. How do you get the actual event pages set up and add the registration form to each one? In this post we will look at one method, adding the script to each new page of your portal. This is just one method and in my opinion not likely to be the one you end up going with but will be a good starting point to understand how it works. Let’s get started!
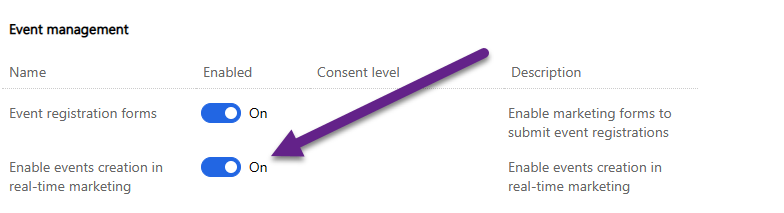
First, make sure you have already enabled the ability to use Real-time Event Registration Forms by going in to the feature switches, Event management and then enabling the switch.
Once you’ve done this, you will notice a new option when adding an event to do so in real time marketing.

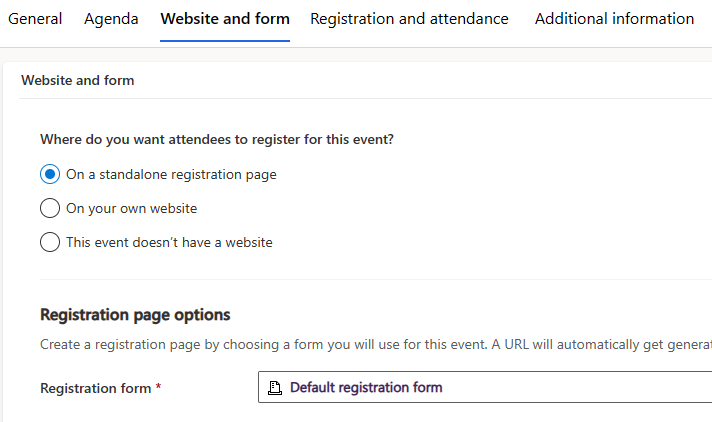
Most of the form will be the same as if you are adding an event previously, but now the website and form tab is a little different. There is a default registration form already there. You can open that and edit it should you wish.
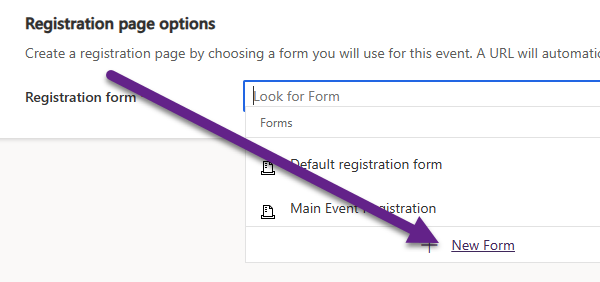
Alternatively you can remove the default one from the lookup field and add a new form.
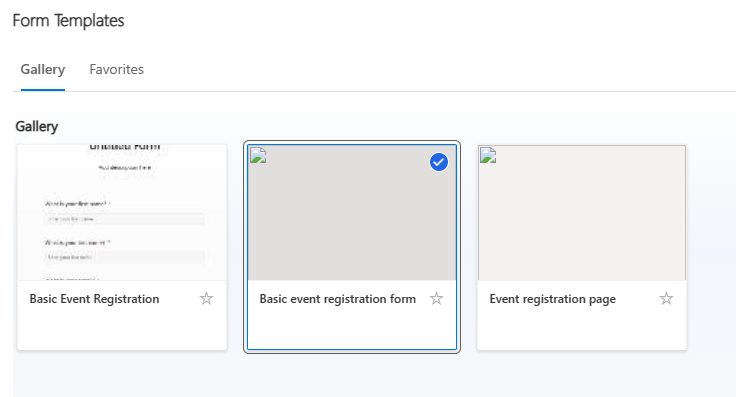
Pick from one of the templates.
You can then edit the form in the same way you would with any other piece of content and publish it once ready to go.
You can then copy the javascript for the form. We are going to use this to embed in to a page in the Events Portal. You won’t be able to make the Event live yet until you have the URL for the new event page.

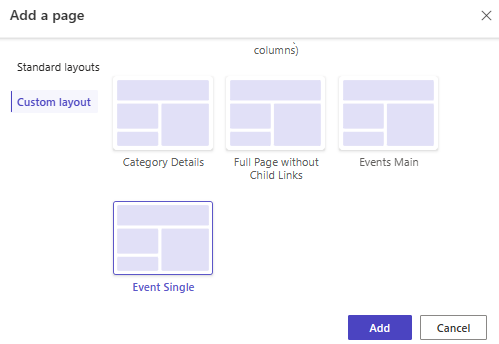
Now you will need to go to your Power Pages portal and create a new page. There are various ways to do this. Let’s look at doing it on Power Pages in the maker portal (https://make.powerpages.microsoft.com). Select the option to add a new page, then give it a name and pick a standard or custom layout.
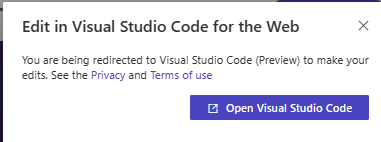
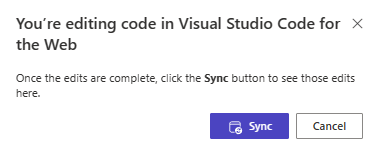
Once you’ve added the page, click the option to edit in Visual Studio Code. You will be prompted with a pop up, just click on Open Visual Studio Code and a new tab will open.
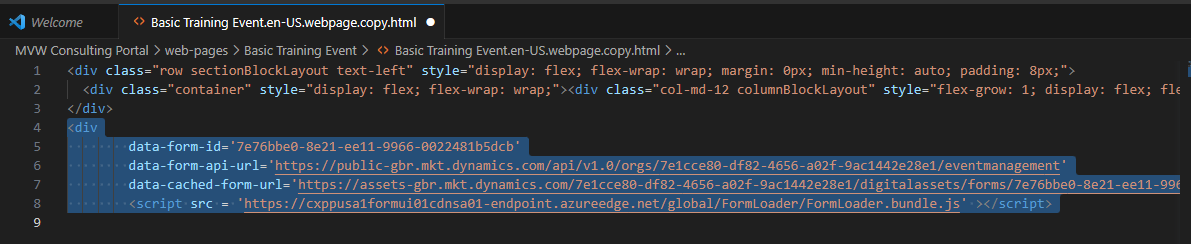
Paste in the javascript code you got from the event form in the place you wish the form to show up. Close the Visual Studio Code editor, saving when prompted. If you look at the code for the form, you should see data-readable-event-id= then the name of the form followed by some numbers. This readable event id is from the Event record and is used to make sure the page being loaded is linked back to the correct Event when the form is submitted. This means you can use the same form for different events should you choose (more on that in a future post).
Then you can sync the changes you just made.
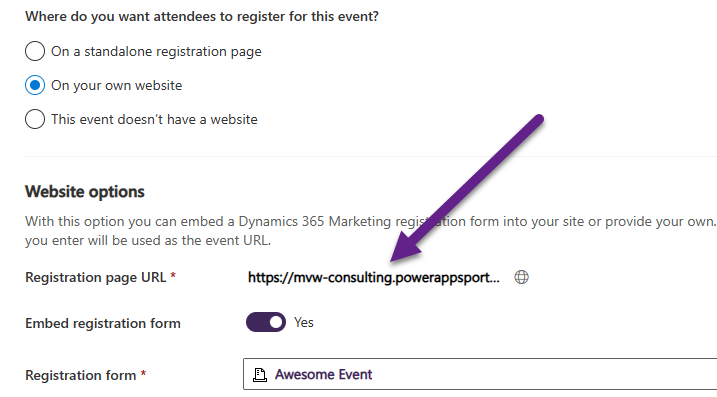
Take the URL for the new page you just created and go back to the Event in D365 Marketing. Select to add this to your own website, then add the URL to the Registration page URL field. Save and then click the Go live button to publish the Event. Now it’s time to review your page!
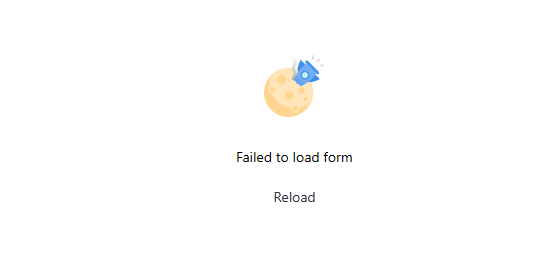
There are a couple of gotchas to keep in mind. First one, if you see the error below of ‘Failed to load form’, make sure the Event is actually live. If still in draft, you will never see the form load.
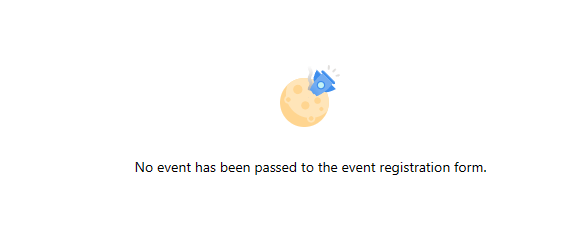
Another error is this one, with a message of ‘No event has been passed to the event registration form’. This is likely happening because you took the Javascript direct from the Event registration form, rather than taking it from the section on the event where your form has been linked.
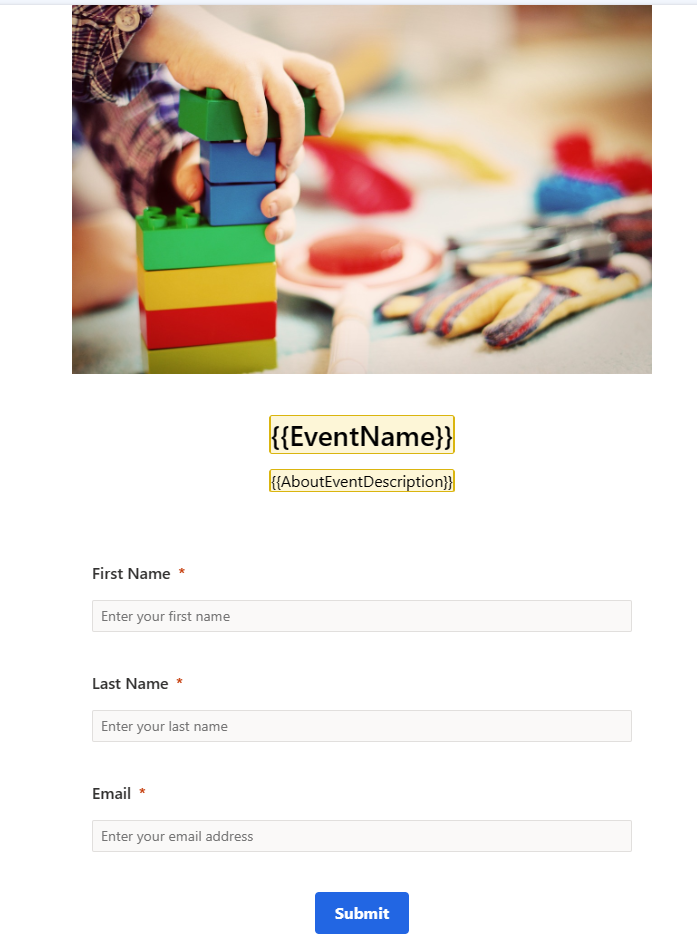
Assuming everything looks good and no errors, that should mean your form has loaded and you will see the details you added. You should be able to fill out the form and submit it. An Event Registration record will be created and linked back to the Event.
In summary, if you take this approach, I would ask if a Power Pages portal is right for you. You may as well simply continue using the approach of adding a form to a page on your own company website for registrations. Someone would need to create one form per event, then go in to the portal create one new web page per event to store the form. It’s unlikely that the people working in the marketing team would also have the level of access or knowledge to go and add a new page on the portal.
In the next post, we will look at how to create one Event Registration Form, create an Event record web template for the portal and understand how we can make sure the correct Event information displays. Also, we can make sure that even just using one form, when someone submits it they are registered for the correct Event.
Check out the latest post:
Use Custom Event Registration Questions To Branch Your Journeys In Customer Insights
This is just 1 of 603 articles. You can browse through all of them by going to the main blog page, or navigate through different categories to find more content you are interested in. You can also subscribe and get new blog posts emailed to you directly.
Hi and thank you for this post. It is really interesting.
I have now tried to do the same thing as you. I have embedded the code into the page, but i am not able to see the form in the page. It is just blanc. Maybe I have missed something.
I am new to power pages, and when I add a new page into my new created portal, Iam able to choose text, image, etc.. Should I choose anything, before i edit the code? Or should I just add the code before choosing anything. (If you understand what I am trying to explain :)).
It had been nice to get this to work for me aswell 🙂
Best Regards
Camilla
Hi Camilla, you are welcome, glad you’ve found it interesting. I would suggest adding a block (text or image or something) to the page too, just so you can confirm and make sure that is showing up. I would also suggest checking out the next blog in the series which would be the better approach, and that is creating your own custom web template. – https://meganvwalker.com/event-page-using-liquid-web-template-events/
Keep in mind, the series isn’t necessarily going to be easy for a total beginner. Ideally you would have a bit of knowledge already in portals. My series isn’t going to start from the beginning (there are tons of courses and way better materials out there for learning), but going to help people who know portals to then build on that knowledge and create an Events portal.
Hi Mega, this is a great series.
I tried to do this for Leads, but it seems to be just for contacts. Is that right?
Hi Ian, Event Registrations are currently only for Contacts and not linked to Leads. So you are correct, this would only be for Contacts at the moment. Hopefully that option for Leads only will come in the future!
Thanks for this post, Megan! One quick question — are you able to have multiple registration forms for an event? For instance, if I have two types of attendees and want to collect different information from each, is there a way to create two different forms and track both back to the same event?
Hi Mary, very good question! I just tested trying to add in the same value for the data-readable-event-id which determines which Event it is linked to, but instead it just displays the form linked to the Event again. Wil do some digging on this one and post and update once I figure out more.
A little off topic for this post, but is there a way to make a Power Pages form where you enter an attendee’s registration ID and display the attendee info? My ultimate goal is to make a check-in/check-out page for in person events.
Hi Nikki, rather than trying to do that with a Power Page site, I would either use the D365 mobile app which already has the functionality to scan a QR code for an event and check the person in, or I would create a Canvas App using the option to scan a QR Code that way.
Hi Megan, I don’t see the option “In real-time marketing” when create new Event. I use the CIJ, so how to apply it?
Regards,
François
Hi François, you would only see that option if you have previously been using Outbound Marketing and then switched on the option to add Events in Realtime (from the Feature Switches in the settings area).
How do we add Custom Registration Field
This is the item on the release plan. Currently scheduled for March 2025 – https://learn.microsoft.com/en-us/dynamics365/release-plan/2025wave1/customer-insights/dynamics365-customer-insights-journeys/collect-extra-customer-information-without-creating-custom-attributes