*** NOTE: ALL INFORMATION IS ACCURATE AT DATE OF PUBLISHING ***
Back in 2021, prior to Google Analytics going from Universal to GA4, I wrote a post about tracking D365 Marketing form submissions in Google Analytics. This was to help track all conversions even if you were not using a redirect to a thank you page (the easiest way to track your conversions). GA4 is not the easiest tool in the world to use, so this post will show you steps to add the ability to track submitted forms via Google Tag Manager and Google Analytics (GA4) regardless of if you are using thank you pages, or just displaying a thank you message on the same page as the form. This also means if you are using the same form embedded in multiple web pages, it will still pass through to GA4 and allow you to track those conversions. This post assumes you have Google Tag Manager already set up and have at least a basic knowledge of Google Analytics.
We will start in Google Tag Manager.
Variables – GTM
There are built in variables for Forms that you could add to Google Tag manager. However, the way in which the D365 Marketing forms work make it challenging to track your submissions without inadvertently tracking an event when someone presses the submit button even if it fails because they missed out required fields. There is a specific function or event used by Microsoft for the form submissions which we need to make sure our website waits for prior to considering a successful form submission has occurred. So, that’s why we won’t be using the built in form related variables.
Go in to the Variables section, then scroll past all of the built-in variables to the user-defined variables and then click the New button from the top right. Give the new variable a name, then click anywhere within the variable configuration panel in the middle. Remember the name you have given this variable as we will use this later on.

Click on the Data Layer Variable option.

Now we need to add in something that we want to use to capture the name of the form. We will pass through the name of the form via some JavaScript we will add to the same page where the D365 Marketing form script is added. You can call the Data Layer Variable Name whatever you like, but it will need to match in the script we will review and add to the web page later. formName is what I used. That’s it for this custom variable. We will use this to pass the name of the form through from the web page in to this custom variable so we can use the value to pass in to GA4.

Triggers – GTM
Next, we need to add a custom trigger that will fire when a form submission occurs. From the triggers section, click New from the top right.

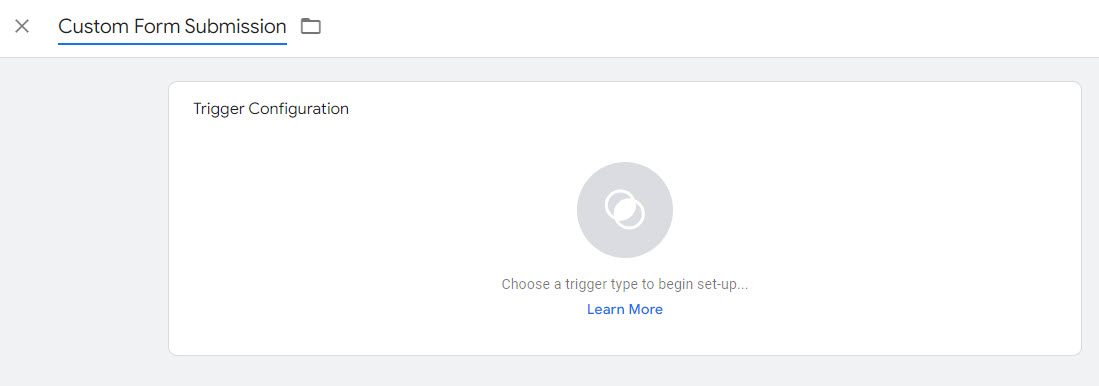
Give the trigger a logical name such as Custom Form Submission, then click anywhere in the main Trigger Configuration area.
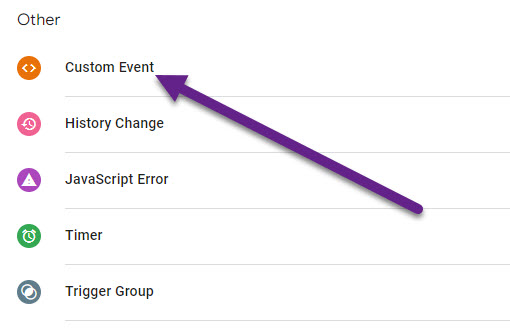
Click on the Custom Event option to add as the trigger type.
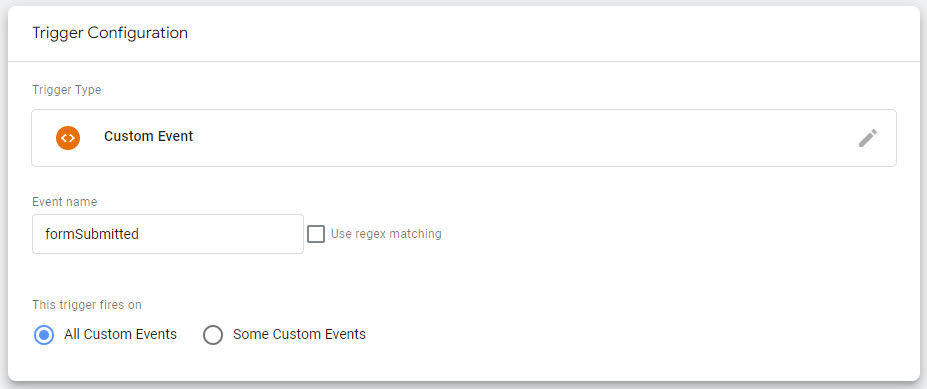
Once you have selected the trigger type, add in an Event name which will be used in our JavaScript that will need to add to each page where we add a D365 Marketing Form. So it’s fine to put what you want, but in my example I am using formSubmitted as the event name and will use formSubmitted in the script (that I will provide shortly) so that the two match. Google Tag Manager will then pass through whatever value we give as the form name via the formSubmitted element. More on this later! Leave the trigger to fire on all custom events.
Tags – GTM
Next we need to create a Tag. Create a new one, give it a logical name, and then click in the middle to set the tag type. Then click on Google Analytics and pick the Google Analytics: GA4 Event option.

For a GA4 Event, we need to add in the Measurement ID from your GA4 account. More on where to get this from in a moment. Give the event a name. Best practice is lower case and words separated with an underscore, so I’ve called the event form_submission. This will end up being passed through in to GA4. Next I have added a parameter because I want the name of the form to be passed through too. Give the event parameter a name (form_name made sense to me!) and then set the value as the custom tag you created earlier, so I called mine formName Custom. This means when someone submits a form, we will pass through the name of the form in to an event in Google Analytics called form submission.

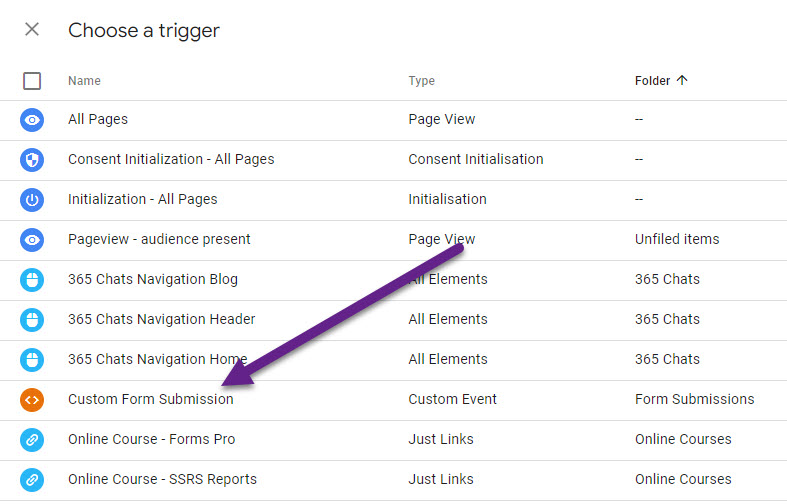
Now in the bottom part of the Tag, in the Triggering section, click in the blank canvas area, then pick the new trigger you created of Custom Form Submission. That’s it for the custom tag!
If you are not sure where to get your Measurement ID to add in to the custom tag, go in to GA4, then the Admin area, and then click on Data Streams. You should see one or more streams listed. Click on the one related to your website tracking.
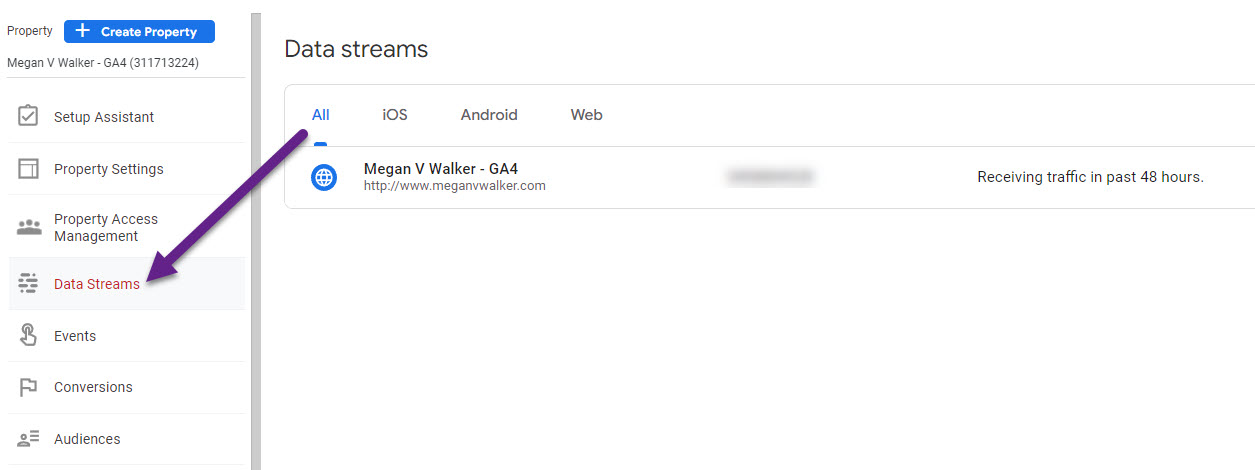
From there, the Measurement ID will be shown on the far right. Click on the icon to copy to your clipboard to then add to your custom tag.

Add Script To Your Web Page
On your website, anywhere you add the script provided from a D365 Marketing form, add the following simple script. Basically the script waits until the d365mt-afterformsubmit event has been completed successfully, then passes through the name of the form to GTM. This way we don’t pass anything through from GTM in to GA4 until it’s an actual submission, rather than passing through information any time the submit button is pressed but the person missed out required fields.
The event MUST be formSubmitted because that is what we named it in the Custom Form Submission trigger. Where I have formName, this must be whatever you called your Data Layer Variable Name when you created the Variable. So if you called it formName, this should work great. The only part of this script that changes each time you add it to a new page is the actual name of the form you want to pass through. So where I have MVW Contact, that will be different for each form you add to your site.
<script>
document.addEventListener("d365mkt-afterformsubmit", function(event) {
    window.dataLayer = window.dataLayer || [];
    window.dataLayer.push({
        'event': 'formSubmitted',
        'formName': 'MVW Contact'
    });
});
</script>
Preview In GTM
Now that you have it all set up, you will need to click the Preview button from the top right in Google Tag Manager. You add in a URL to review, so make sure you pick one that has a form on it AND that you have added the script above underneath the D365 Marketing form script. If you press the Submit button on the form, you should just see a click. Now if you fill out the form with all completed required fields and submit it, in the Tag Assistant area you should see the summary now shows formSubmitted. In the Tags Fired section you should see your Form Submissions Tag was fired. Click on that.
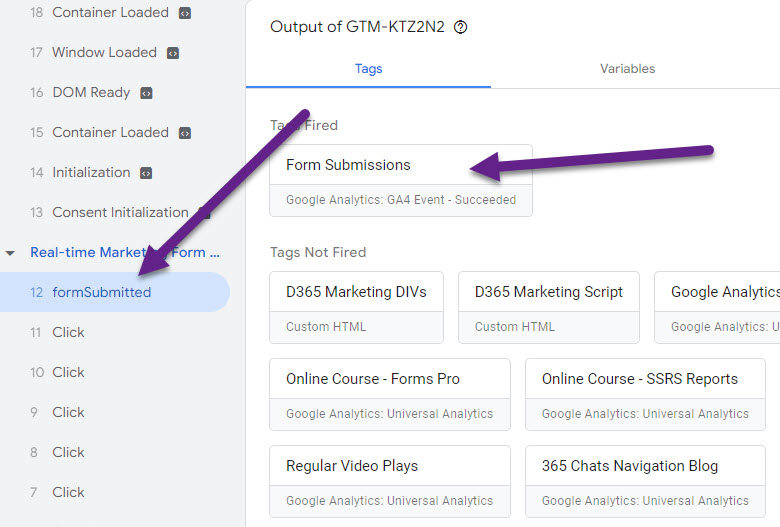
Here we can see that the eventSettingsTable shows the parameter of form_name that was added in to the tag configuration, and the parameterValue shows what was passed through the web page from the script added below the D365 marketing form. So this one shows the MVW Contact form was submitted. We can also see that the Custom Form Submission trigger was fired which captured this data for us.

Now all that is left is to publish the changes you made in Google Tag Manager.

Google Analytics Configuration – GA4
First thing to do, go in to the Admin area, then Custom definitions, and then click Create custom dimension. This is going to be useful when it comes to your reporting and filtering, and you want to actually see the form_name that was passed through from Google Tag Manager.
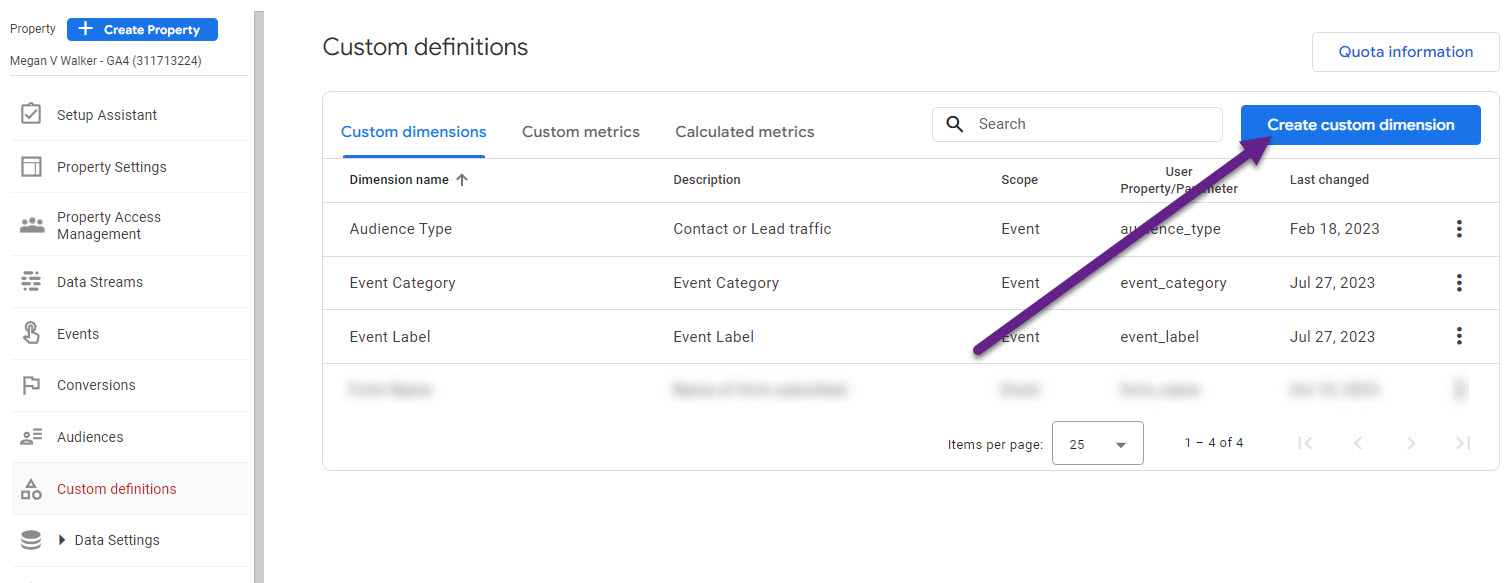
Give the dimension a name, scope is event and then give a description. The event parameter is whatever you set up in the Form Submissions tag you created in GTM under event parameter, so in my examples, I called it form_name. That’s it with the custom dimension, more on it later!

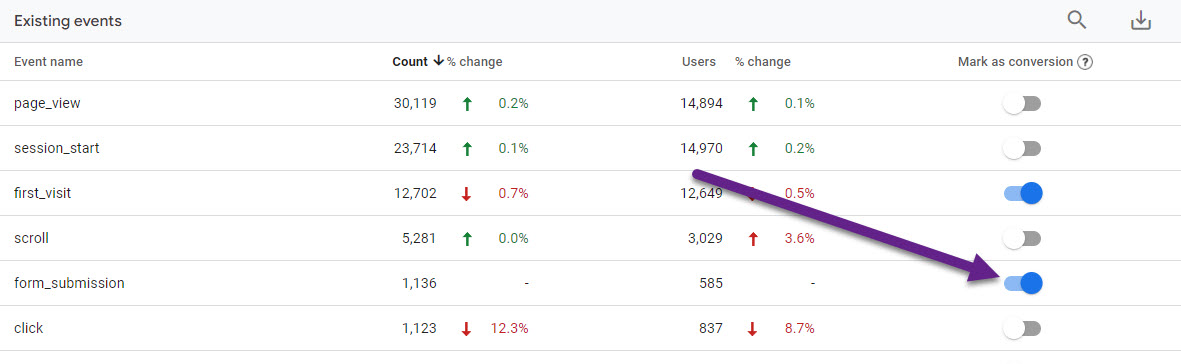
After this, you might need to wait a WHILE, like a few days. It’s hard to be patient, but at some point you should see the form_submission event show up in your list. This is back in the Admin area under Events.
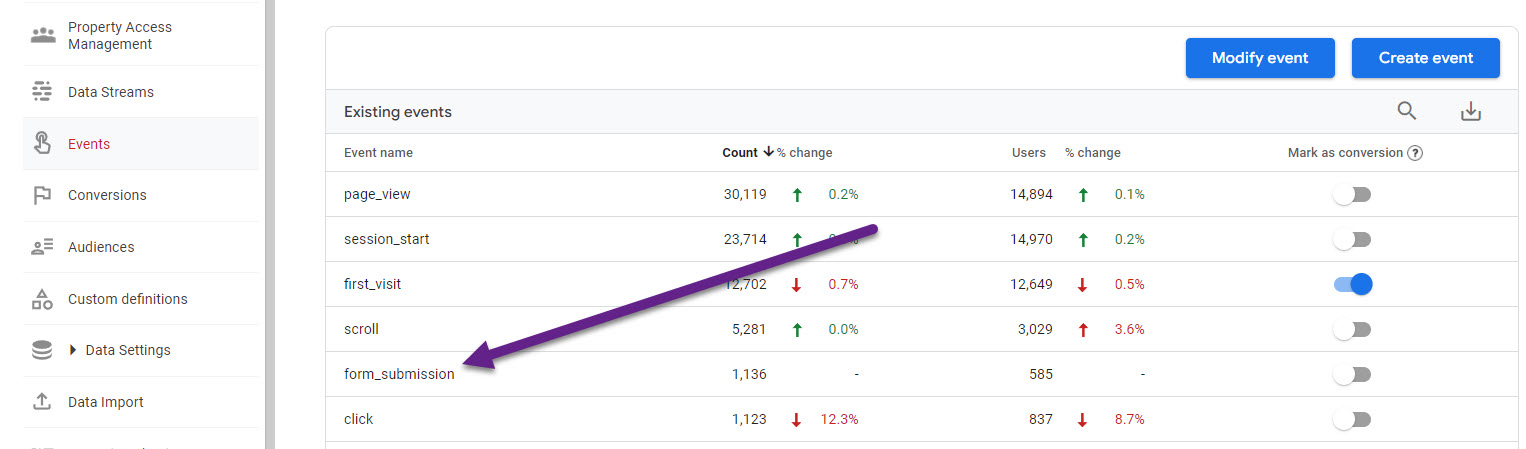
Last thing in the Admin area, if you want this to be tracked as a conversion, you can switch the toggle to mark as conversion. You can assign a monetary value to this conversion also if you consider form submissions to equate to revenue.
Google Analytics Reporting – GA4
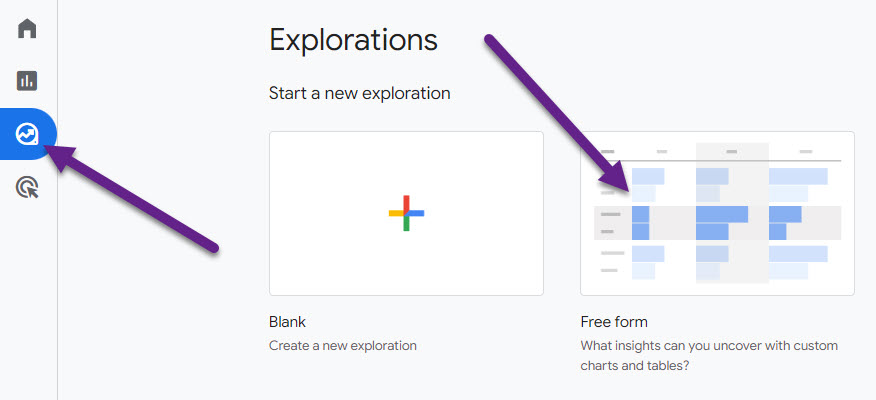
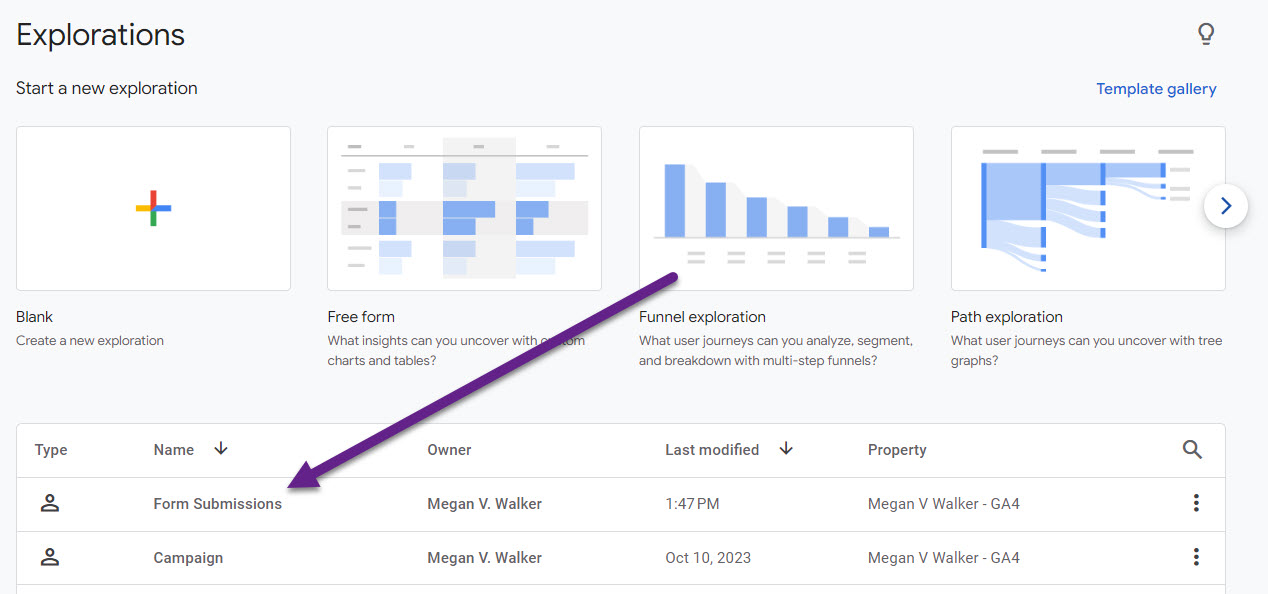
You will also need to wait a few days to do this last part. As mentioned, data can take a while to start coming through, especially for custom events. Once you’ve got some form submissions, there are a couple of options available to you. The first is under explorations. Select the free form option.
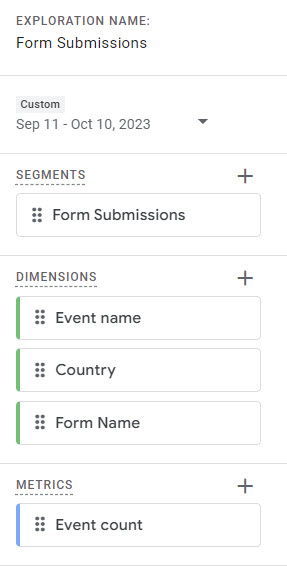
We are going to create something that looks like this below in the variables section of the exploration. First, we need to segment the data so click the plus button at the top of the segments section.
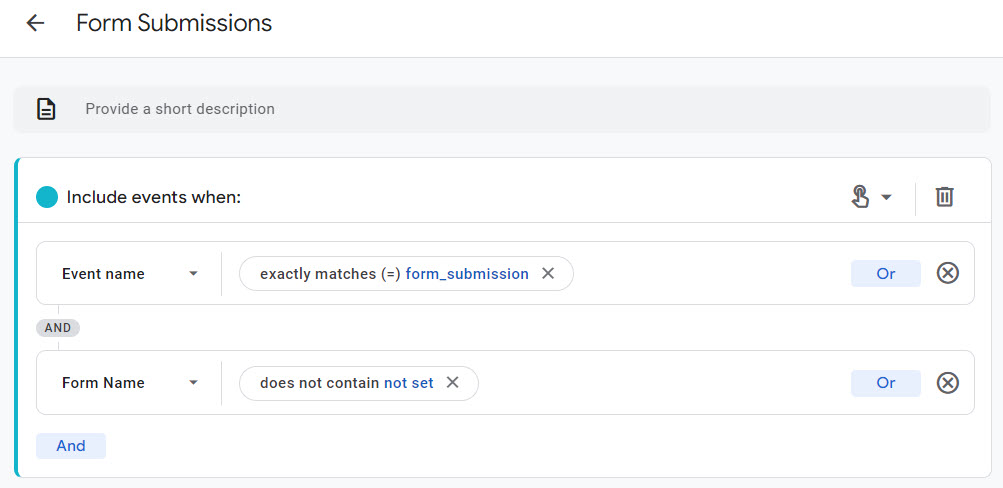
Then add in your filters. For mine, I am only including the event name of form_submission and where the form name does not contain not set (this is a value GA assigns when no data passes through or hasn’t had enough time to pass it through).
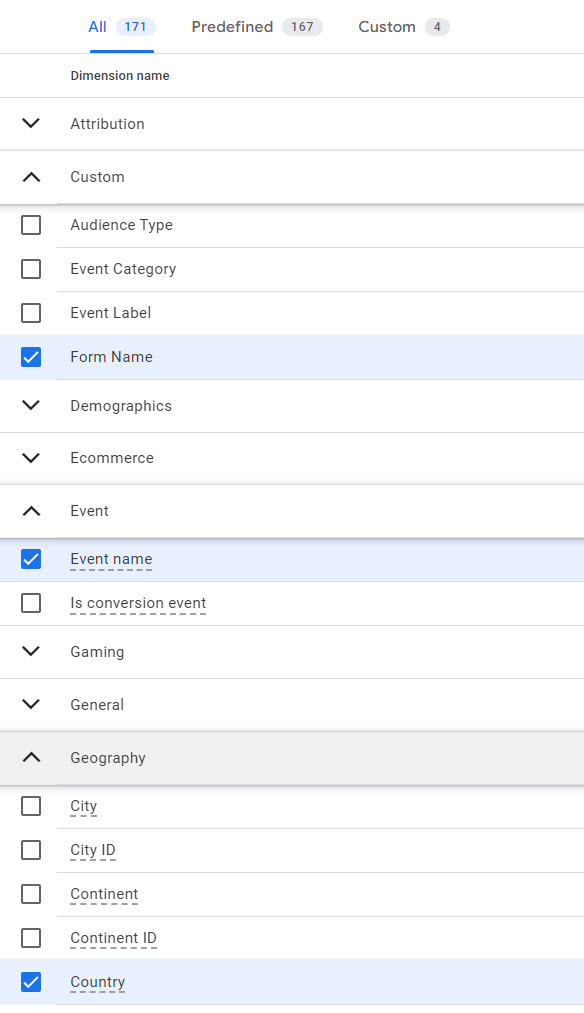
Now click on the plus button above Dimensions. You can pick and choose what you want to see, but I have gone with Event name, Country and Form Name.
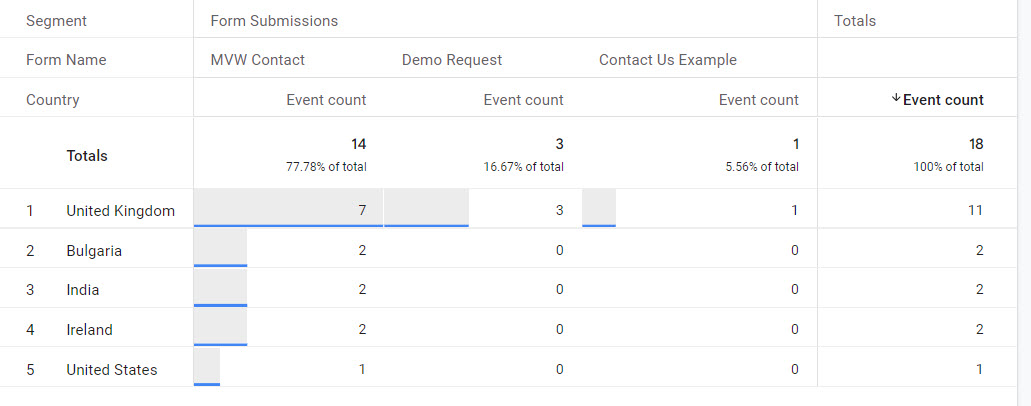
For the metrics, Event count should already be there available, but if not, just click on the plus above metrics and then select it to import in to the exploration. Once you have all the variables you need, you can then drag items over in to the settings section. My visualisation is a table, and the segment comparisons is the Form Submissions segment I created. The Rows will show Country, the Columns Form Name, and the Values will just be Event count. Now we can see the data laid out based on the name of the form, then split by country. You could consider adding in things like Year or Month if you wanted to break it down further. The columns and rows you use will definitely depend on the number of forms you have and type of website traffic too. You can give the exploration a name, and it will have saved automatically.
You can get back to your exploration by simply clicking on it in the list of your save explorations when needed.
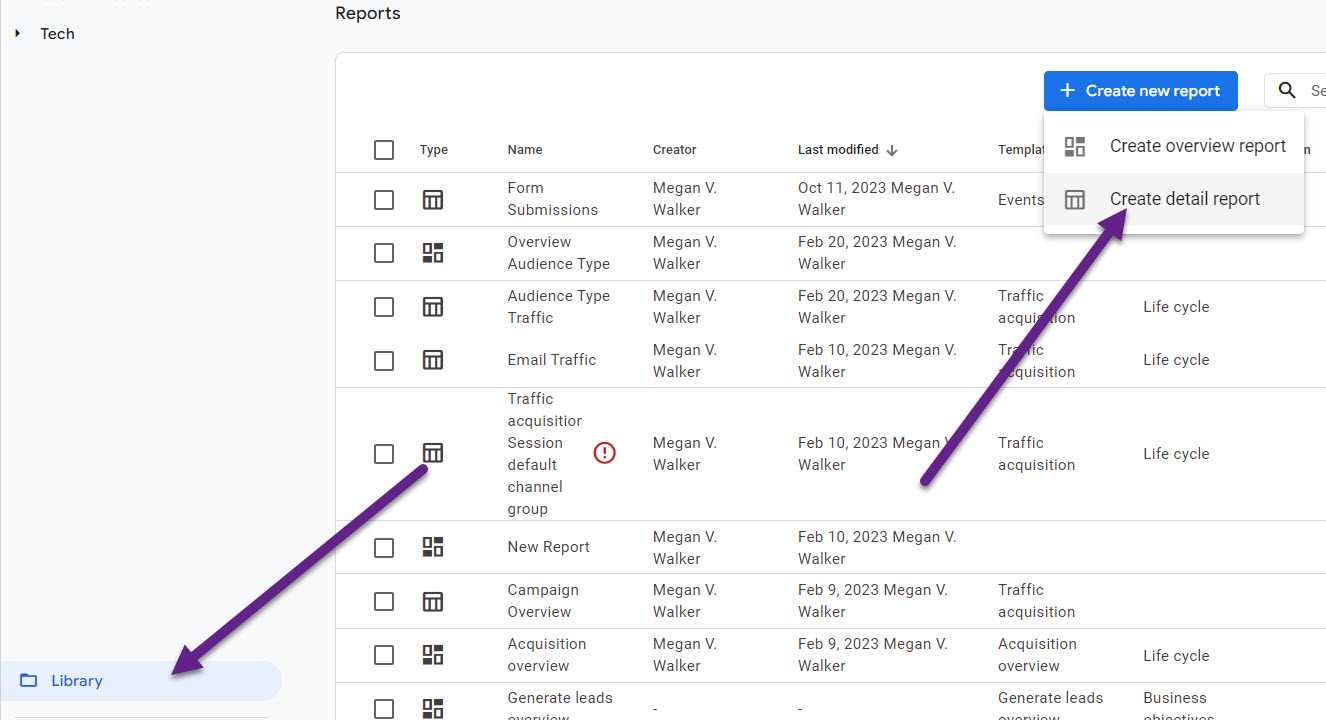
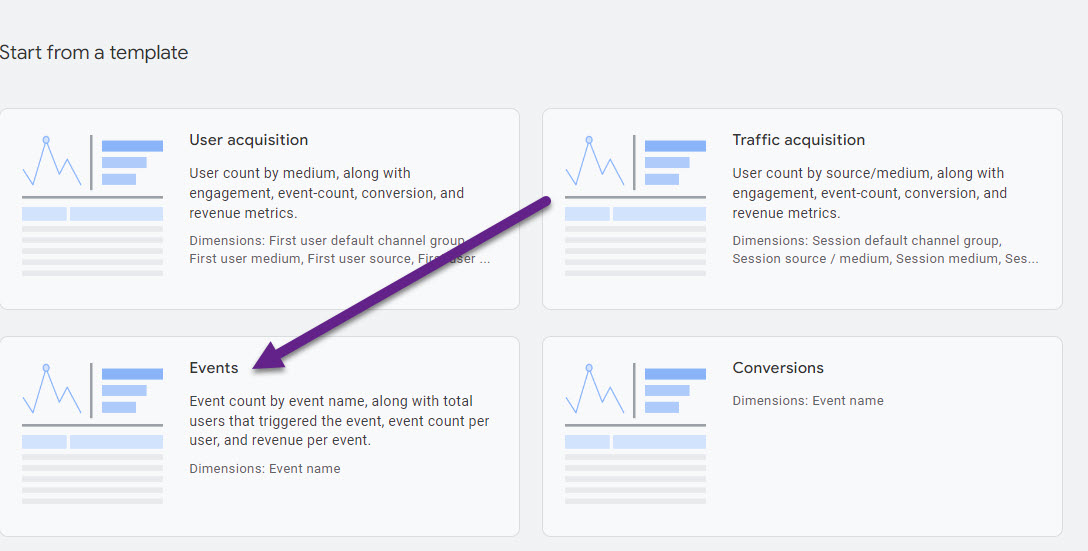
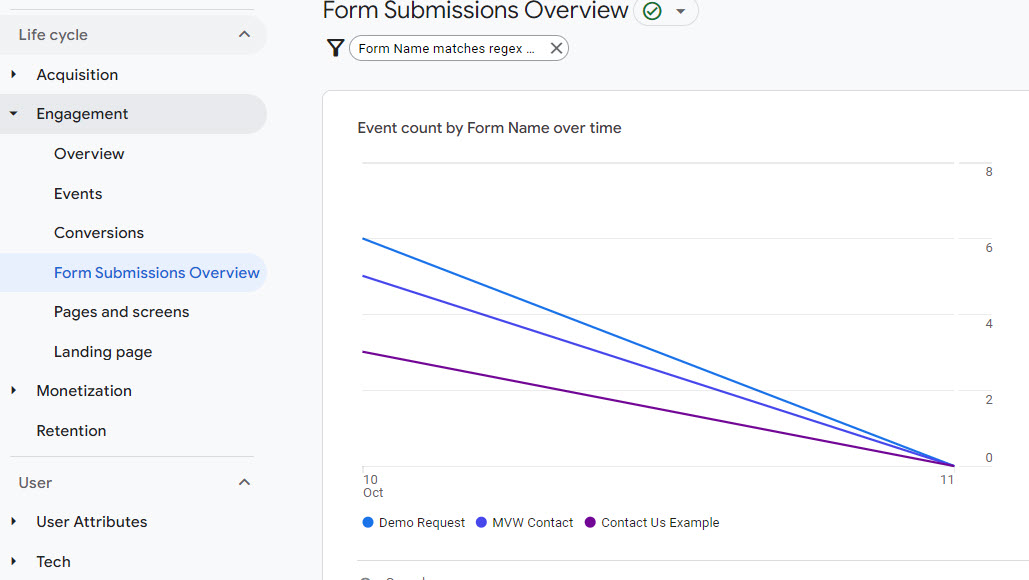
Now let’s look at creating a new report. Go to Library, then click on create new report and select Create detail report.
Pick the Events template as the starting point. We will then make changes to it to get the information we need.
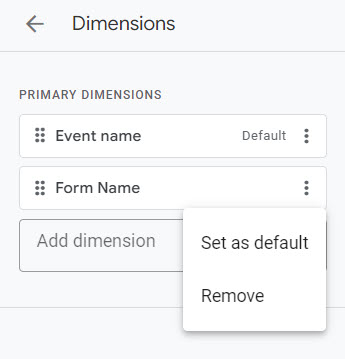
On the right of it, start by clicking on Dimensions.
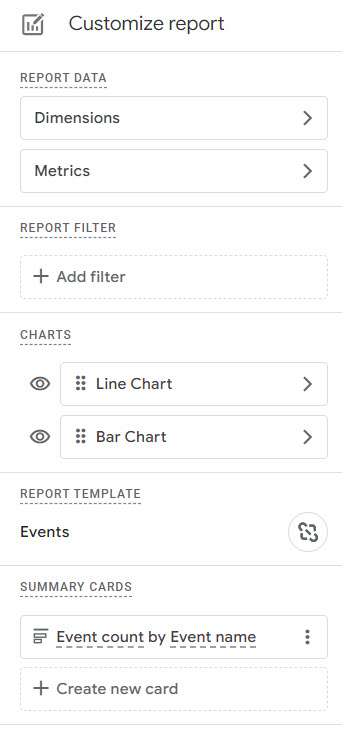
Pick Form Name, from your list of Dimensions (this is the Custom one we set up), then set as default.
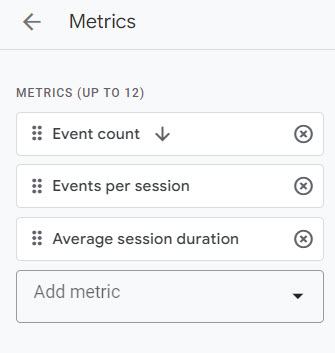
In the Metrics, remove all of the ones except Event count, and add in Events per session and average session duration (or whatever metrics you wish to see).
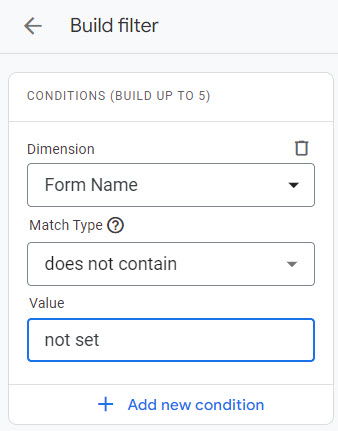
In the filter, set Form Name does not contain not set. This will filter out anything that doesn’t have the Form Name set as a parameter value.
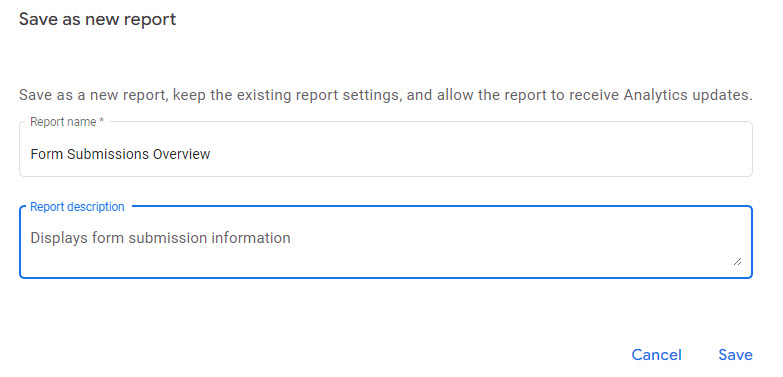
Now save it and you will be prompted to save as a new report. Give it a name and description and click Save.
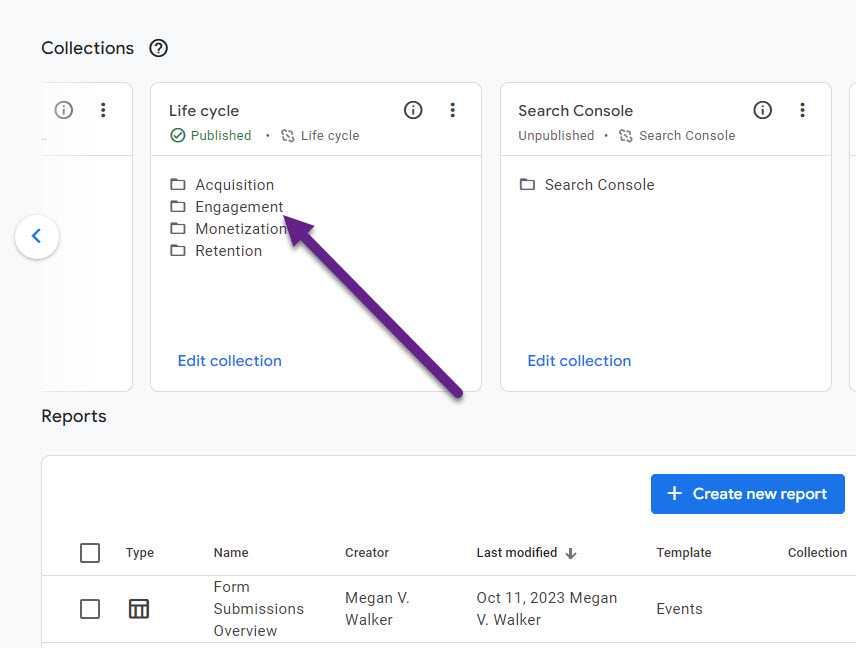
Now you can click in the collections area of the library and choose which collection to edit, or even create a new collection.
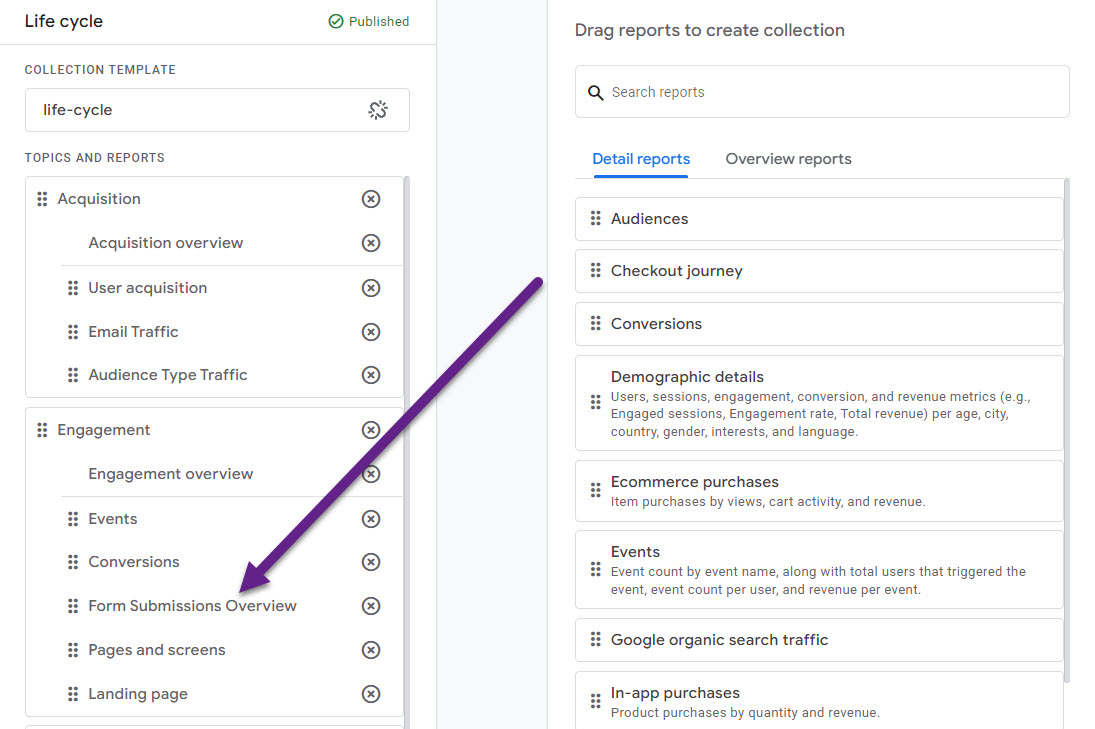
Drag your report over in to the collection topic of your choice and then click save from the bottom left of the screen.
Now you can access your new report quickly to check on your form submissions!
GA4 is a pain in my opinion, and takes a LOT to learn. This took a LONG time to figure out but now hopefully it will help organisations track their form submissions when using D365 Marketing Forms (Customer Insights – Journeys Forms).
Check out the latest post:
Use Custom Event Registration Questions To Branch Your Journeys In Customer Insights
This is just 1 of 603 articles. You can browse through all of them by going to the main blog page, or navigate through different categories to find more content you are interested in. You can also subscribe and get new blog posts emailed to you directly.
Is it possible to view form field results also in GA4? For example, what a person added for their First Name, email, etc? Or is this only viewable in Dynamics? It would be great to view both the form field results in line with user attributes.
Hi Christine, VERY good question. 🙂 I’ve not done it before, but have just started looking in to things like sessionStorage that can have values passed through to it from a form, and then pass that back through in using a script in GTM (which is what you would need to pass in to GA4). I need to do some testing but stay tuned for a post!
Hey Megan,
Thanks for the incredible detail. Will be trying this one out very soon.
Does this work the same for both the Real-time journeys and Outbound Marketing embedded marketing forms?
Hi Lauren – I wrote about Outbound forms here but it was also Google Analytics Universal rather than GA4 – https://meganvwalker.com/tracking-d365-marketing-form-submissions-in-google-analytics – it should be pretty similar other than what you are pushing in to the data layer. Hopefully you are quickly moving all of your forms to Realtime marketing so can use this post for GA4 as it is the most up to date.