*** NOTE: ALL INFORMATION IS ACCURATE AT DATE OF PUBLISHING ***
If you’ve followed any of my previous posts on compliance profiles and Realtime marketing subscription forms, you might be wondering how you can send a confirmation email to the Lead or Contact who submitted the form. It’s a nice touch to send a confirmation email displaying the topics they opted in to, what they are opted out from and give them a quick link back to be able to update their preferences (or even opt out if they made a mistake). This post will show you how you can create a new trigger, email, journey and flow in Power Automate to achieve this.
Create Realtime Marketing Form
First you will need a new Realtime Marketing form. Check out this post that shows you how to do this for your compliance profile and related topics. Make sure you publish it and you have somewhere to add it to your website. Remember, this is a form you want to allow people to find and it is NOT the form use when people are already getting your emails and want to unsubscribe.

Create Trigger, Email and Journey
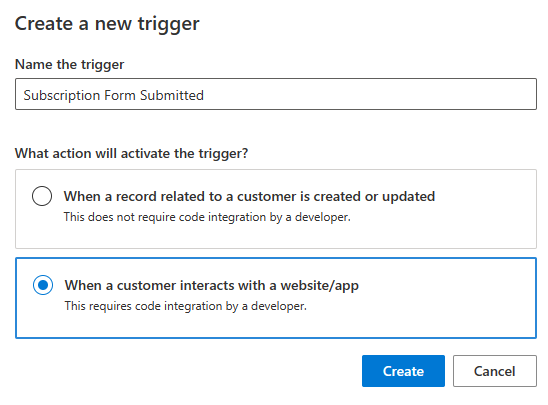
Now we need to create the components in Realtime Marketing for the trigger, email and journey. Navigate to the Engagement section then click on Triggers. Give the trigger a name, then make sure the second option is selected for firing the trigger. Ignore that it says it requires code integration by a developer, we will be using Power Automate for this.
We only need two attributes on this trigger. The Customer Data should match the audience type you added to your Realtime Marketing form. So for me that is a Lead. Then add a text attribute and call it HTML Table. Make sure you go through the rest of the steps and publish the trigger so it is ready to use.

Once your trigger is published you can create the email you want to send out once the form is submitted. Add whatever content you need, but you will want to make sure the first name used is from the same audience type of Lead or Contact. Again, mine links to the first name of a Lead record. I’ve also got a hyperlink that I am linking to the Compliance profile record and pulling in the Preference center link. That way someone can quickly click on it and update their preferences from the email they receive.

For the HTML Table, this is added by clicking on Personalisation and then selecting the new trigger you created and pulling in the HTML Table attribute. That’s it! Save and publish the email so it is ready to use.

The last thing we need here is the Journey. Create a new one in Realtime Marketing and give it a name. Make sure it’s set as trigger based and pick the trigger you created. You should see the audience type so make sure it’s what you expected (Lead or Contact). Then create the Journey.

You only need one other step and that is to send the email that you created that is linked to the trigger.

Before publishing, make sure you click on the Settings icon on the right of the Journey, then turn off frequency capping for this journey. Someone might fill out the form a few times so we want to make sure things don’t get blocked and the email will go through to them.

Create Flow in Power Automate
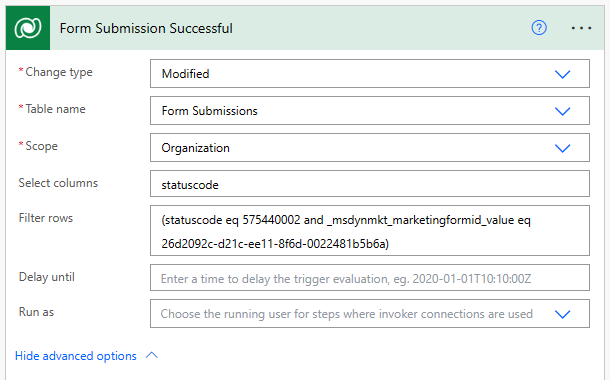
Now we can create the flow in Power Automate. Our trigger is from the Dataverse connector and will run on the Form Submissions table when a record is modified. Add statuscode in to the select columns to make sure it only runs when the Status Reason on the record changes. We want to make sure it has a value of Success before we then do anything with it so will add in the following to the filter rows value. This is also going to make sure it only runs for a specific form. Just get the form guid by opening the form in D365 Marketing, then going to the end of the URL and getting the long string of letters and numbers after this: msdynmkt_marketingform&id=
(statuscode eq 575440002 and _msdynmkt_marketingformid_value eq 26d2092c-d21c-ee11-8f6d-0022481b5b6a)
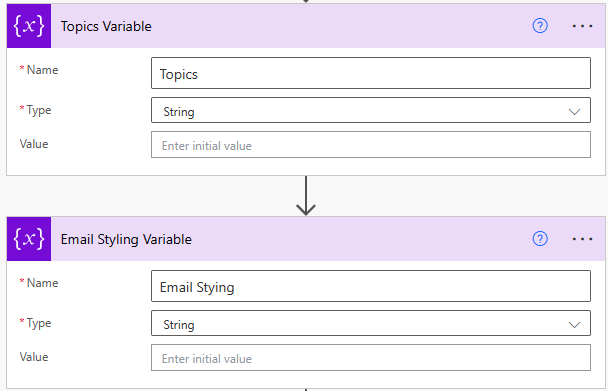
Now we are going to add two steps that are the initialise variable action. Both should be string variables. The Topics will be used to capture the list of topics and if they have been opted in or opted out of. The Email Styling one will be used to determine what the table of topics looks like when passed back through to D365 Marketing.
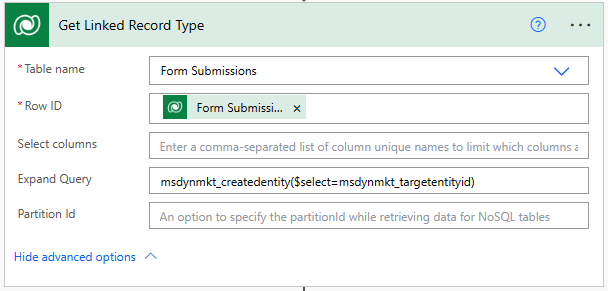
To send the right person through the journey, we need to get the related record link from the form submission via a table called Created Entity. Add the ‘Get a row by ID’ step and select from the Form Submissions table. Use the Form Submission id from the original trigger step. Finally, all we want is the related target entity id (the Lead or the Contact GUID) so we are going to use the Expand Query option to just pull that back via the Created Entity link.
msdynmkt_createdentity($select=msdynmkt_targetentityid)
Now we need to use a list rows step to find the Field Submission records linked to the form submission. BUT we only want those where the Field Localised Name contains the word topic. We don’t want any other field submissions for this flow. You can use the FetchXML query below and paste it in to your step.

<fetch>
  <entity name="msdynmkt_marketingfieldsubmission">
    <attribute name="createdon" />
    <attribute name="msdynmkt_fieldvalue" />
    <attribute name="msdynmkt_localizedfieldname" />
    <attribute name="msdynmkt_localizedfieldvalue" />
    <attribute name="msdynmkt_marketingformsubmissionid" />
    <attribute name="msdynmkt_name" />
    <filter>
      <condition attribute="msdynmkt_marketingformsubmissionid" operator="eq" value="@{triggerOutputs()?['body/msdynmkt_marketingformsubmissionid']}"  />
<condition attribute="msdynmkt_localizedfieldname" operator="like" value="%topicid%" />
    </filter>
    <order attribute="createdon" />
  </entity>
</fetch>
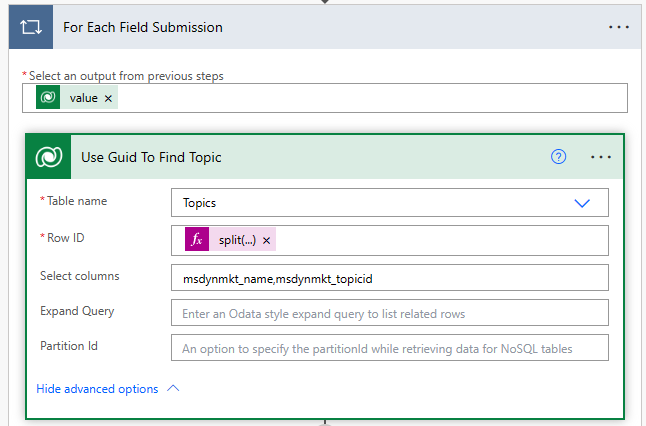
Now we have an apply to each step to check the value captured for each topic. The data is stored in a string. It displays the GUID of the topic first, then the communication channel (email, text), if the box was to opt someone in if checked, and then if the person opted in or opted out of the topic. We can use this string to split out the information and then find the right topic in D365 and get the name.
ce27eb77-e6a7-463e-a3bb-b77ed452b0da;Email;true;Opted In
The formula below will extract the first value which is the GUID for the topic. We can then use that in a ‘Get row by ID’ step and search for the related topic to get the name of it. You can select the columns you need. I am getting these two msdynmkt_name,msdynmkt_topicid.
@{split(items('For_Each_Field_Submission')?['msdynmkt_localizedfieldvalue'], ';')[0]}
In the next step we are going to add to the topics variable by using the append to string variable. We need to format this as a row of a table. Don’t worry about the rest of the table, we will set that in just a moment. This is creating a table row with two columns. The name of the topic goes first, then we use another formula to get the last item in the string from the Field Localised Value and get the value that shows if they Opted In or Opted Out.
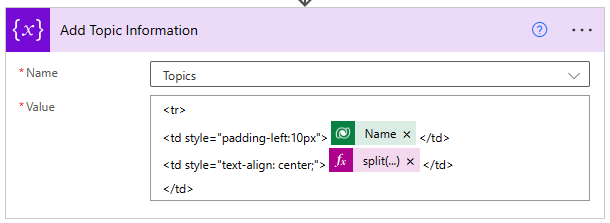
<tr>
<td style="padding-left:10px">@{outputs('Use_Guid_To_Find_Topic')?['body/msdynmkt_name']}</td>
<td style="text-align: center;">@{split(items('For_Each_Field_Submission')?['msdynmkt_localizedfieldvalue'], ';')[sub(length(split(items('For_Each_Field_Submission')?['msdynmkt_localizedfieldvalue'], ';')), 1)]}</td>
</td>
That’s it for the Apply to each step so minimise it and add in a set variable step to set the Email styling variable. The top portion is going to be some styling for the table. We need to do this within the variable so we can pass our table of topics through to the trigger in D365 Marketing all formatted so that it doesn’t interfere with the CSS and styling of the overall email.
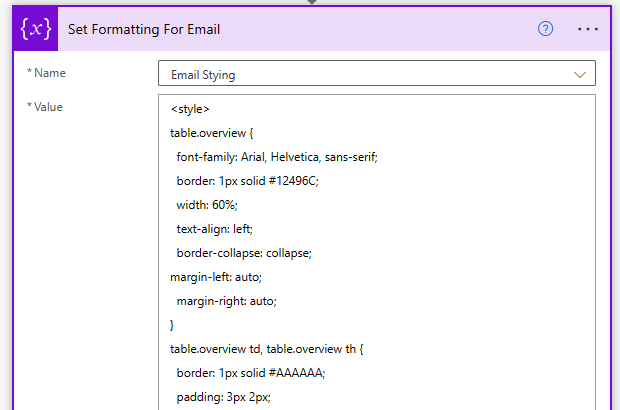
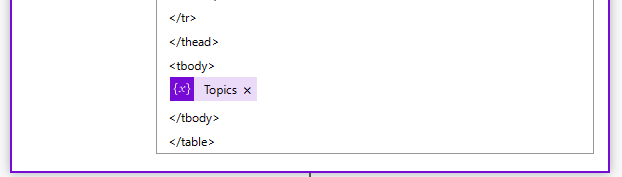
The bottom section needs the Topics variable added right before we finish off the table. Remember that the Topics variable contains a table row for each topic that was on the form.
This is the full value I have in the Email Styling variable which you can use as a starting point if it is helpful.
<style>
table.overview {
  font-family: Arial, Helvetica, sans-serif;
  border: 1px solid #12496C;
  width: 60%;
  text-align: left;
  border-collapse: collapse;
margin-left: auto;
  margin-right: auto;
}
table.overview td, table.overview th {
  border: 1px solid #AAAAAA;
  padding: 3px 2px;
}
table.overview tbody td {
  font-size: 12px;
  color: #333333;
}
table.overview tr:nth-child(even) {
  background: #FFFFFF;
}
.table.overview tr:nth-child(2)  {
    background-color:blue!important;
}
table.overview thead {
  background: #1E0F69;
  border-bottom: 2px solid #444444;
}
table.overview thead th {
  font-size: 13px;
  font-weight: bold;
  color: #FFFFFF;
  text-align: center;
  border-left: 2px solid #D0E4F5;
}
table.overview thead th:first-child {
  border-left: none;
}
table.overview tfoot td {
  font-size: 14px;
}
table.overview tfoot .links {
  text-align: right;
}
table.overview tfoot .links a{
  display: inline-block;
  background: #1C6EA4;
  color: #FFFFFF;
  padding: 2px 8px;
  border-radius: 5px;
}
</style>
<table class="overview">
<thead>
<tr>
<th>Topic</th>
<th>Response</th>
</tr>
</thead>
<tbody>
@{variables('Topics')}
</tbody>
</table>
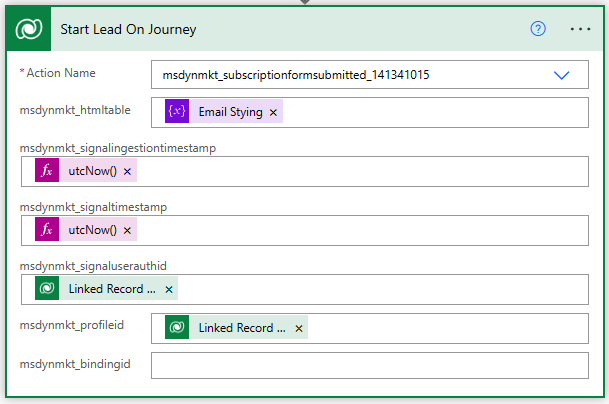
The last step of the flow is to add the action of ‘Perform and unbound action’ from the Dataverse connector. This is what starts the Lead on the Journey we created. In the Action name, look for the new trigger you created. It will start with msdynmkt_ then the name of your trigger without any spaces. Add the Email Styling variable to the HTML Table value. Then add @{utcNow()} to the next two values to set the time stamps. For the signal user auth id and the profile id, use the Target Entity Id you got from the step of getting the linked record type. This will be the ID of the Lead or Contact who filled out your form. Save your flow and then fill out your form to test.
Depending on the styling of your Email Styling variable, your email should look something like this. Notice there is the link for someone to update the list of what they are subscribed to directly under the formatted table.
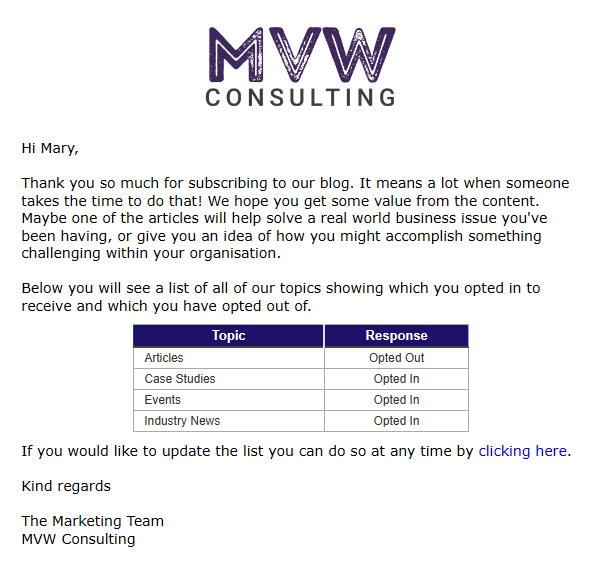
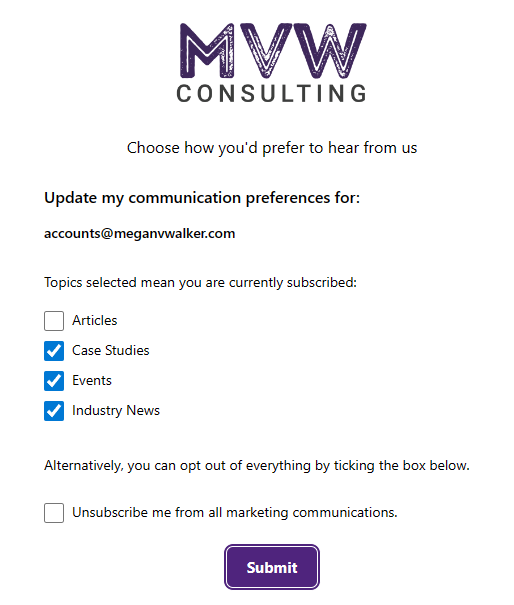
This will then take them to the preference centre form linked to the same Compliance profile record that was added on your Real-time marketing email. They can immediately opt in and out of other topics, or unsubscribe completely, making this a pretty seamless and easy process when someone subscribes for the first time!
Check out the latest post:
Use Custom Event Registration Questions To Branch Your Journeys In Customer Insights
This is just 1 of 603 articles. You can browse through all of them by going to the main blog page, or navigate through different categories to find more content you are interested in. You can also subscribe and get new blog posts emailed to you directly.